

Containers have become a crucial component of application development because they help ensure the code works consistently across different development, testing, and deployment stages.
Amazon Elastic Container Service(Amazon ECS) is a fully managed container orchestration service that helps you easily deploy, manage, and scale containerized applications. With ECS we can fully deploy and manage our containers running in the cloud. it has two launch types which means that it can be run on either Amazon EC2 or Amazon Fargate.
This article is a walkthrough on incorporating containers into your project and deploying on Elastic Container Service (AWS ECS). Let's dive in.
Prerequisite
AWS Account
Basic Knowledge of Docker
Basic Knowledge of ECS
Basic Knowledge of using Elastic Compute Cloud(EC2)
The Node.Js App Structure
The Node.js app is a Contact form that has the Frontend which handles the client side, the backend which handles the functionality and sends the client response to the database for storing, the MongoDB database for storage, and the Mongo-express which gives us a visual representation of our data in MongoDB.
Check out the repository link here.
project-root/
│
├── Frontend/
│   ├── index.html
│   ├── index.js
│   ├── base.css
|
├── Backend/
│   ├── Dockerfile
│   ├── package.json
│   └── server.js
|
├── README.md
Frontend
The folder contains our static files which can be deployed on Amazon S3, Azure static web apps, Netlify, Github pages, and different web hosting platforms.
Backend
Within our backend codes, the form inputs gotten from the client side will be sent to our MongoDB database. and here we will incorporate the use of containers because it enhances the efficiency, reliability, and scalability of your application.
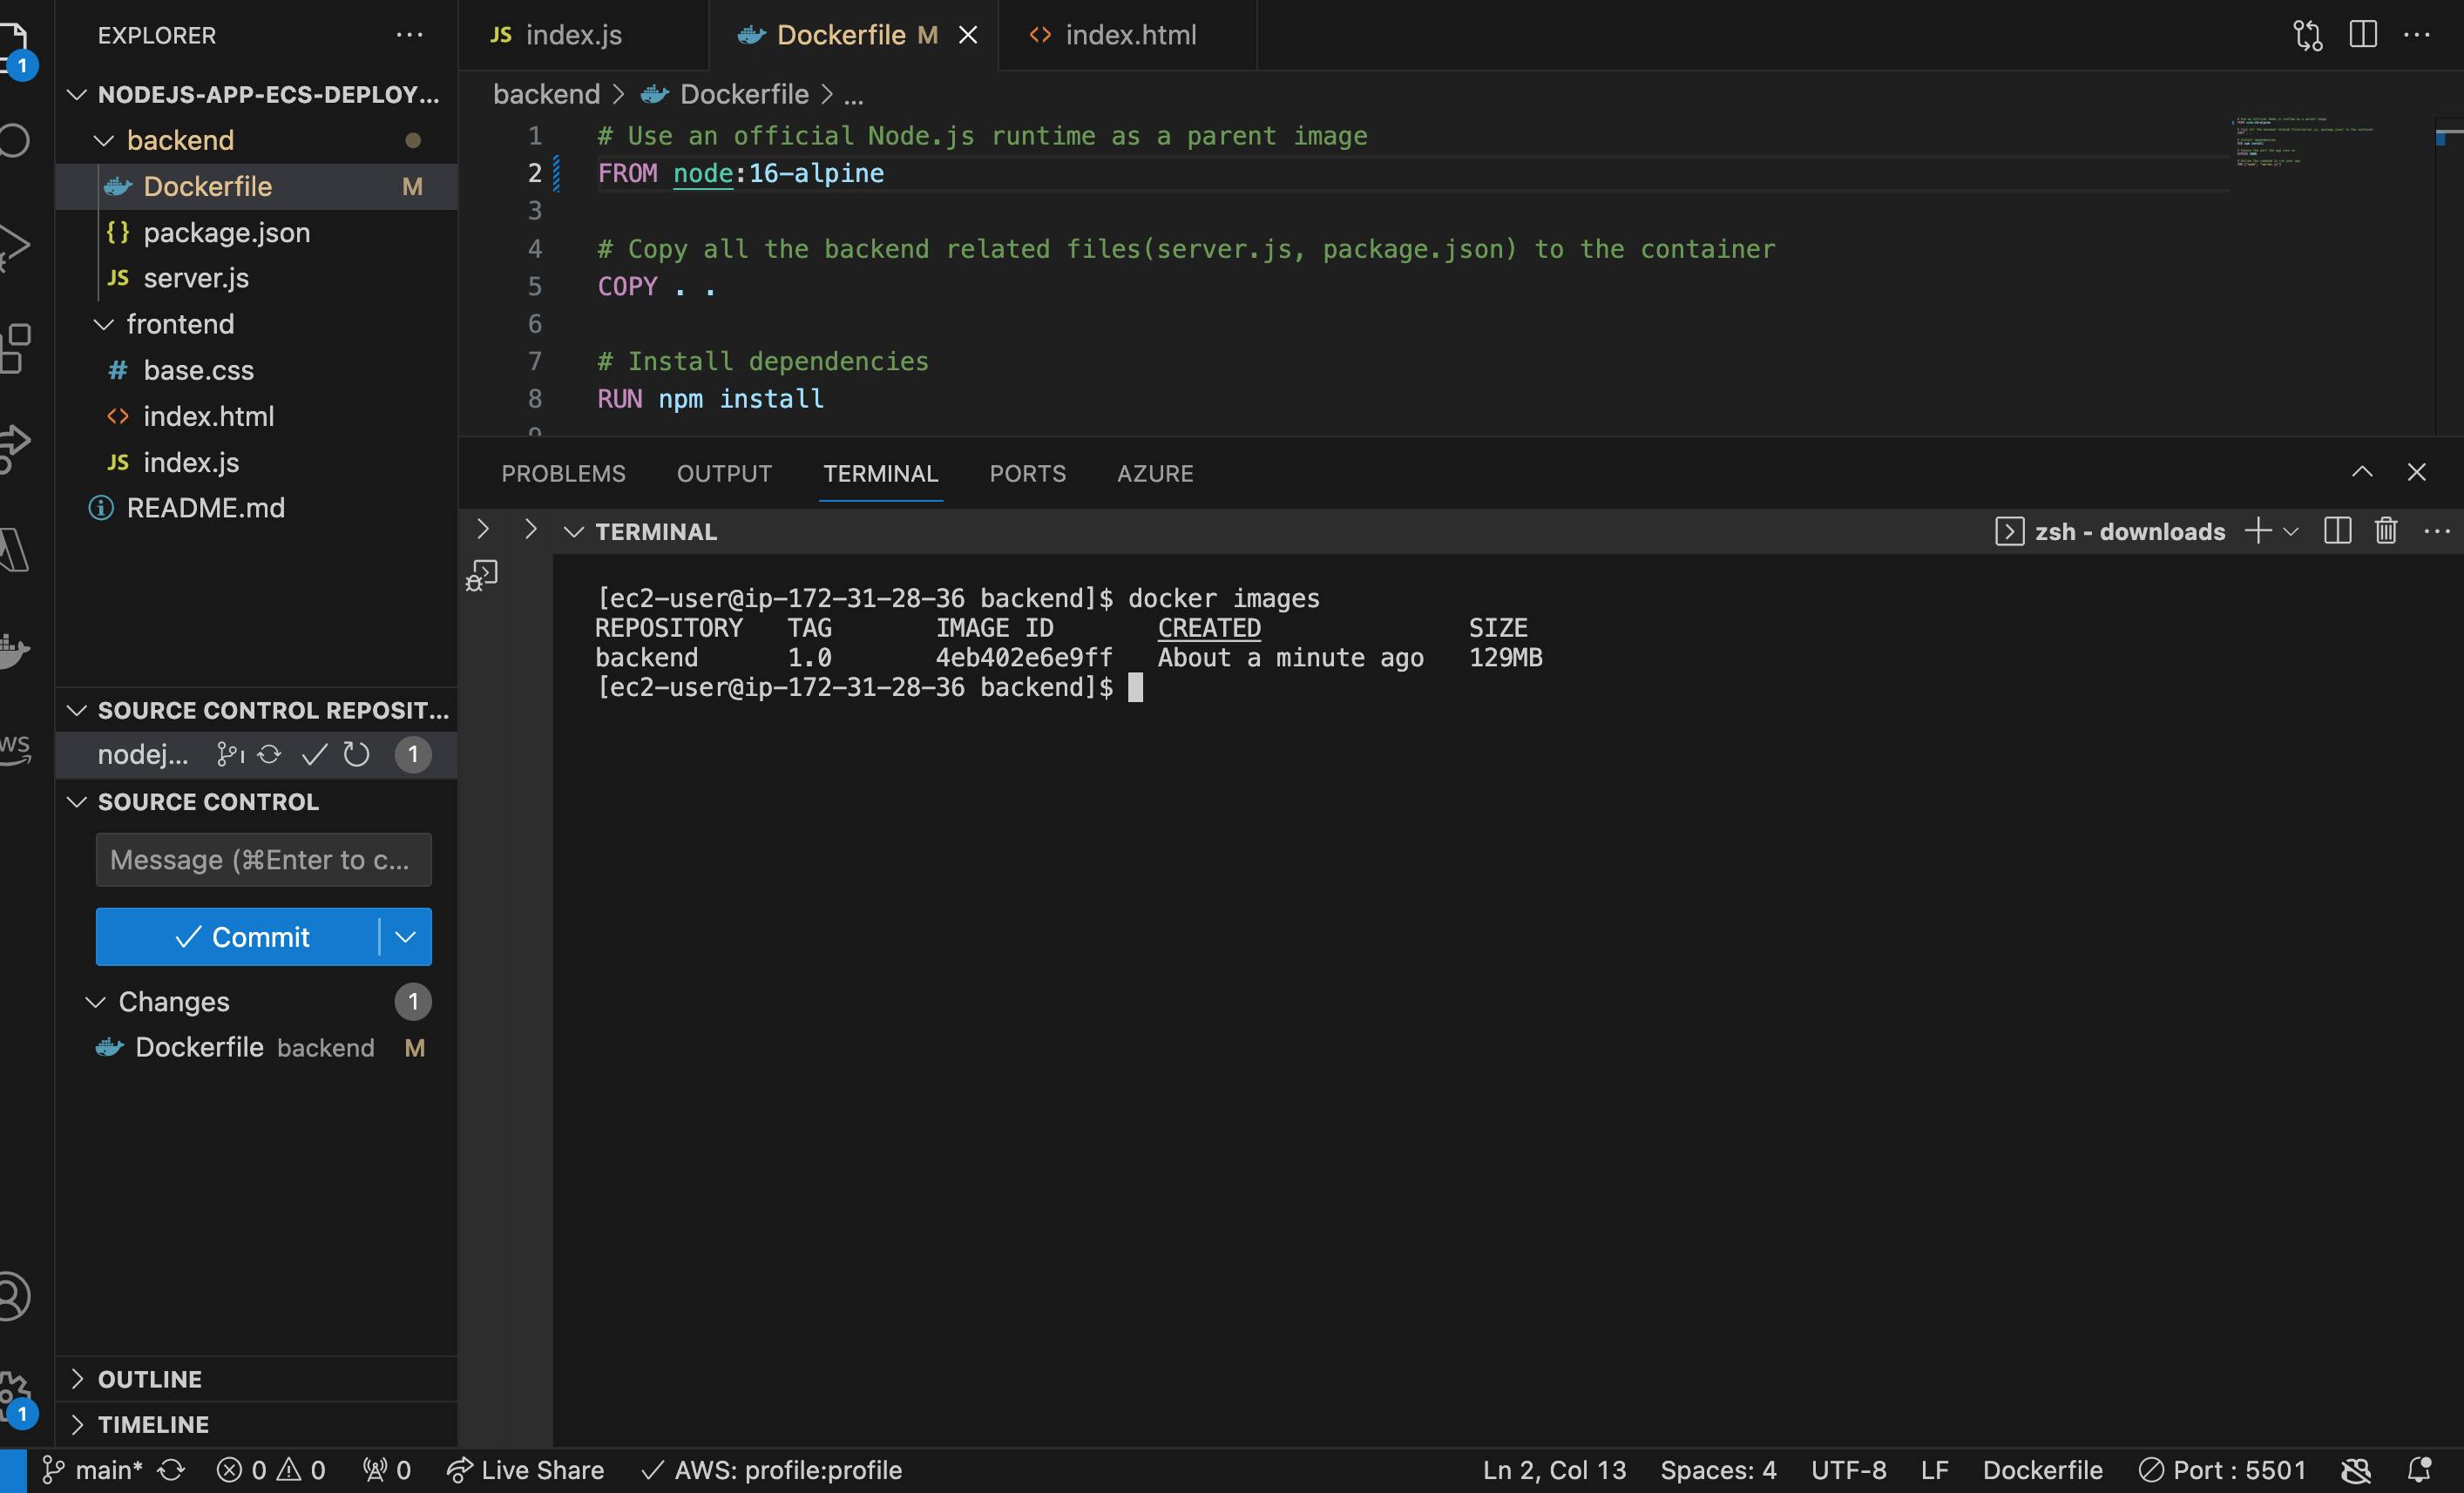
The Dockerfile contains the instructions needed to build an image of our backend.
MongoDB and Mongo-express
MongoDB serves as our NoSQL database while Mongo-express serves as a web-based administrative interface, allowing users to interact with the database through a browser.
We will be running both as container images so we don't have to install them locally in our device. And that's another advantage of incorporating containers in our project because they can be reused across different development stages.
Launch a Linux Server Instance on EC2
We will be using a Virtual Machine to build our docker images because it's faster and saves our device's memory capacity.
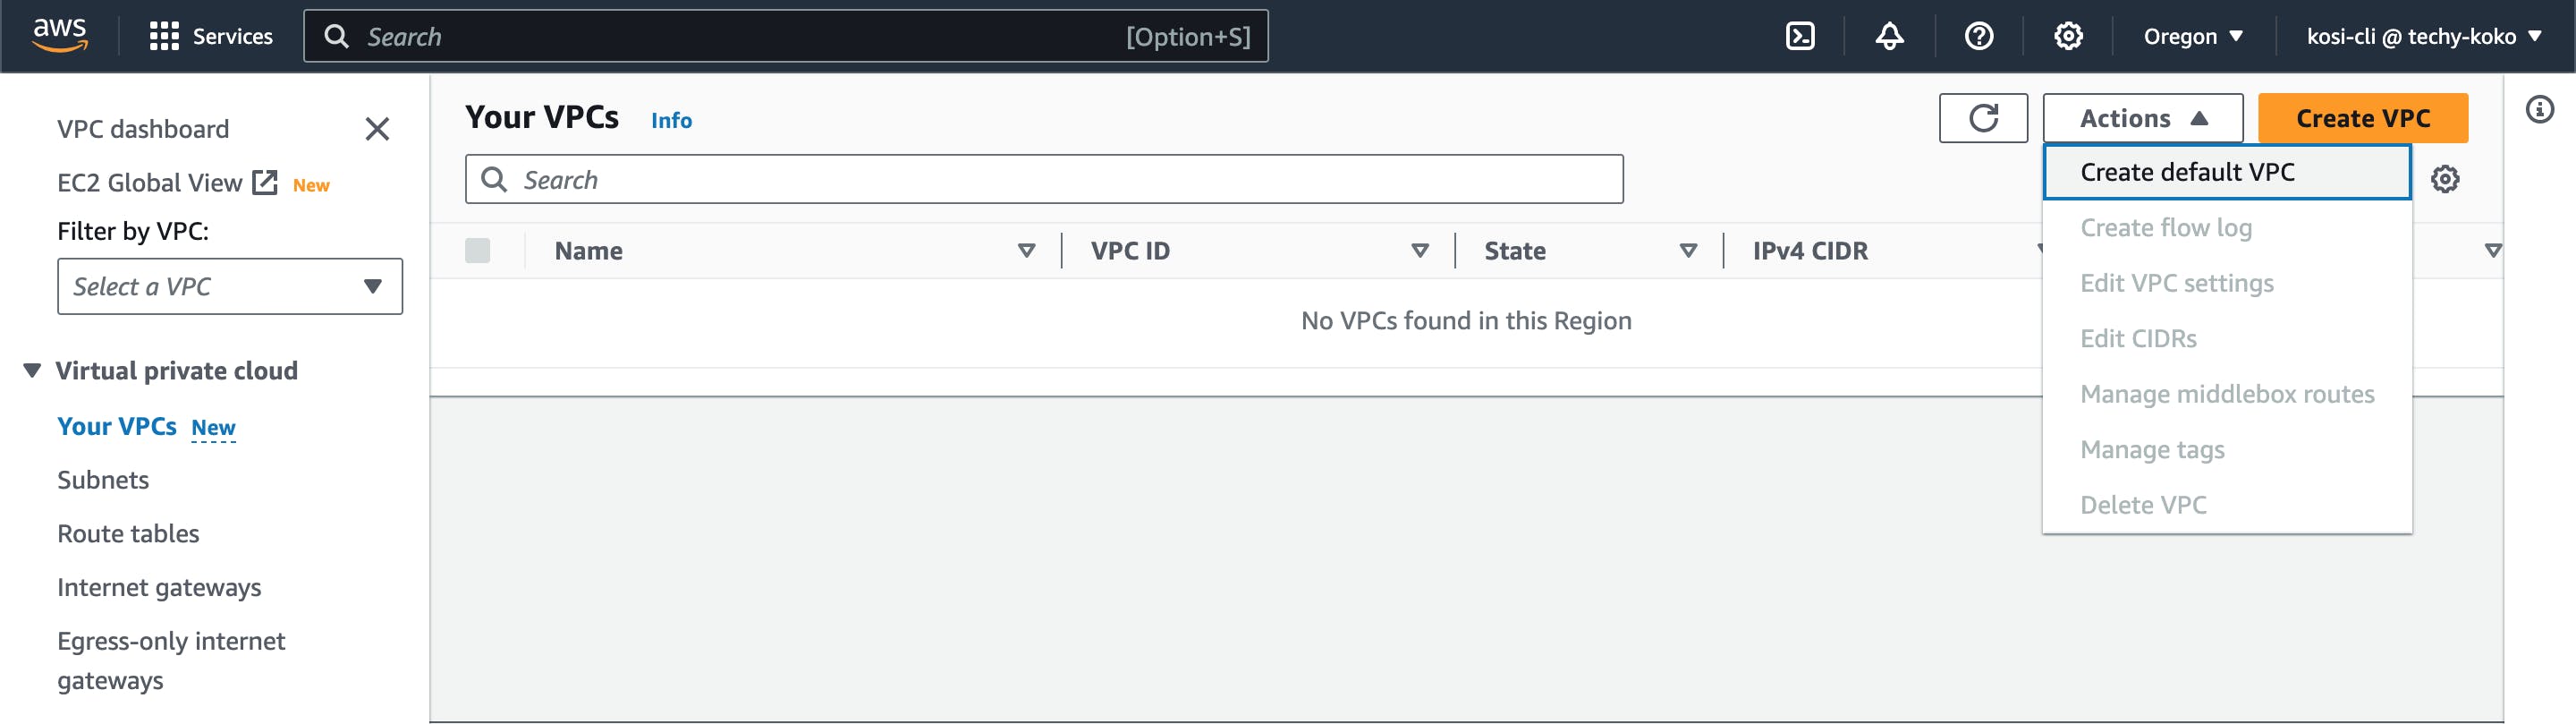
* Create a default VPC
By creating a default VPC, subnets, internet gateway, and security groups have already been created for you so you do not need to create them again individually.

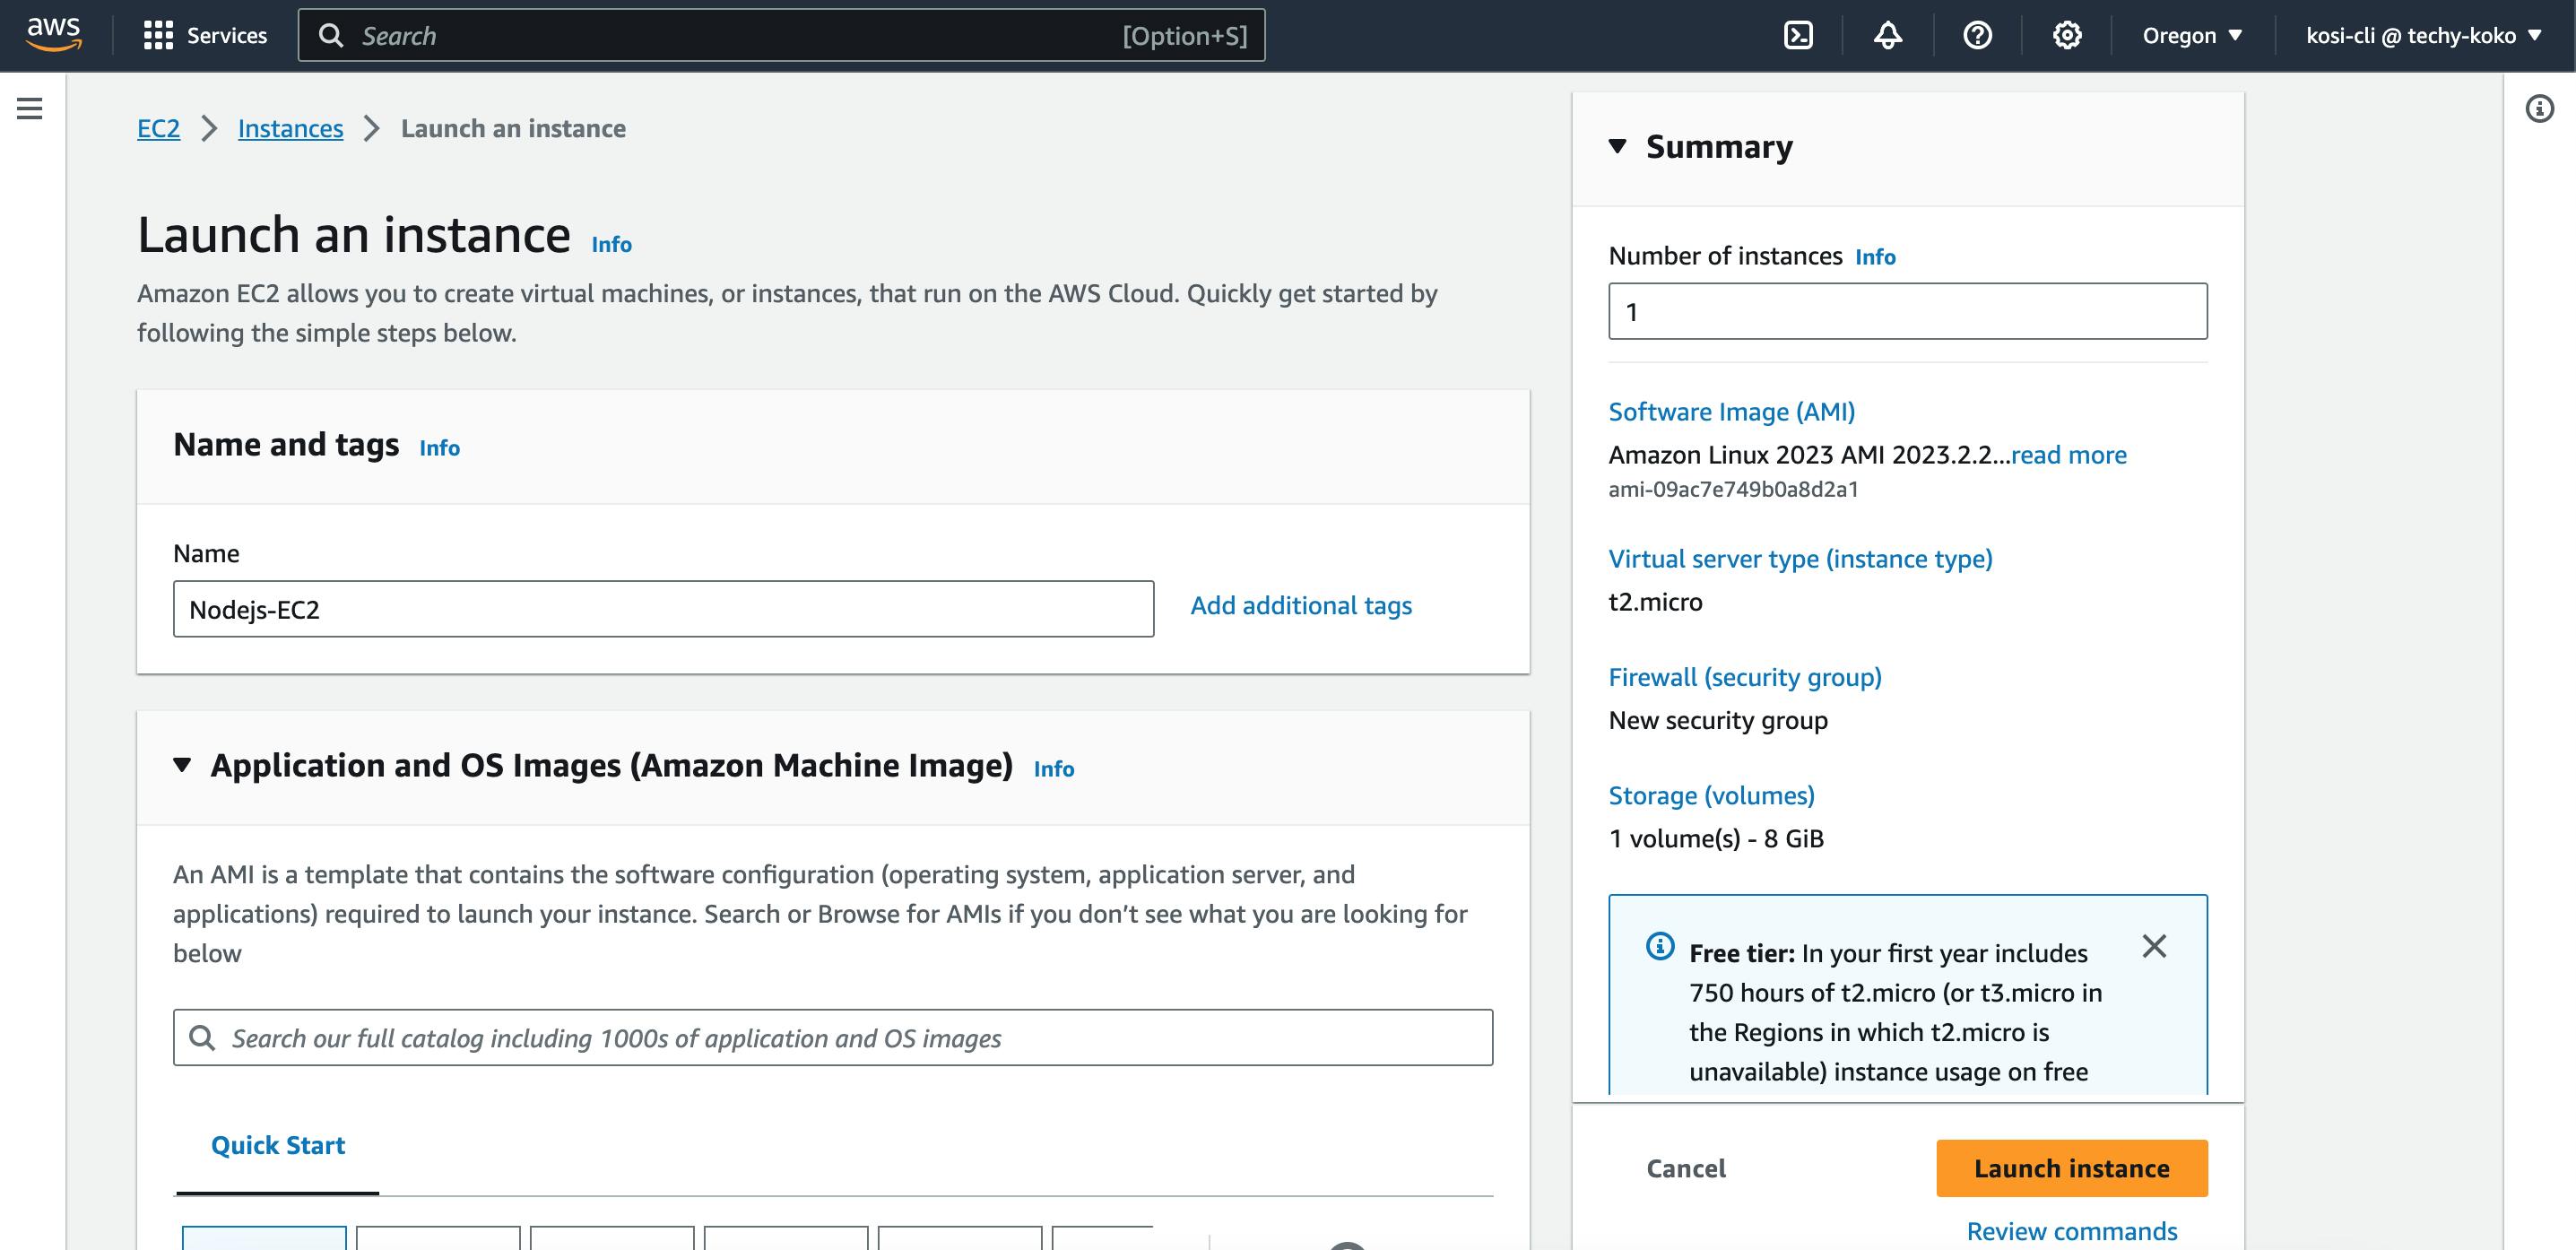
* Setup your EC2 Instance
We need to create a key pair to connect to your instance securely. After creating a new key pair, the key file is automatically downloaded into our system. Also, select your default VPC and default security group from the dropdown.
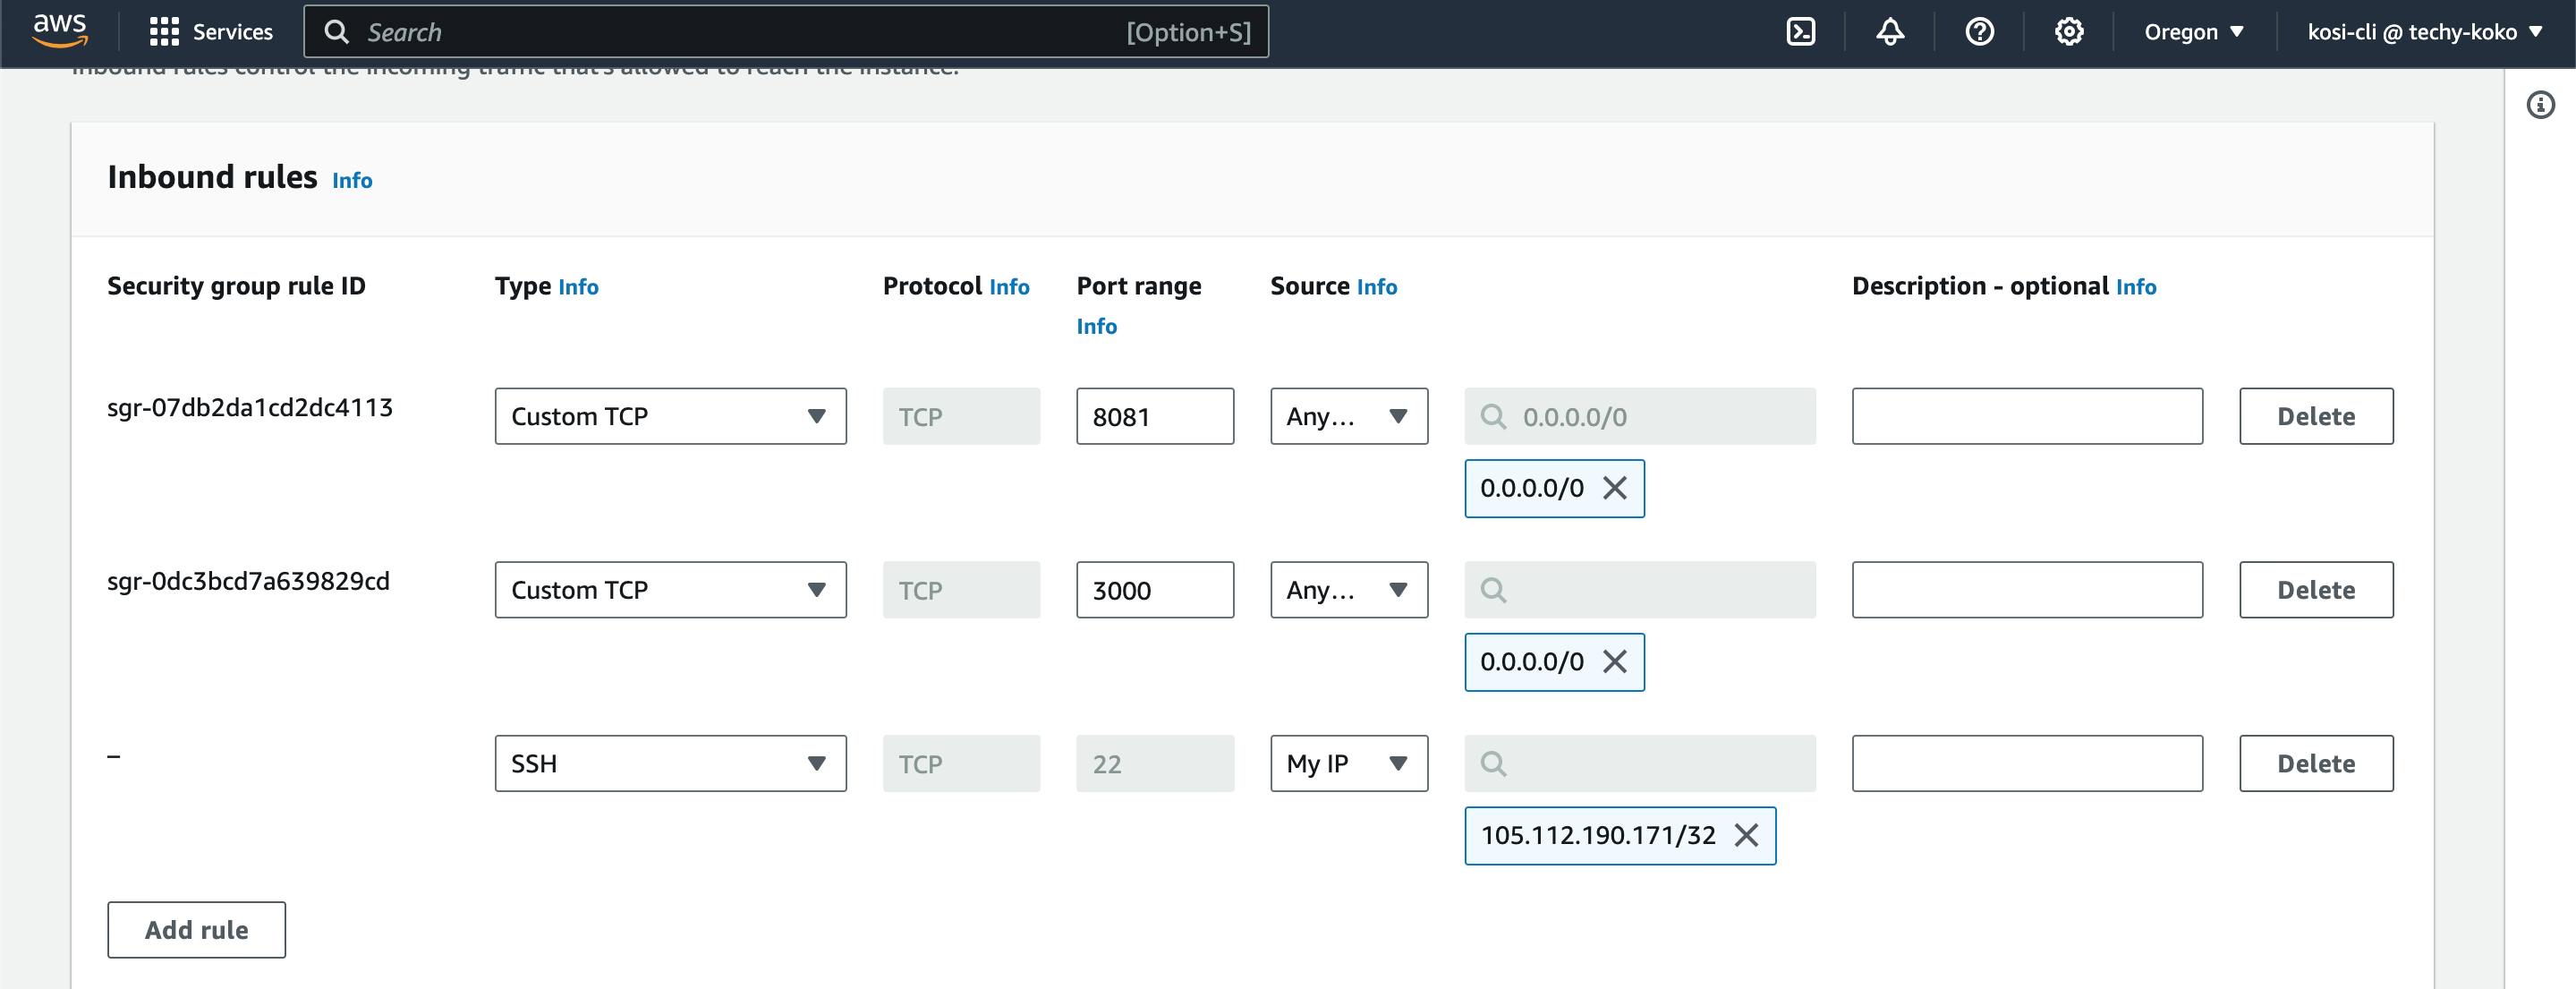
Edit the inbound rule of the security group of your default VPC to allow SSH traffic this will help us connect to our instance using an SSH client. and also open up the ports you will be working with 3000(backend) and 8081(mongo-express)

* After a successful creation, connect your instance by clicking on the Connect button on the top right corner of the service console.
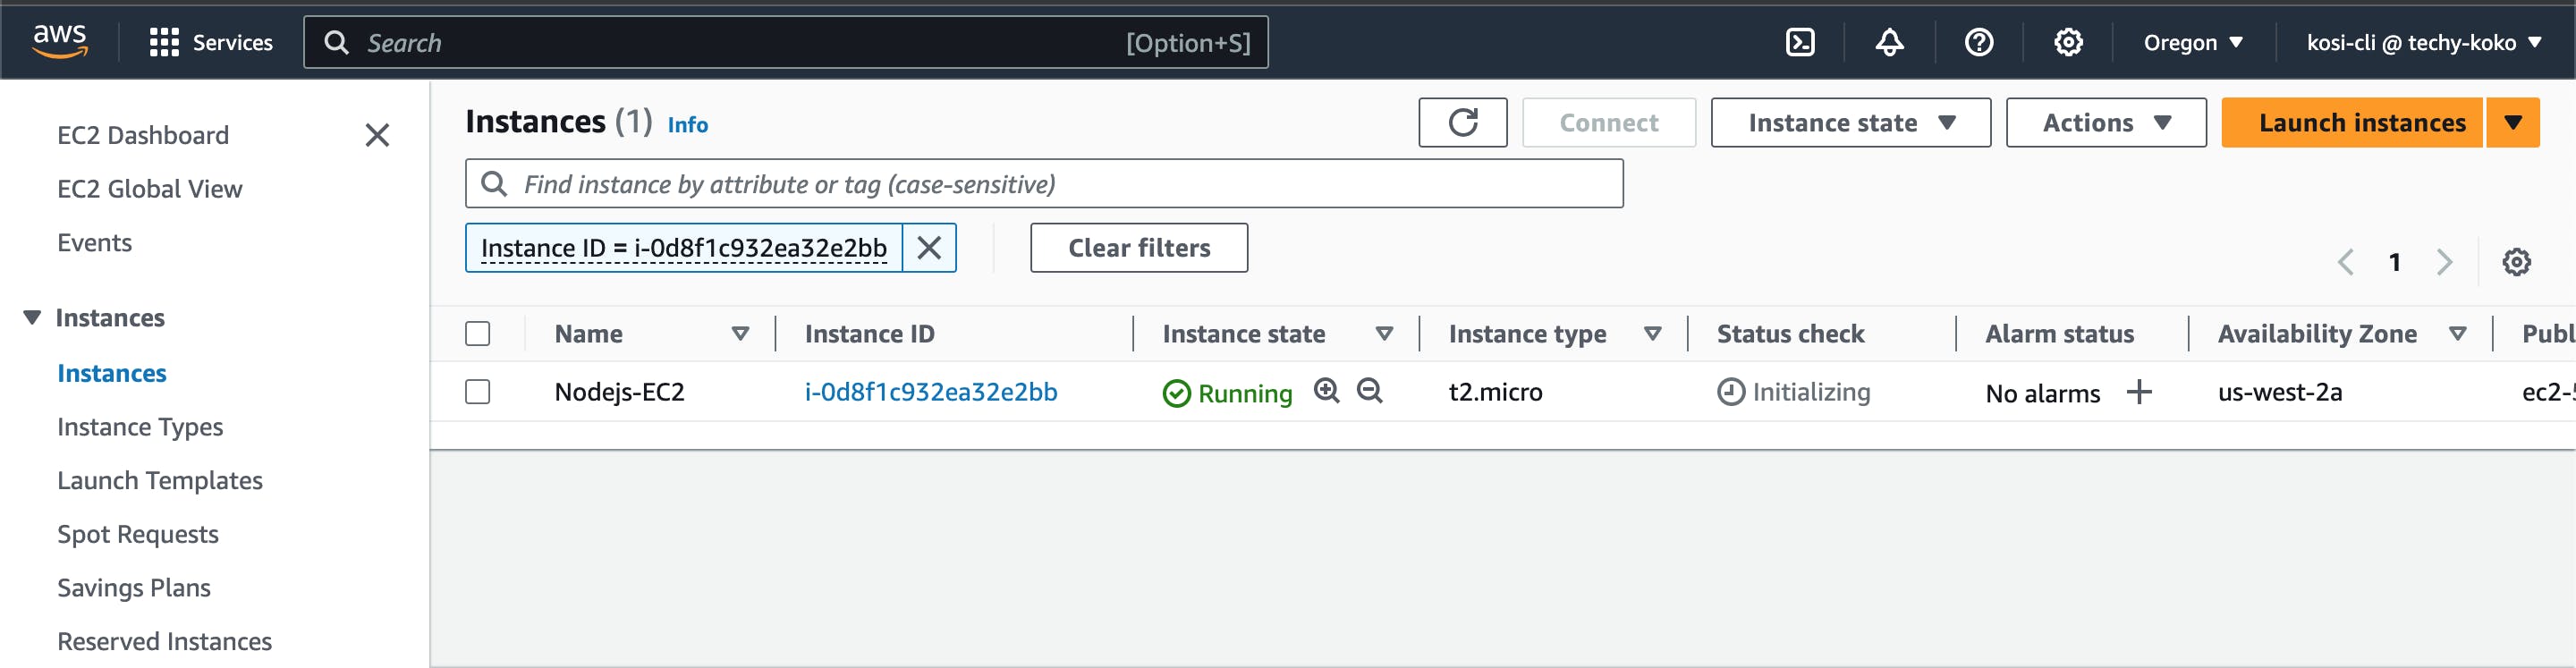
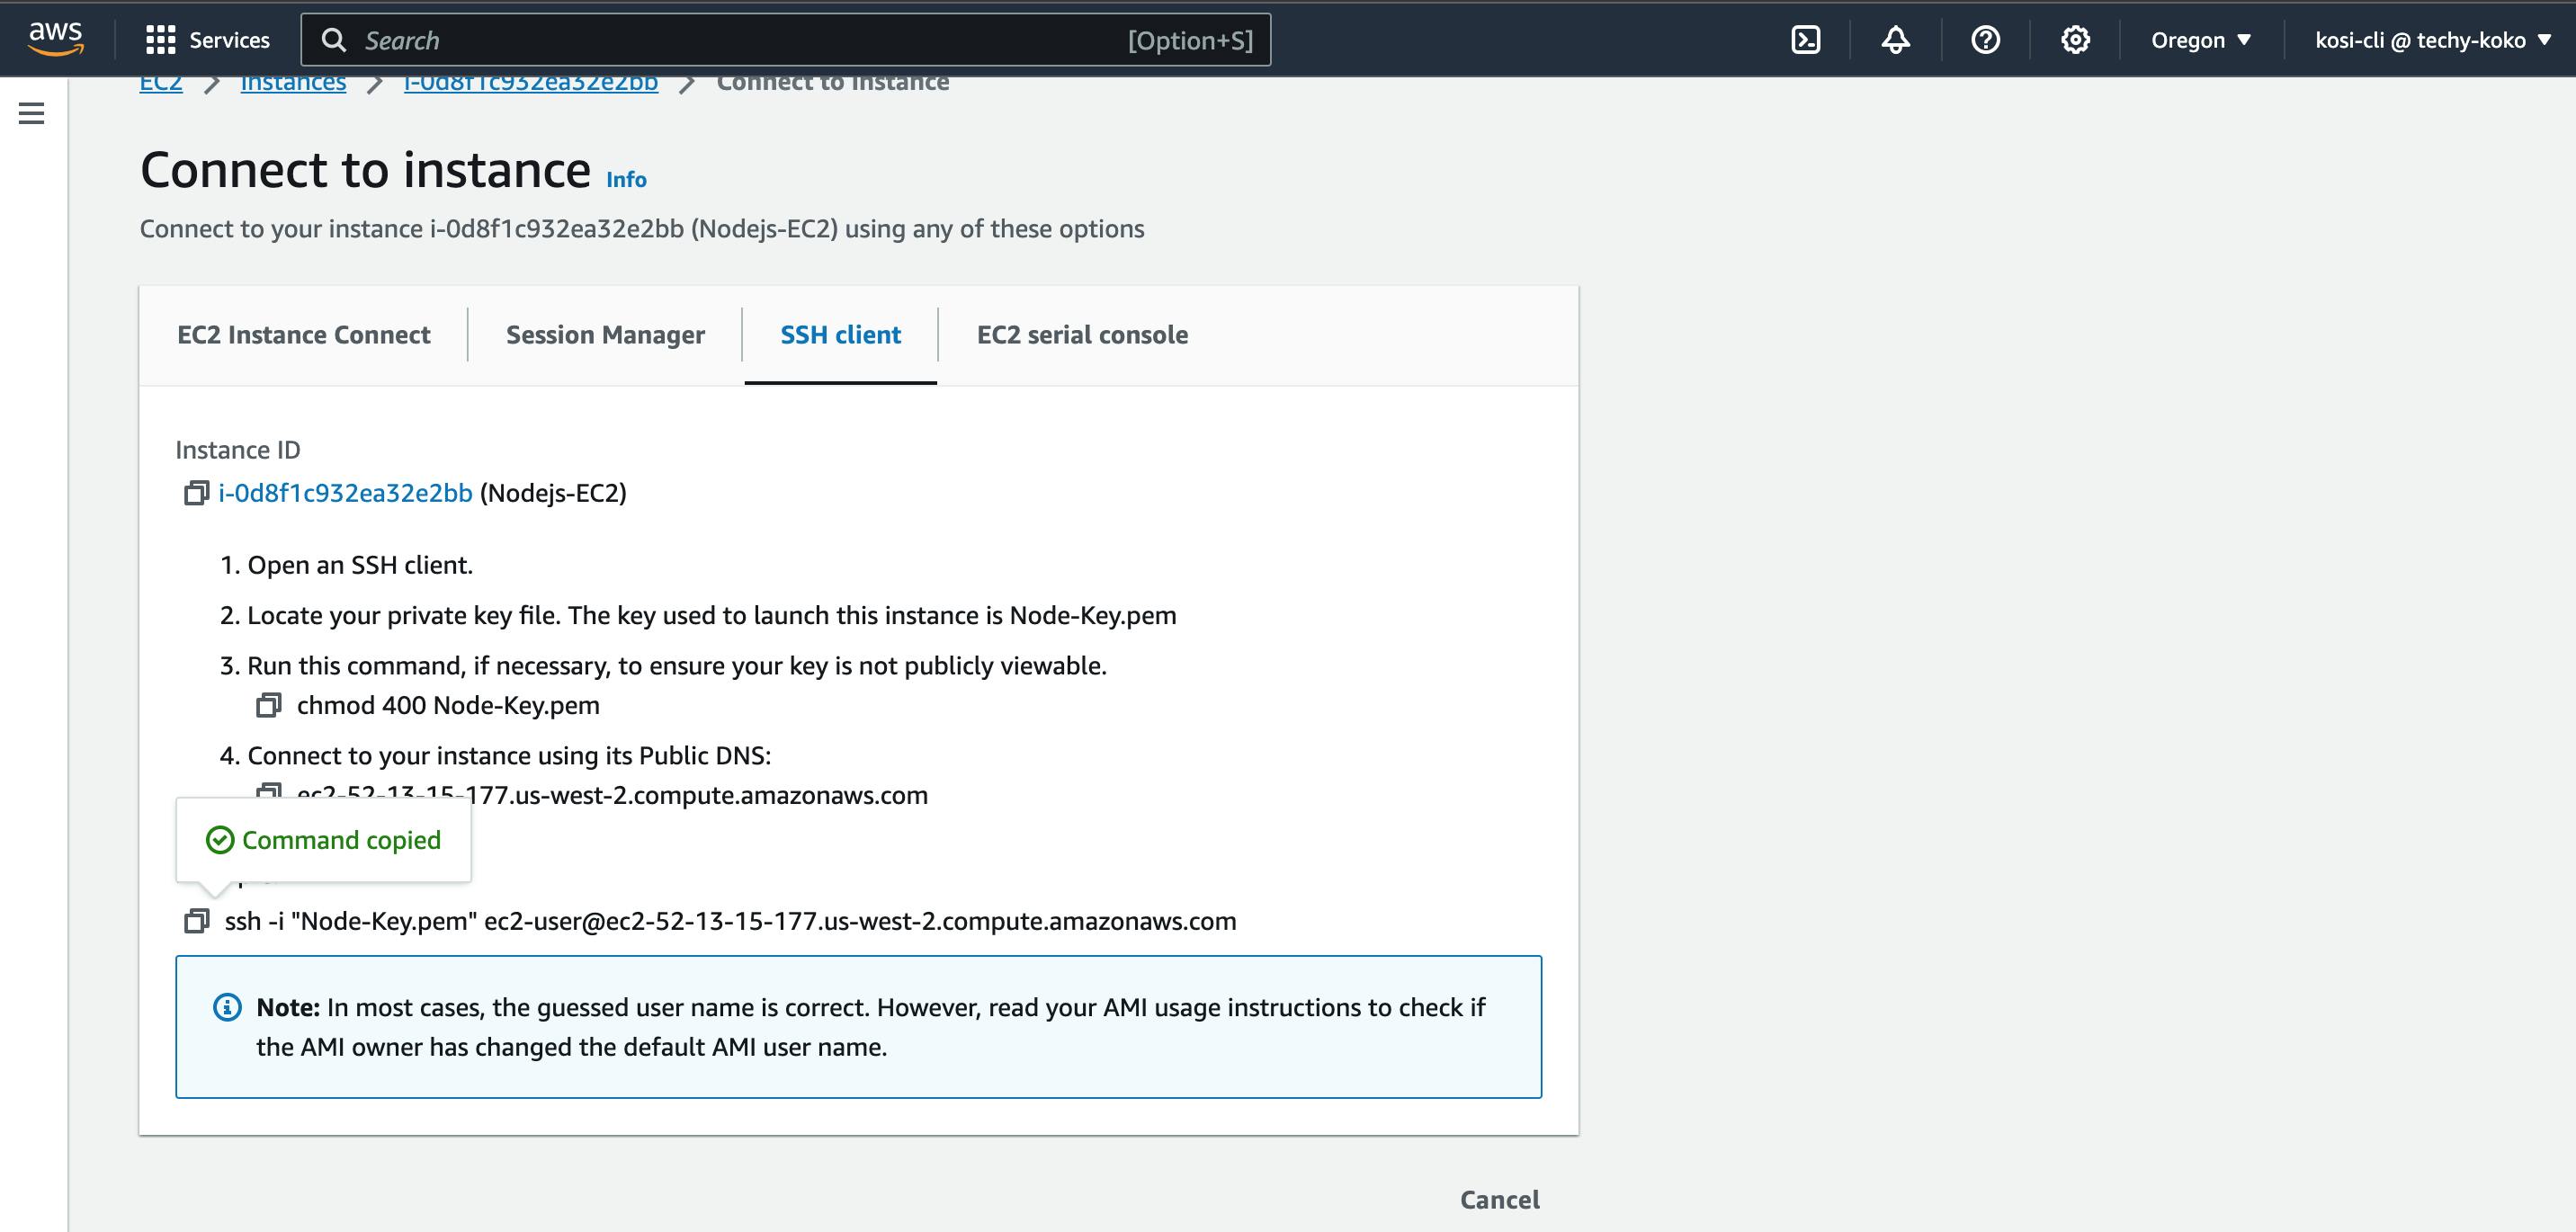
* From the tab menu, there are different options provided on how you can connect to the Linux Server but we will be using the "SSH client" option.
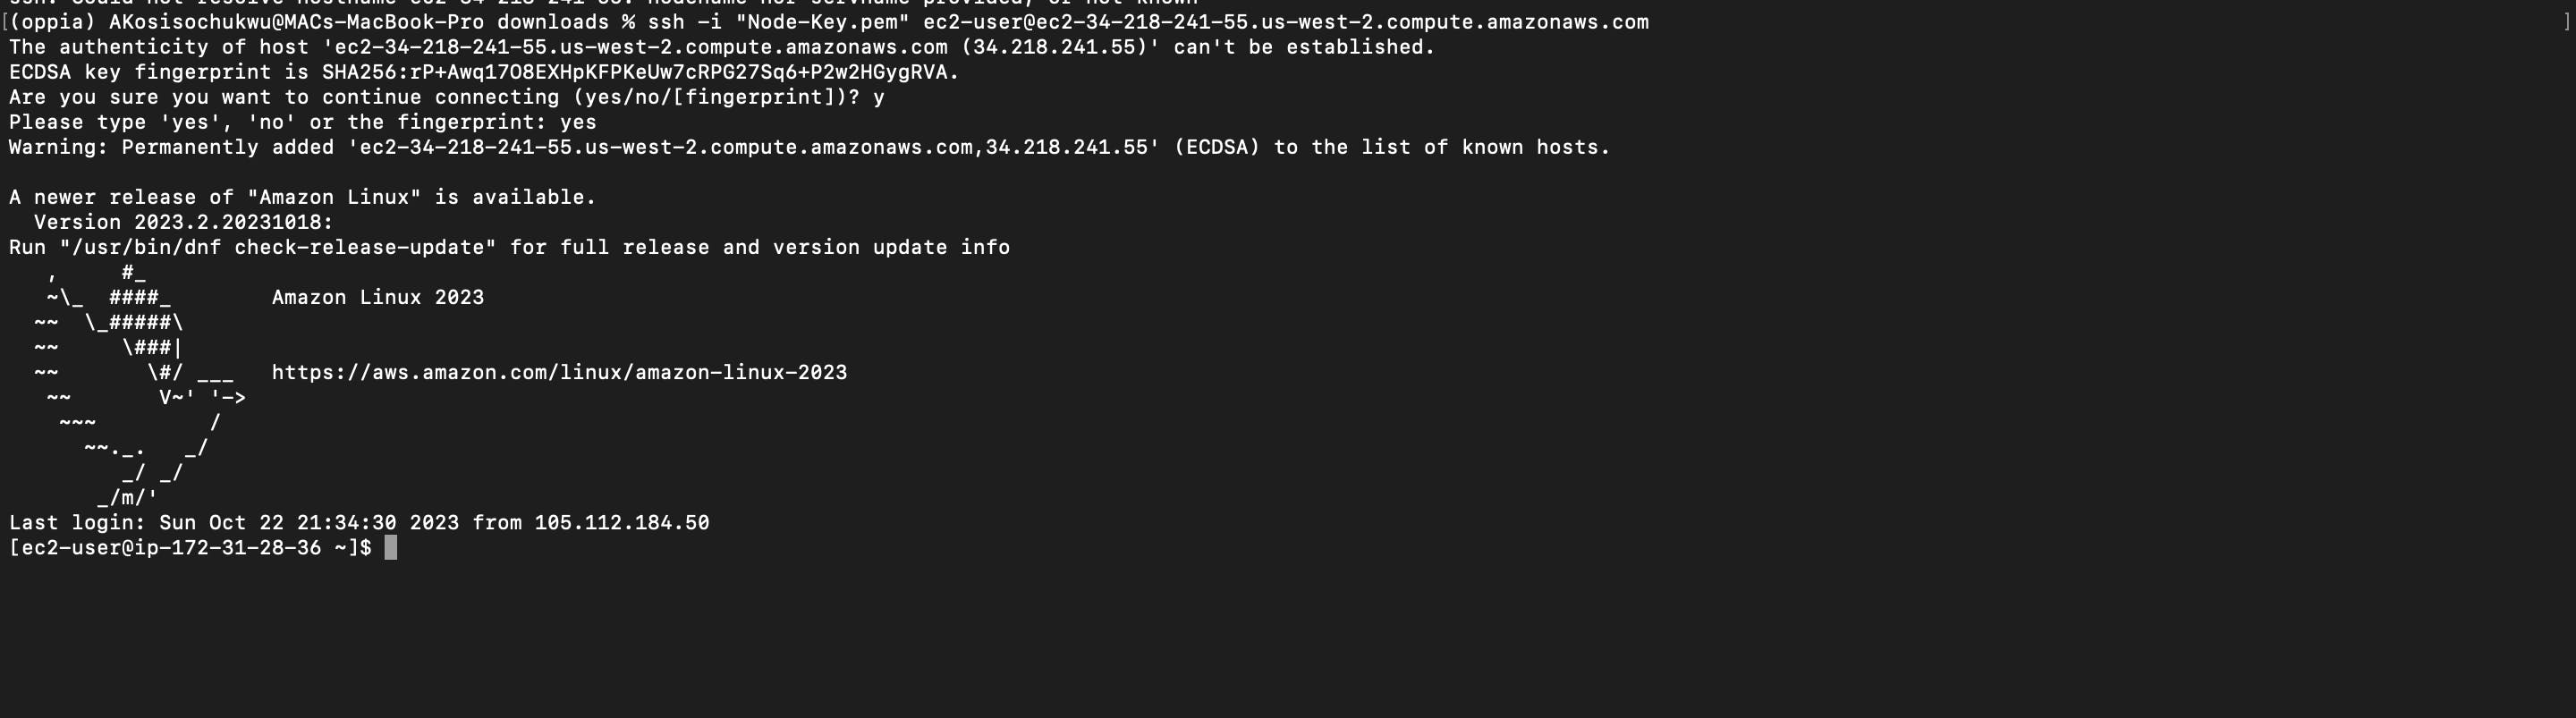
copy the example command on the console and paste it into your device terminal. Now you have successfully set up your EC2 virtual machine.
** You should see this, after a successful completion.
Build the Docker Images
To build the docker images, we will clone our project repository into our VM and run some docker commands within it to enable the docker file within our repository to build the different images. For this to work we need to install Git and Docker in our EC2 instance
* Update the package manager by running this command in your terminal
sudo yum update -y

* Install Git for Linux-based systems (because that's the operating system of our instance)
sudo yum update -y
sudo yum install git
* Install Docker
sudo yum install -y docker

* Start the docker service
sudo service docker start
* Add your user to the 'docker' group to run Docker commands without sudo:
sudo usermod -a -G docker ec2-user
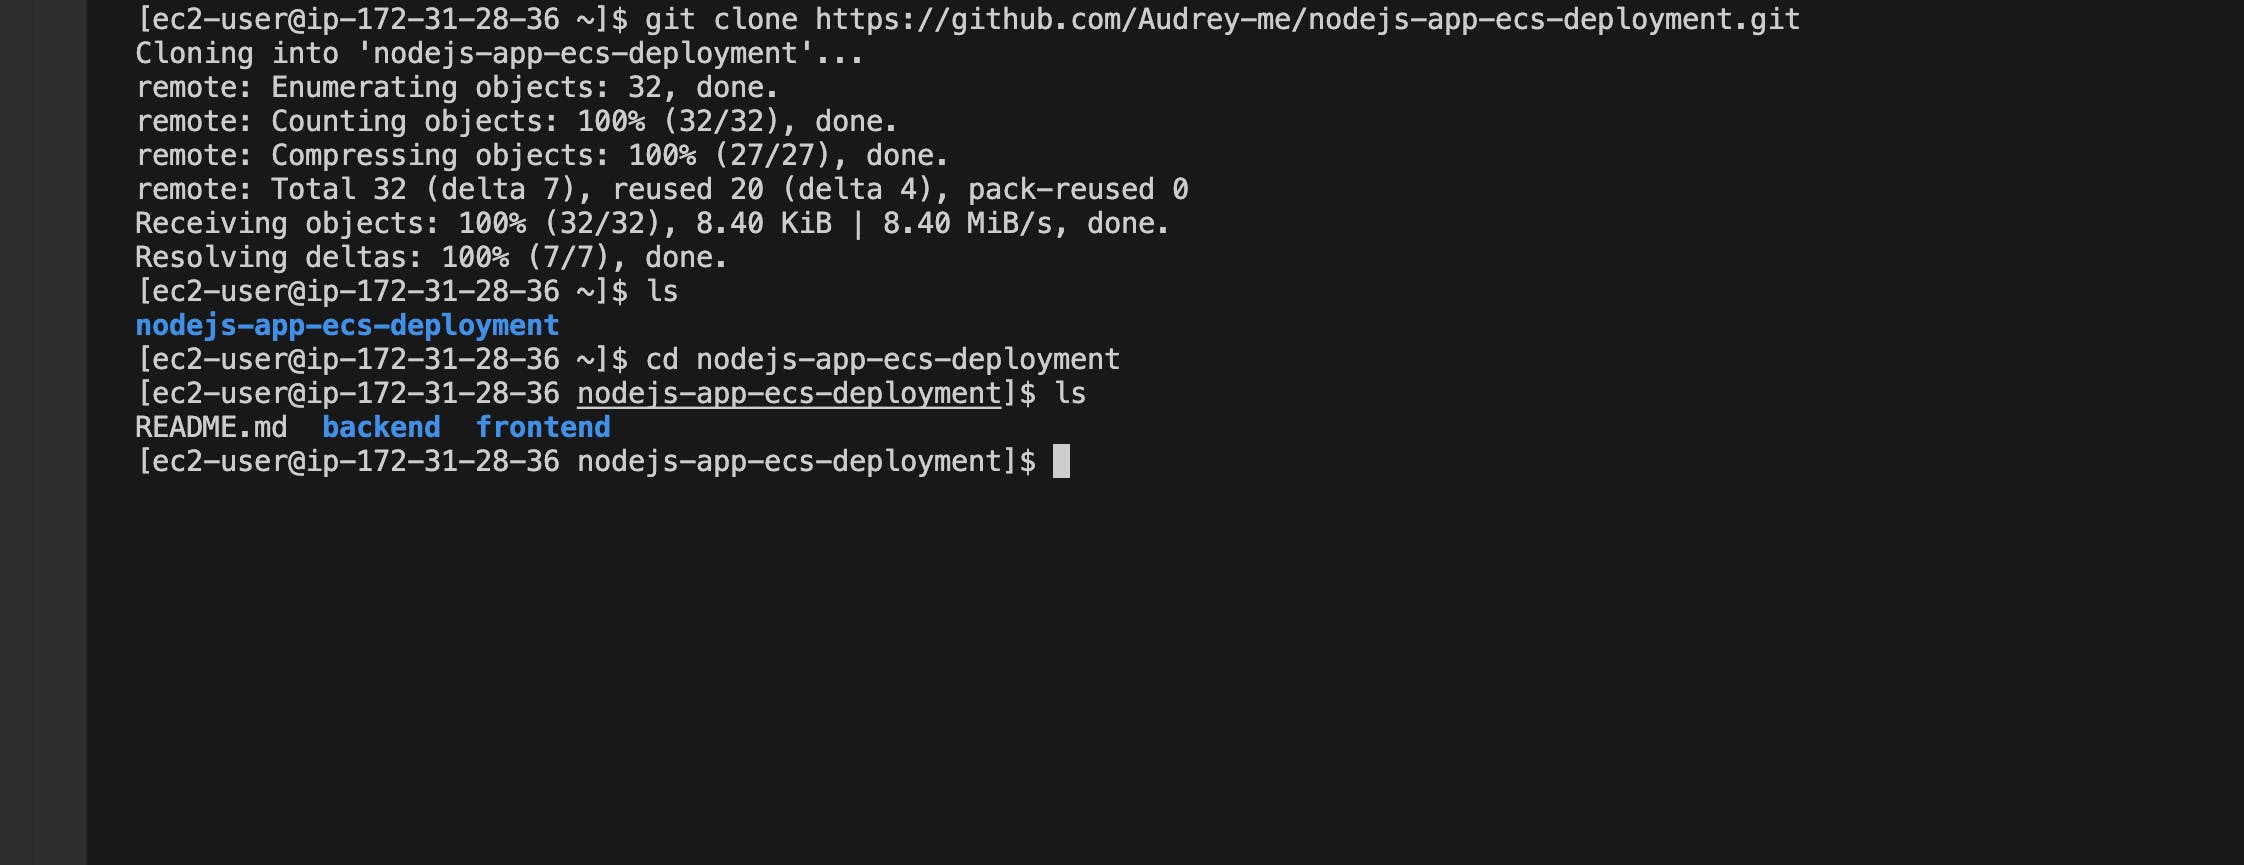
* Clone the repository, and run the different commands to build the image for the backend folder.
- git clone https://github.com/Audrey-me/nodejs-app-ecs-deployment.git
- cd nodejs-app-ecs-deployment
- cd backend
- docker build -t backend:1.0 .
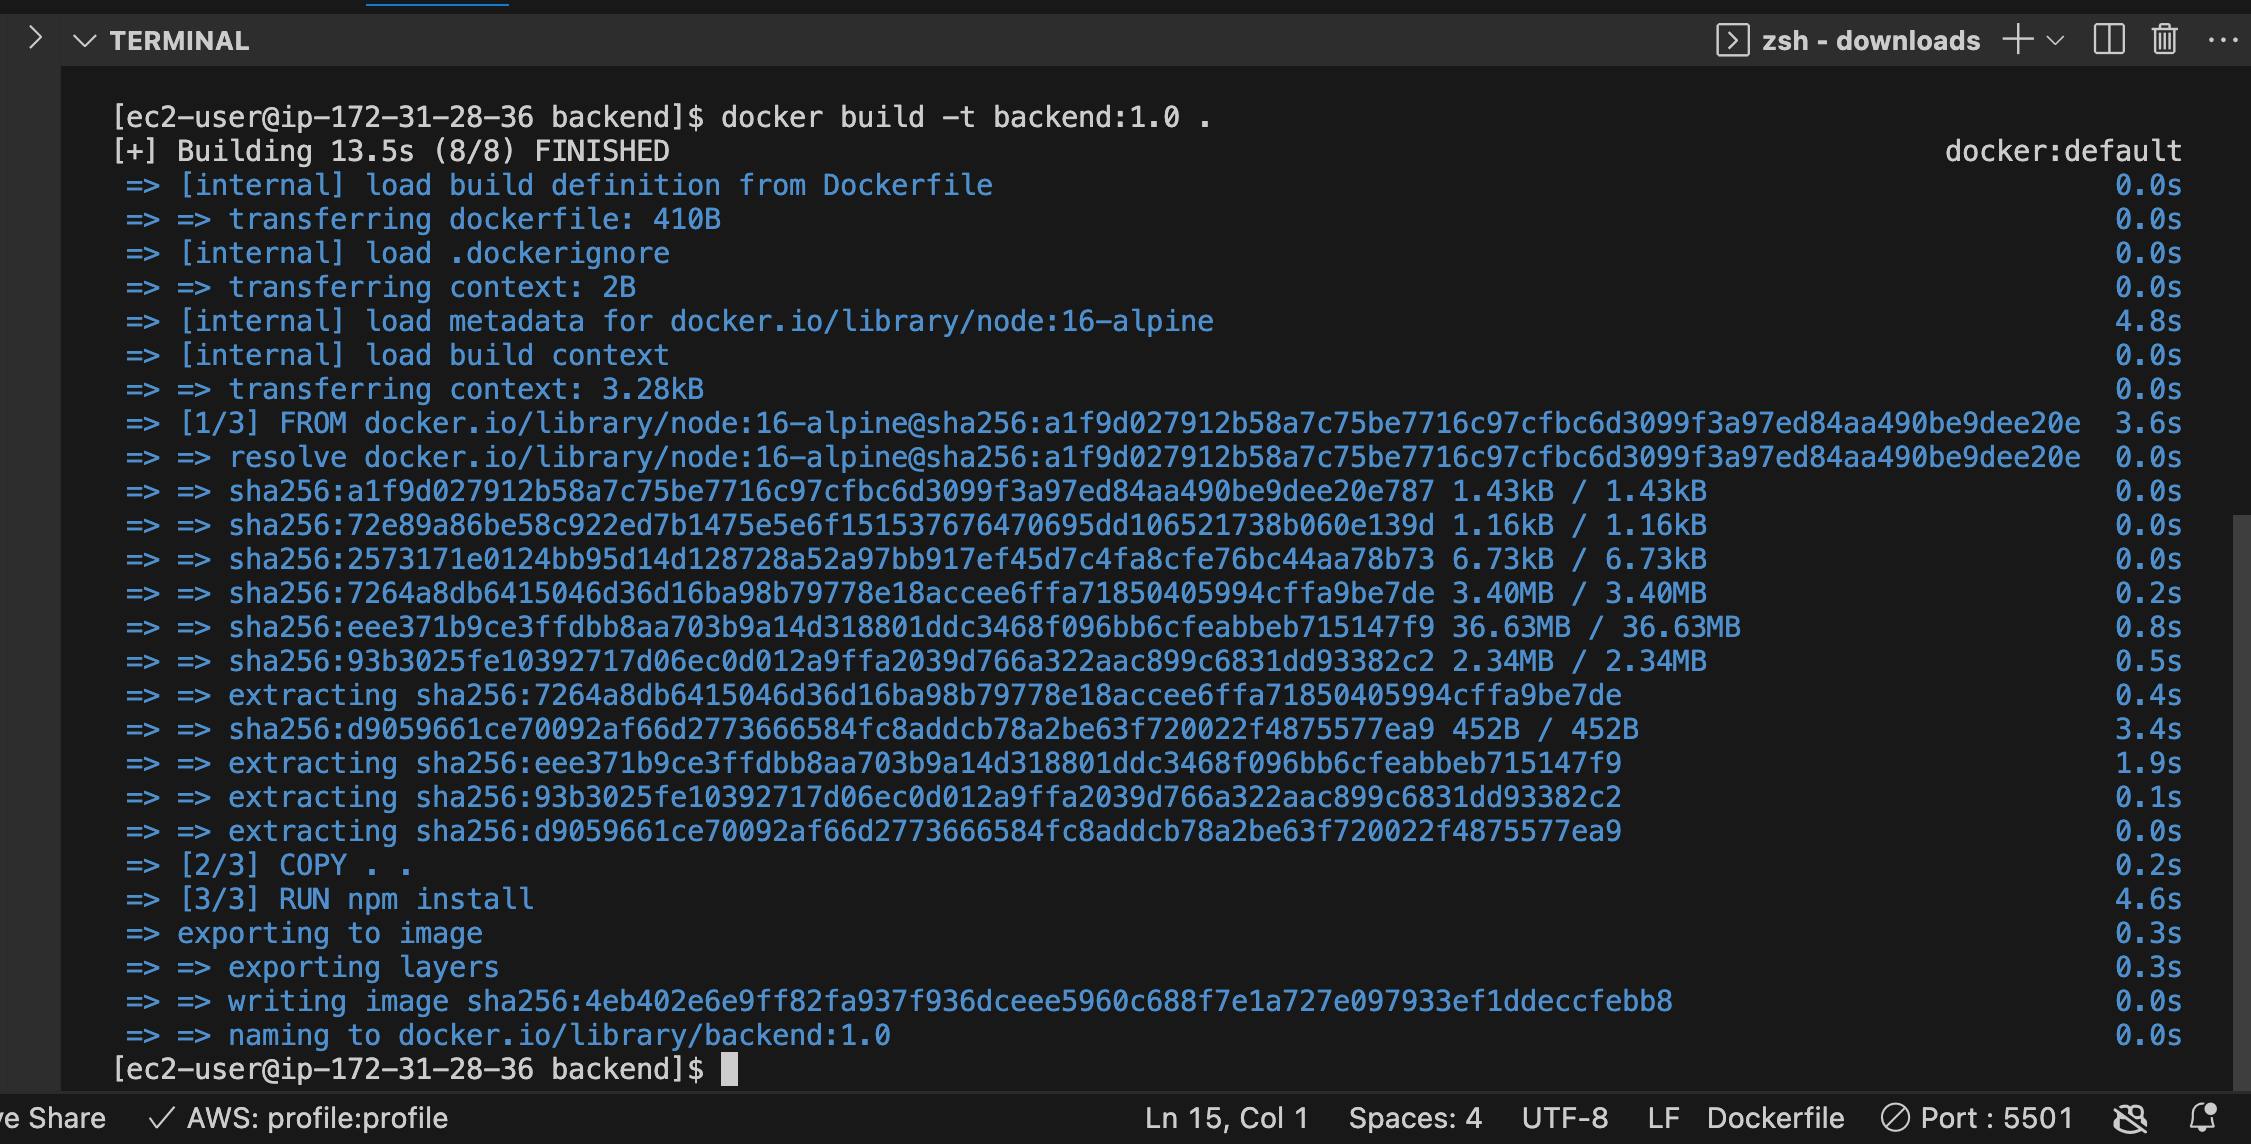
* Now we can see the backend image we just created displayed after a successful setup.
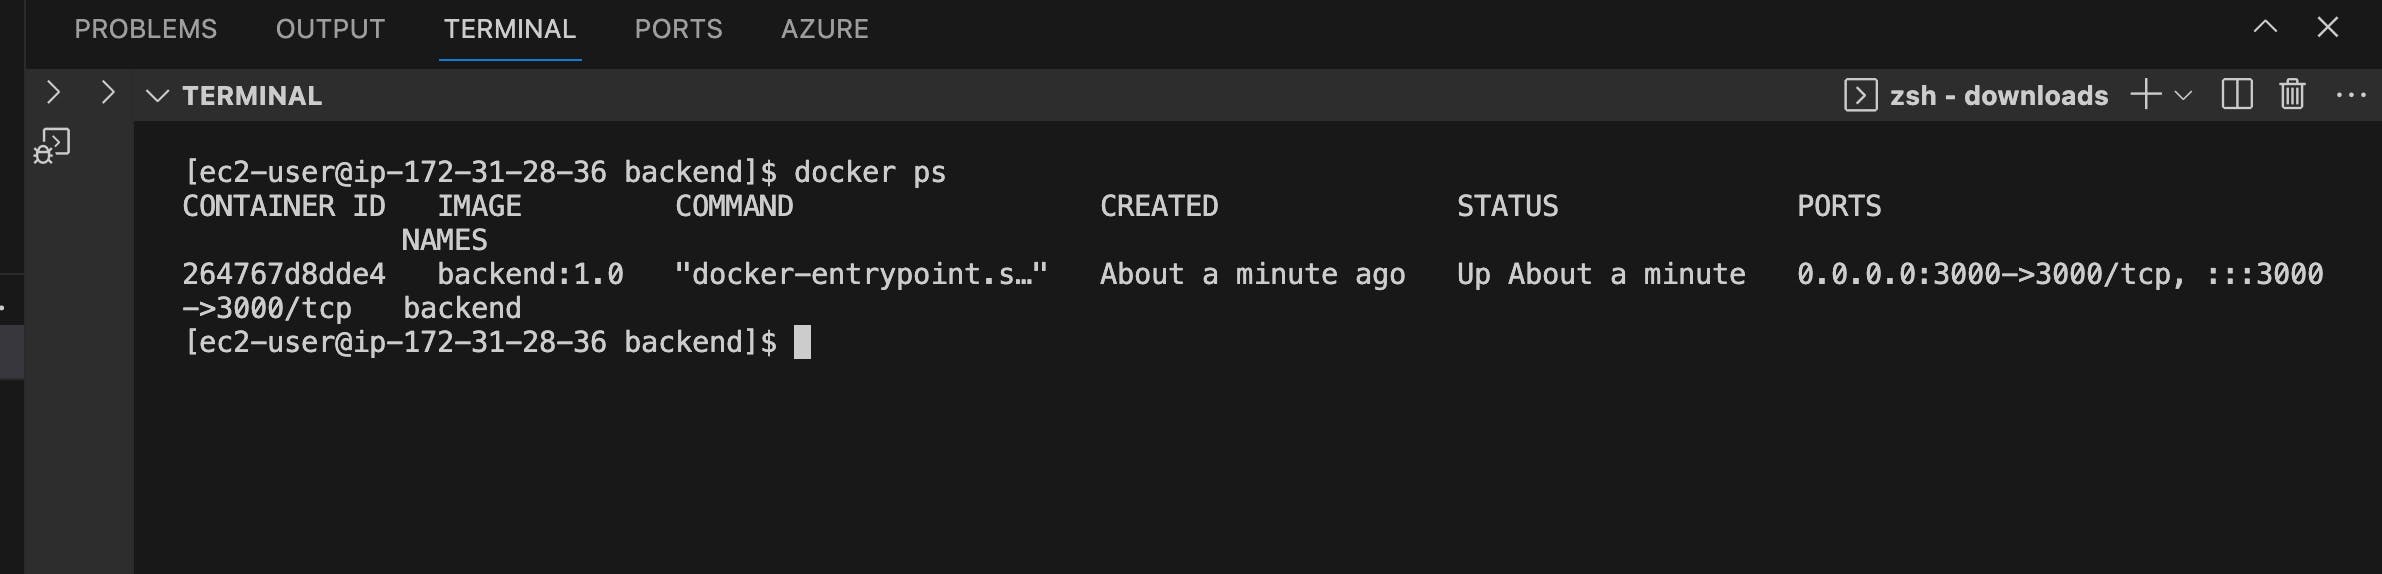
** Run this command to start up a container from the created image just for testing purposes.
docker run -d -p 3000:3000 --name backend backend:1.0
Pushing to a Container Repository
A Container Repository helps us to store our container images.
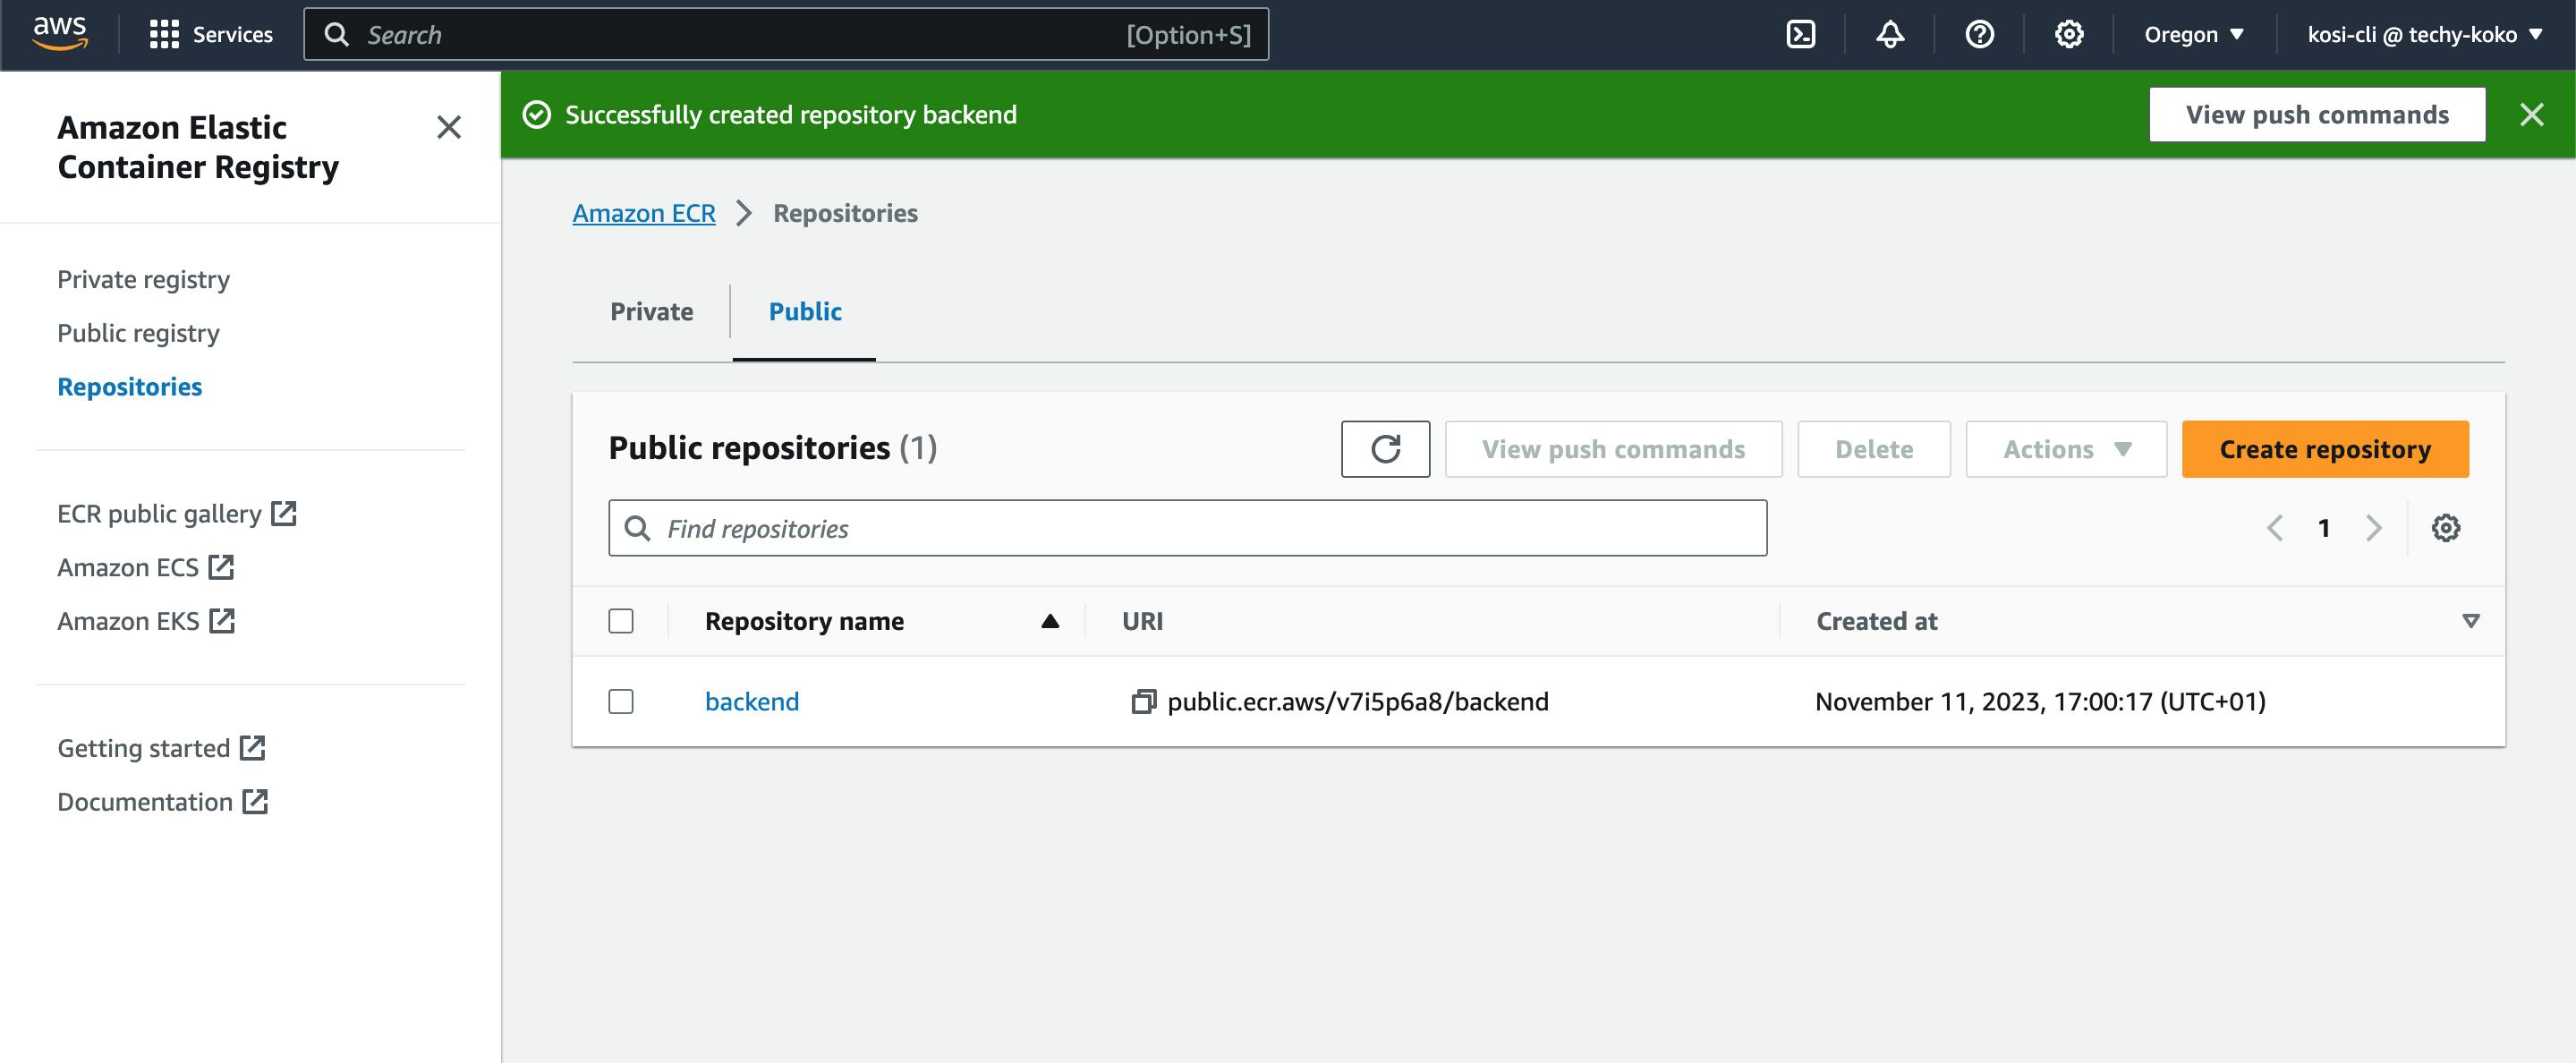
Now we have built our image and tested it out by running them, we can now push up to a repository which will be the Amazon Elastic Container Registry(ECR). This helps generate a URL for us which will be used to deploy our containers in ECS.
** Go to the ECR service console and click on "Create a repository". to create the backend repository and click on view push commands.
** Click on the "view push command" button to push your built image to the created repository.
You will need to authenticate to allow access to your AWS account by creating an IAM user and getting an access key.

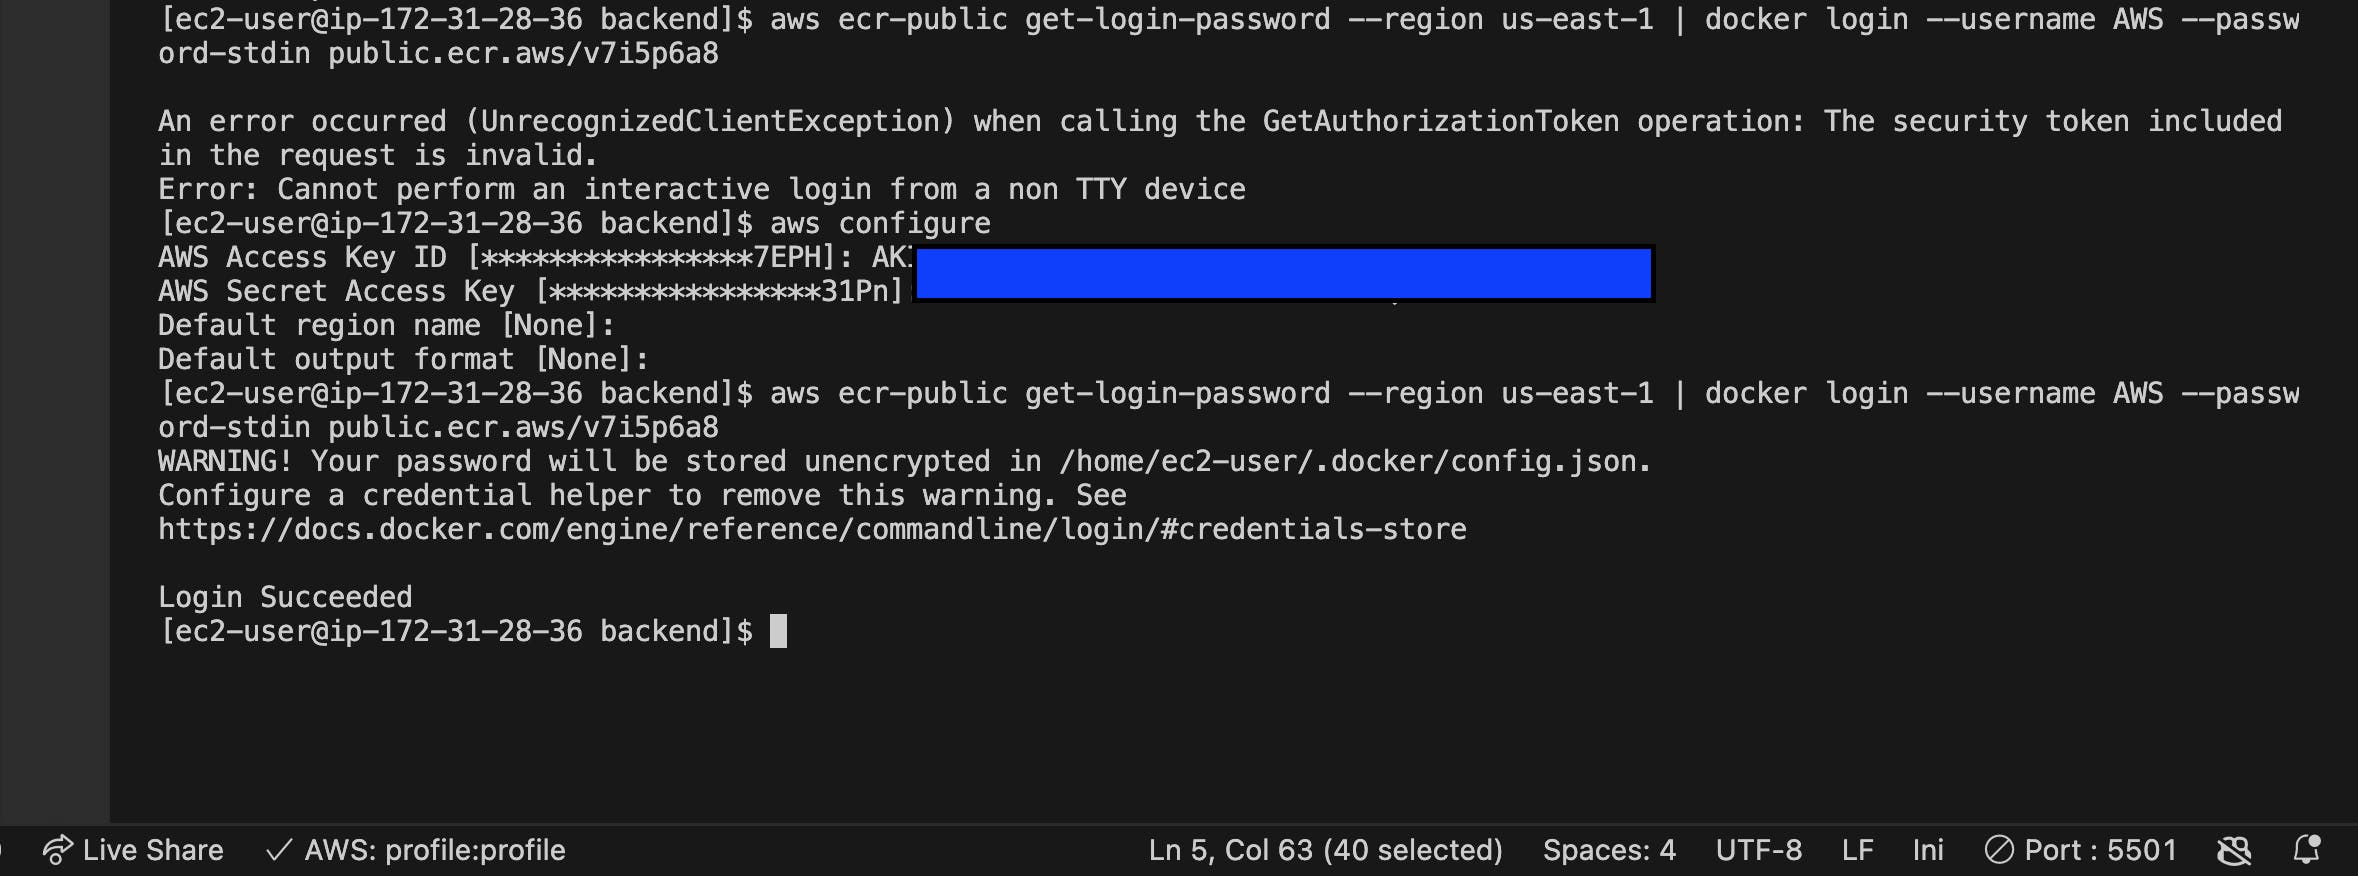
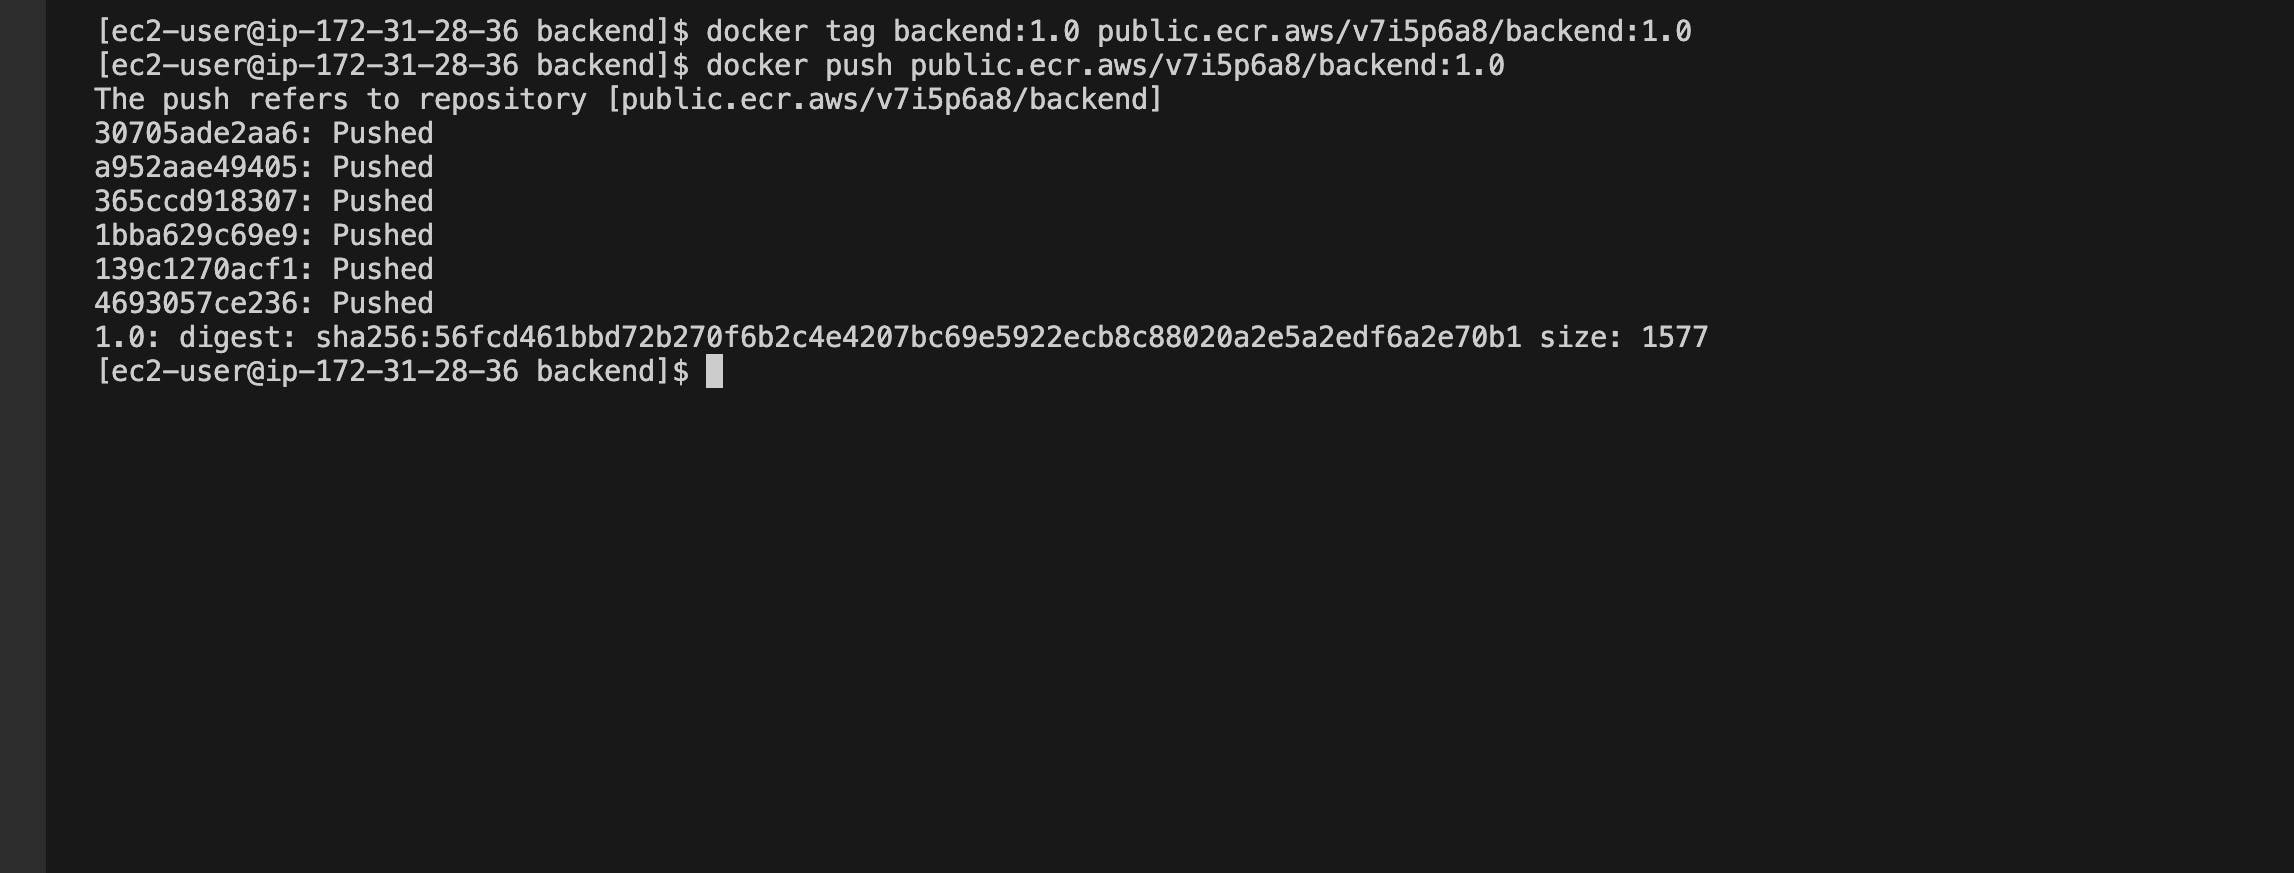
Note the use of tags when building our images. These tags help with version control and we can easily reference changes to our image using the tags.
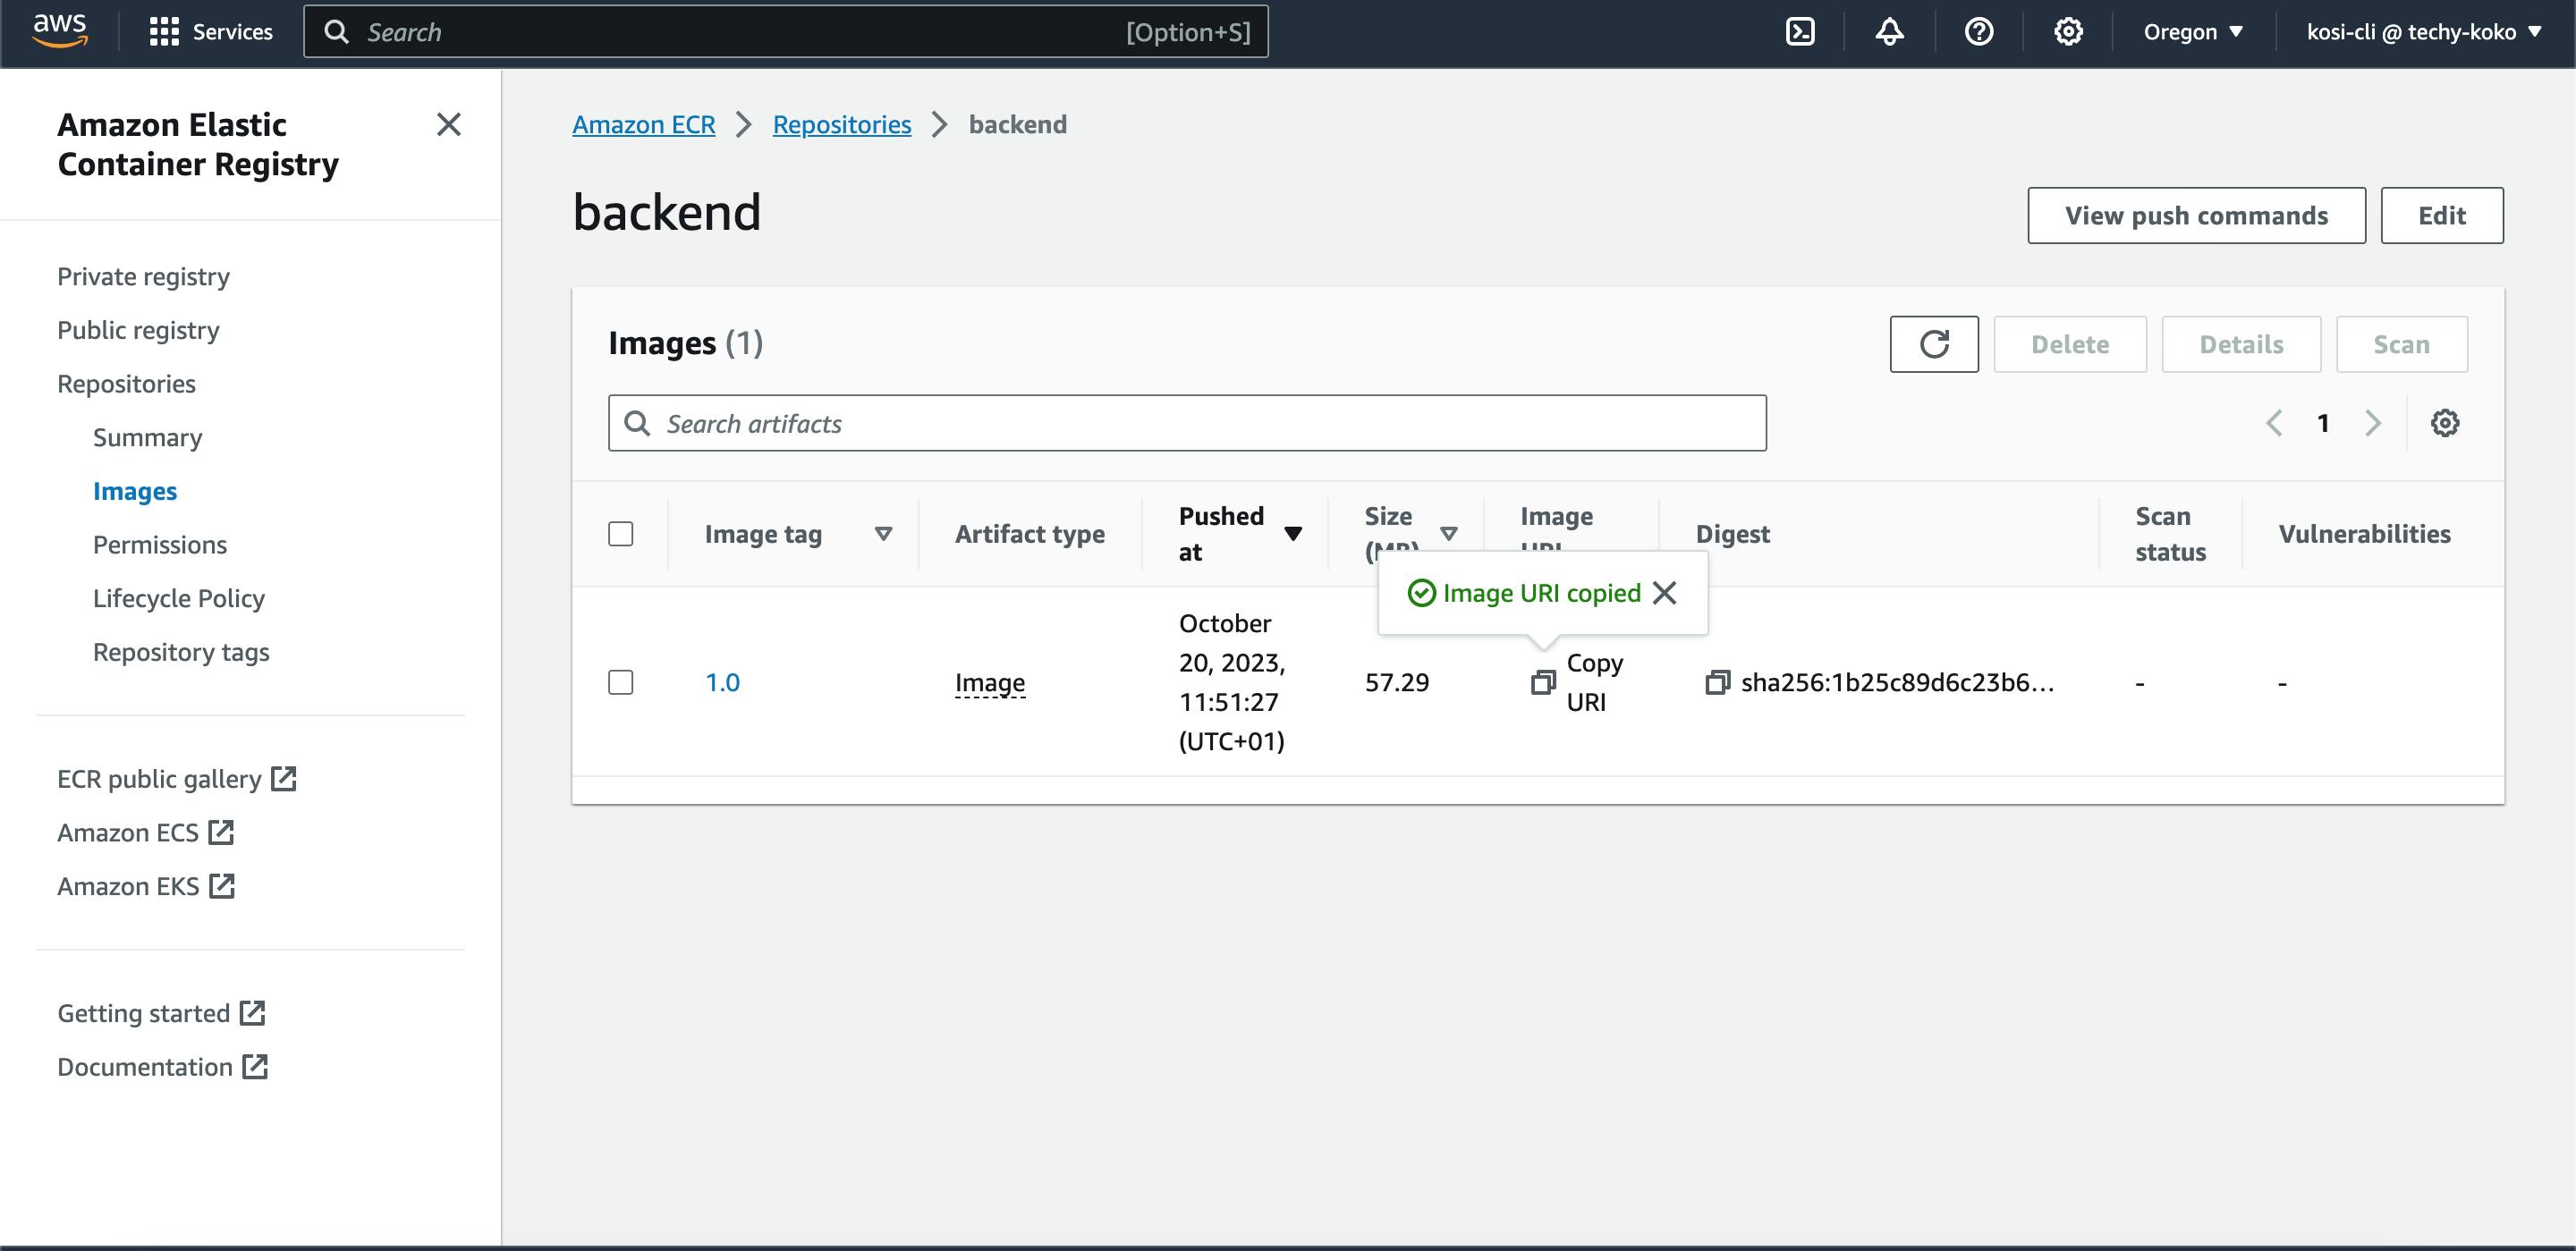
Now, our images have been pushed to a registry, and we can easily reference them using their URI. With this, we can deploy our project in ECS but before then, we need to understand the different terminology used in ECS.
Terminology Used in Amazon ECS
- Clusters
This is basically a logical grouping of your containers. For example, you may have different containers running on different services or different environments (e.g., testing or production). With clusters, you can easily give a name to all the containers specific to those environments, and it also easily helps you identify what your different containers are for.
We can see clusters as a car that has kids(containers) sitting inside of it maybe going to a beach or somewhere fun, and the car has different kinds of seats (either soft or hard) which can be an AWS EC2 seat or an AWS Fargate seat.
So you can say Cluster A has an EC2 Launch type(EC2 seat) while Cluster B has a Fargate Launch type (Fargate seat) or that Cluster A has both EC2 and Fargate Launch type(both seats).
Task Definition
To understand task definition we need to understand what a "Task" is.
A "task" typically refers to a unit of work or a job that you want to run using containers. using the previous analogy.
Each of the kids inside the car is assigned a role to play to make the outing a fun one and these roles are called "Task." To make these tasks more defined and documented so they can easily make reference when they forget their task, we use "Task Definition," which is a text file in JSON format.
So, every container(kid) inside a cluster (car) has a task definition that specifies its type of seat (EC2 or Fargate) the tasks it should perform, and other important information.
The task definition serves as a blueprint for how each container should be configured, what image it should use, and how it should interact with other containers and resources within the cluster. The task definition is synonymous with a docker-compose file.Tasks and Scheduling
To ensure that there is some form of regulation and a proper division of labor during our outing, we need a special adult who will look through the different tasks assigned to the kids, group the similar ones as well, and make sure the car is not over-crowded or overloaded. In some cases, it splits the kids(containers) into different cars(clusters). That special Adult is called the "Task scheduler".Services
in ECS, the service is like a coordinator, making sure that the right number of containers are performing their tasks to run your application smoothly.
using the initial analogy, just as the task scheduler checks the task definition of each container and puts them in the right position.
There should be some form of a coordinator who will always remain there to make sure the kids(containers) are performing their assigned task, and if for any reason one of the kids gets tired, He assigns the task to another person.
In summary, the scheduler assigns jobs (Tasks) to the individual kids (containers) based on their instructions (Task Definition) and finds the best seats (resources) in the car (cluster) for them, The special adult makes sure there is regulation and proper division of labour while the Service is the General Cordinator making sure the arrangement remains effective and the outing(your application) goes smoothly.
Orchestrating and Deploying on ECS
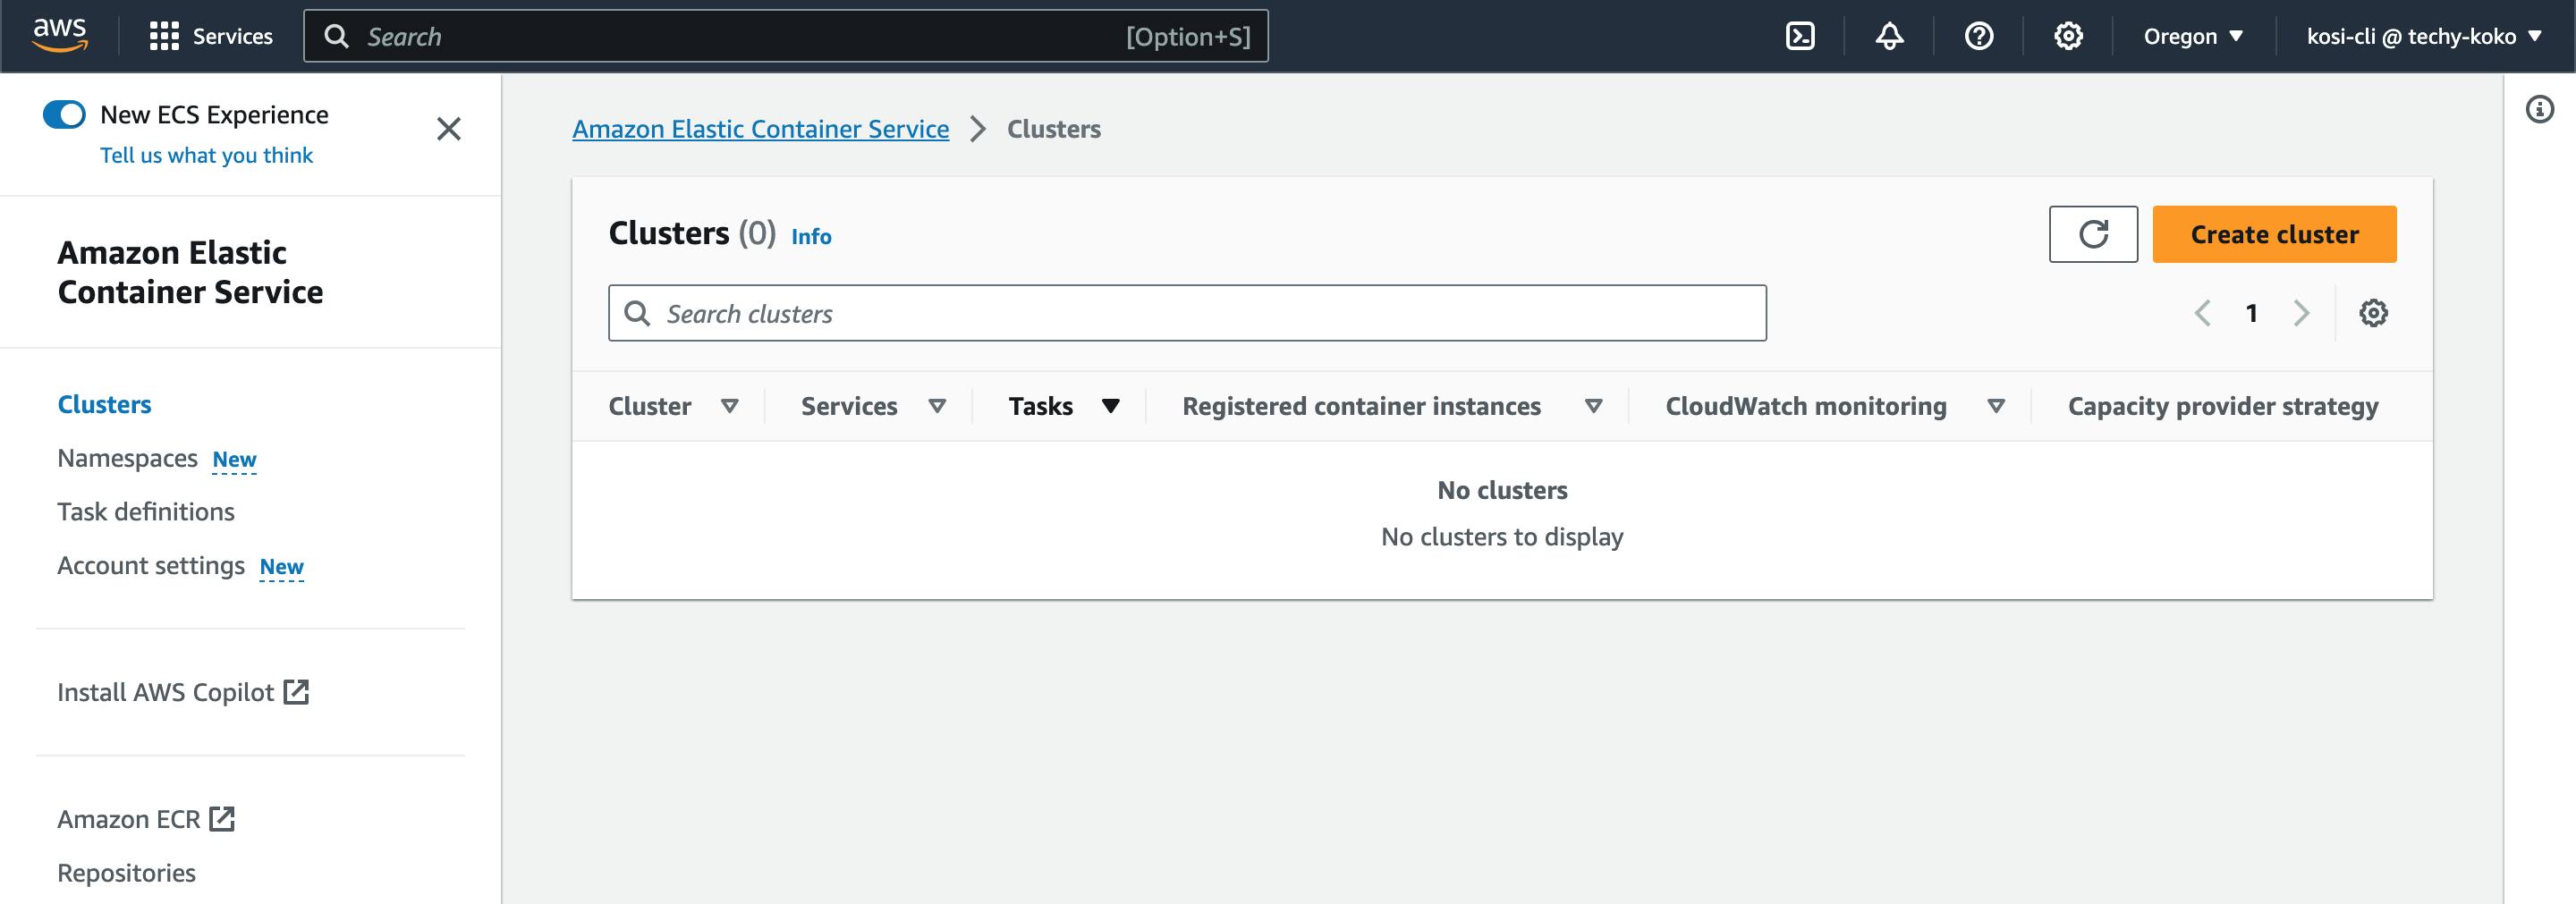
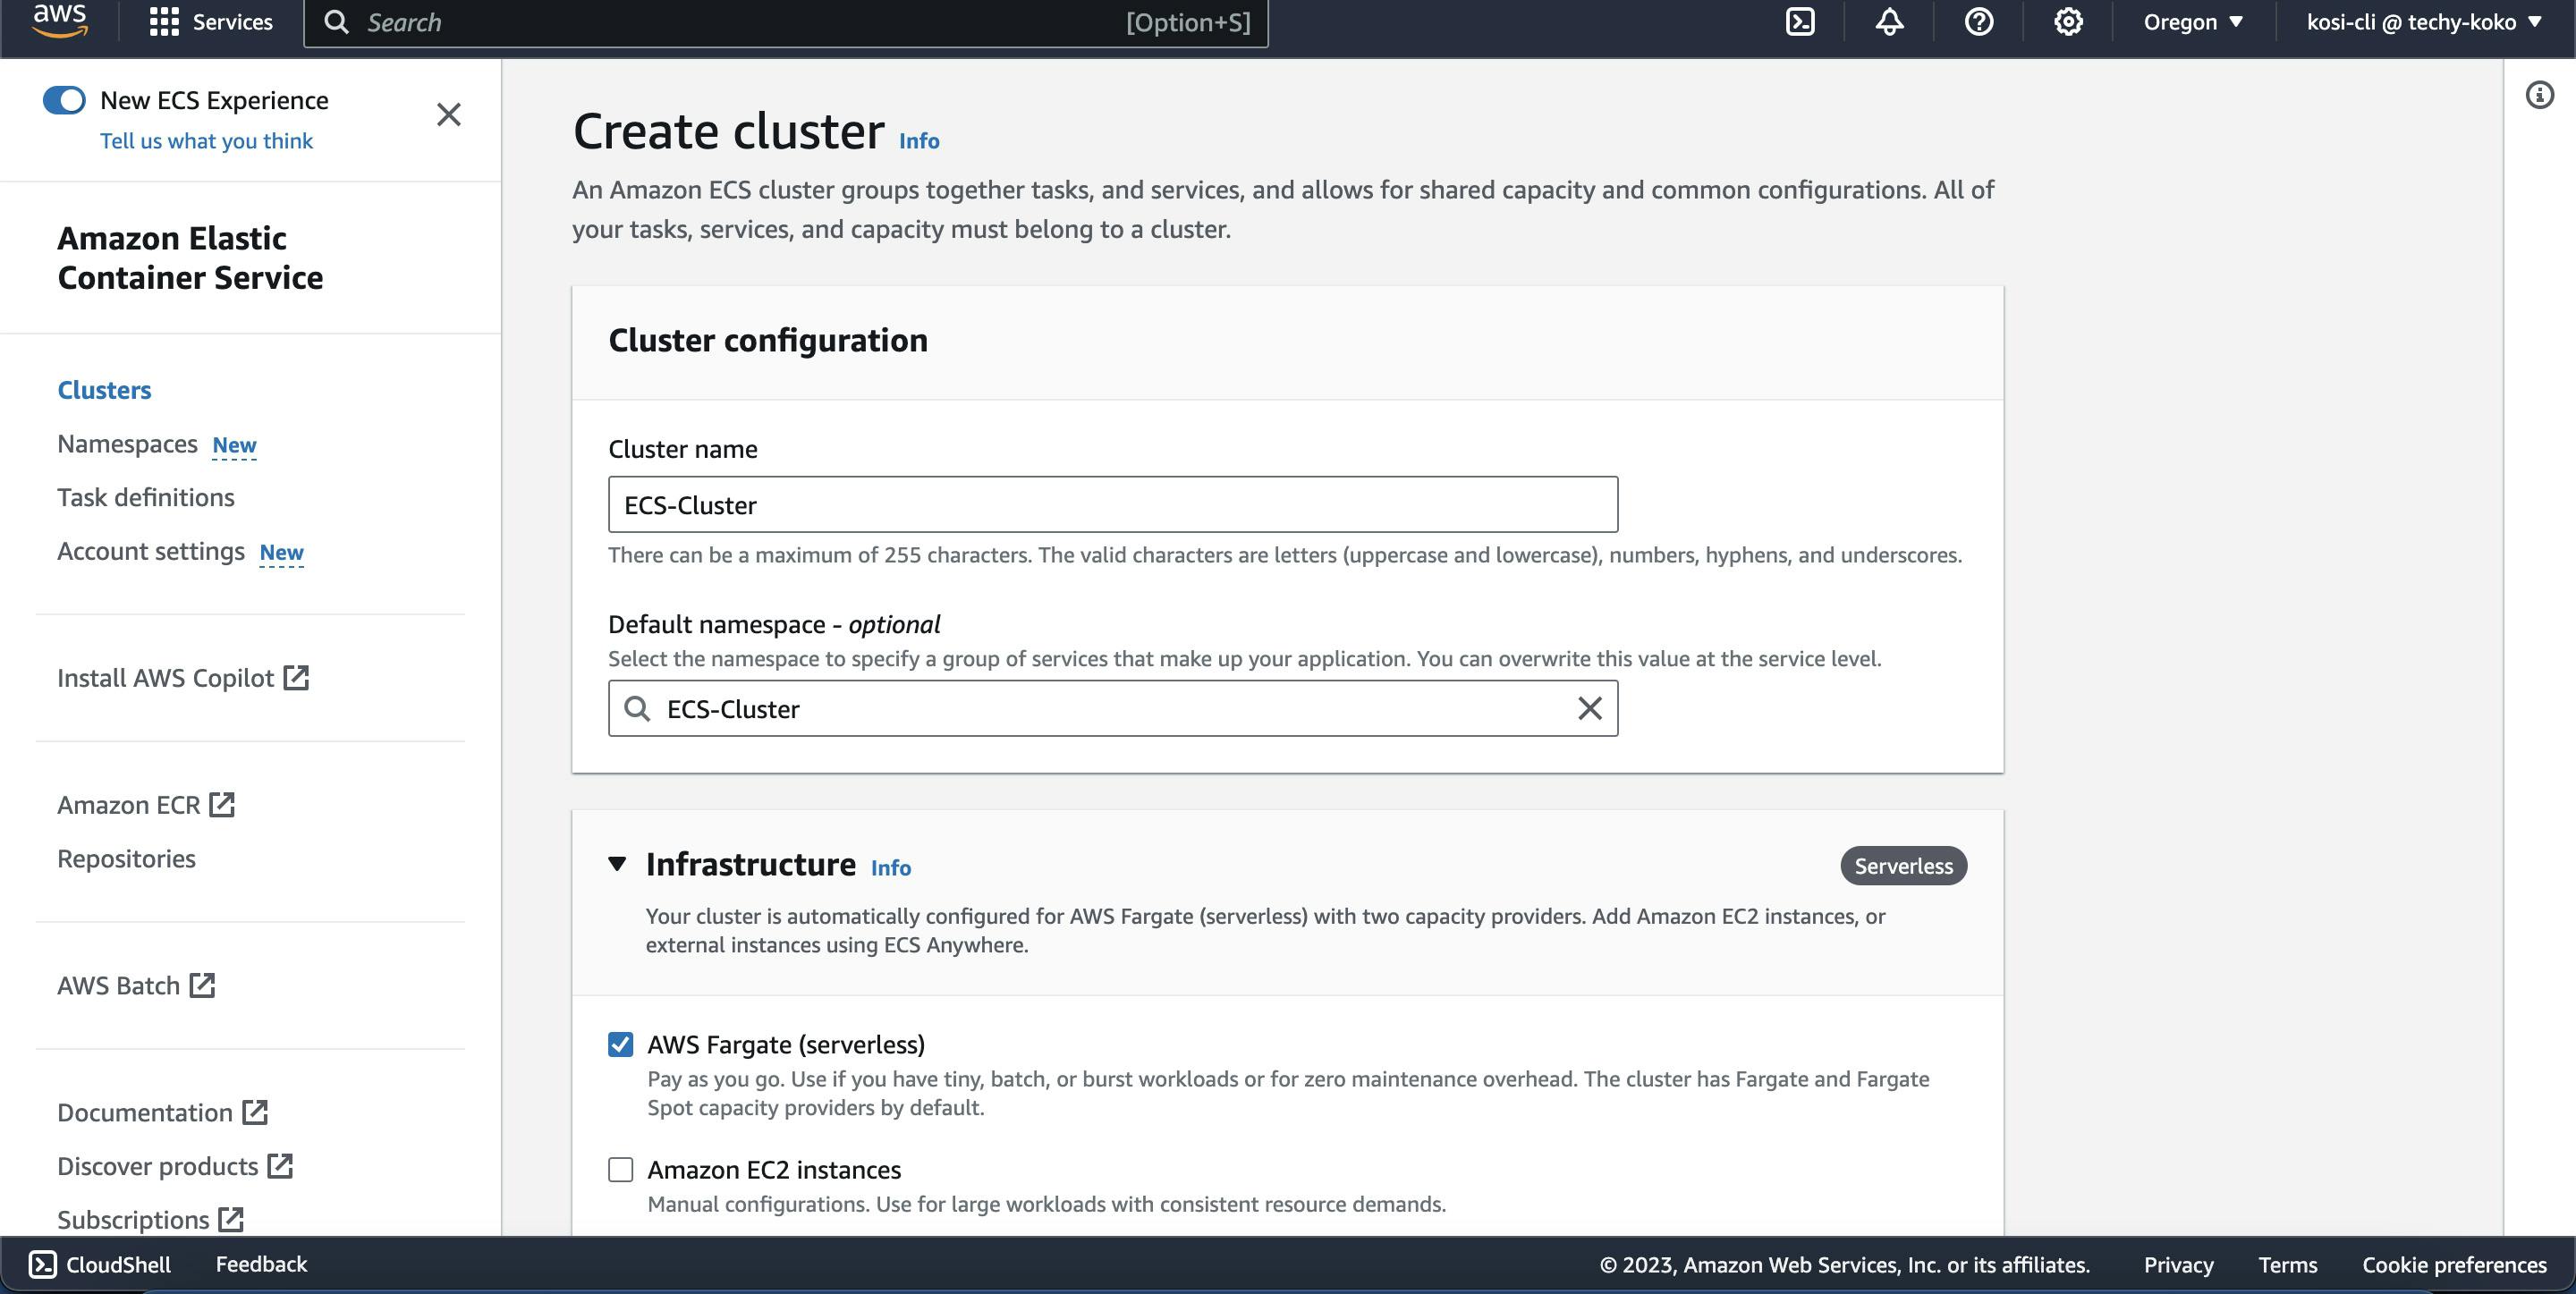
** Go to the ECS service console and click on Create a cluster, we will be using Fargate as our launch type. Make sure your ECS cluster is created in the same region as your VPC and security groups.
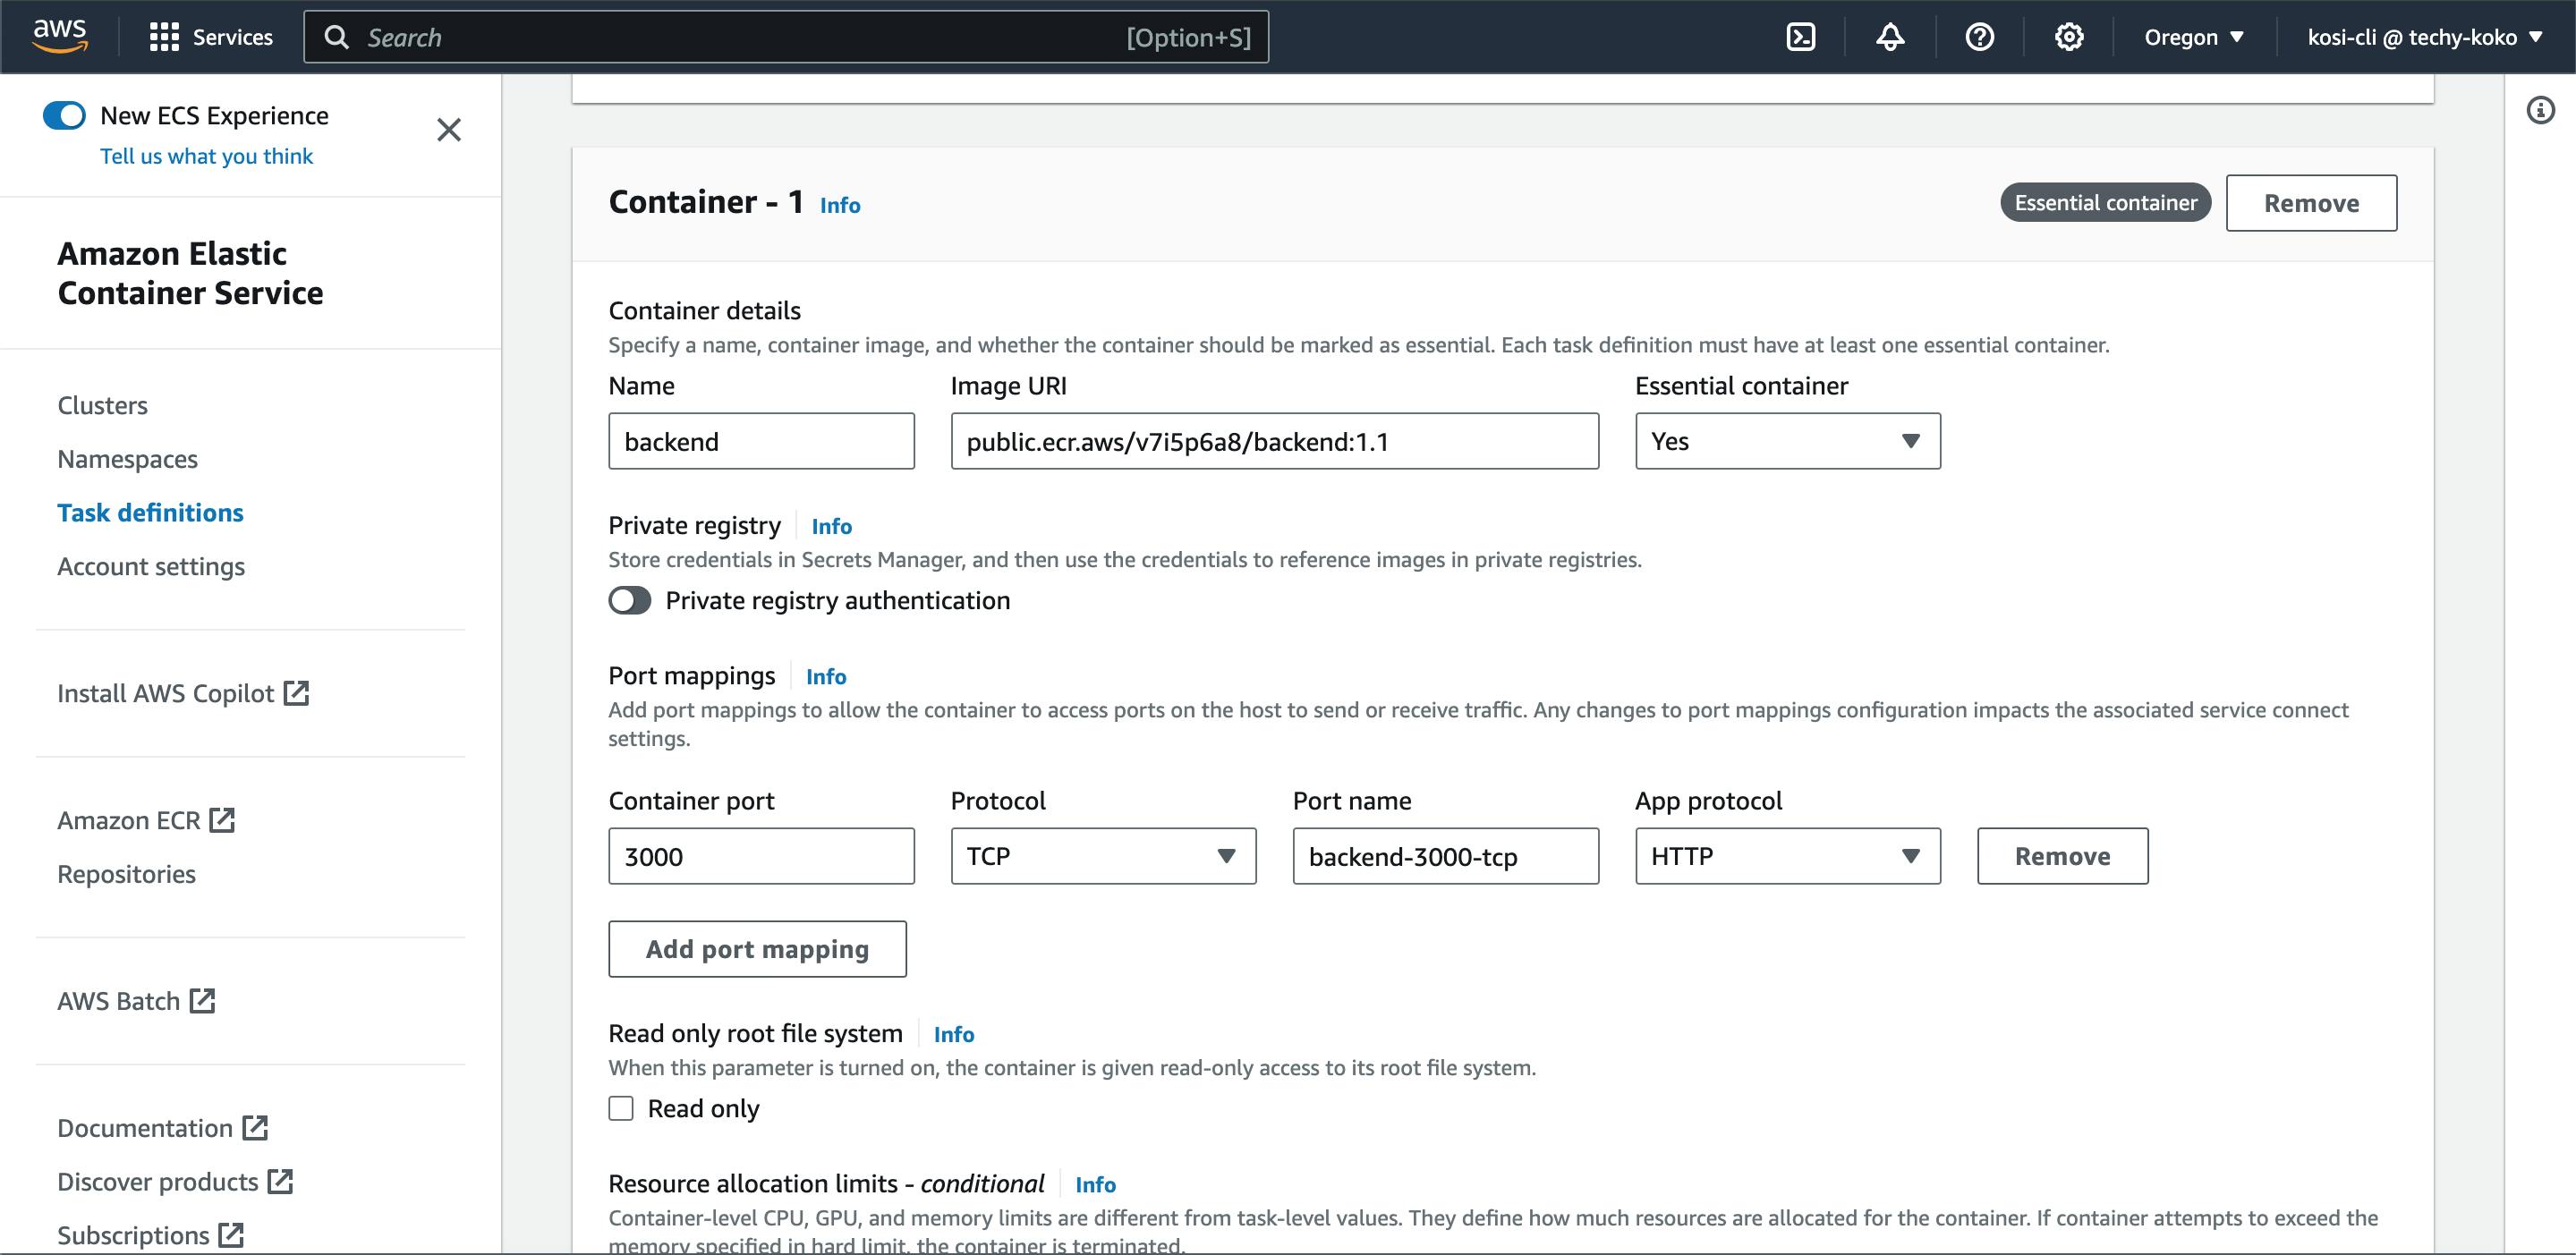
** Create a task definition for containers within the Cluster.
This task definition is similar to your docker-compose file because it tells ECS how to create the containers. Each container is associated with an image, which is used to start your container and can be mapped to ports and volumes.'
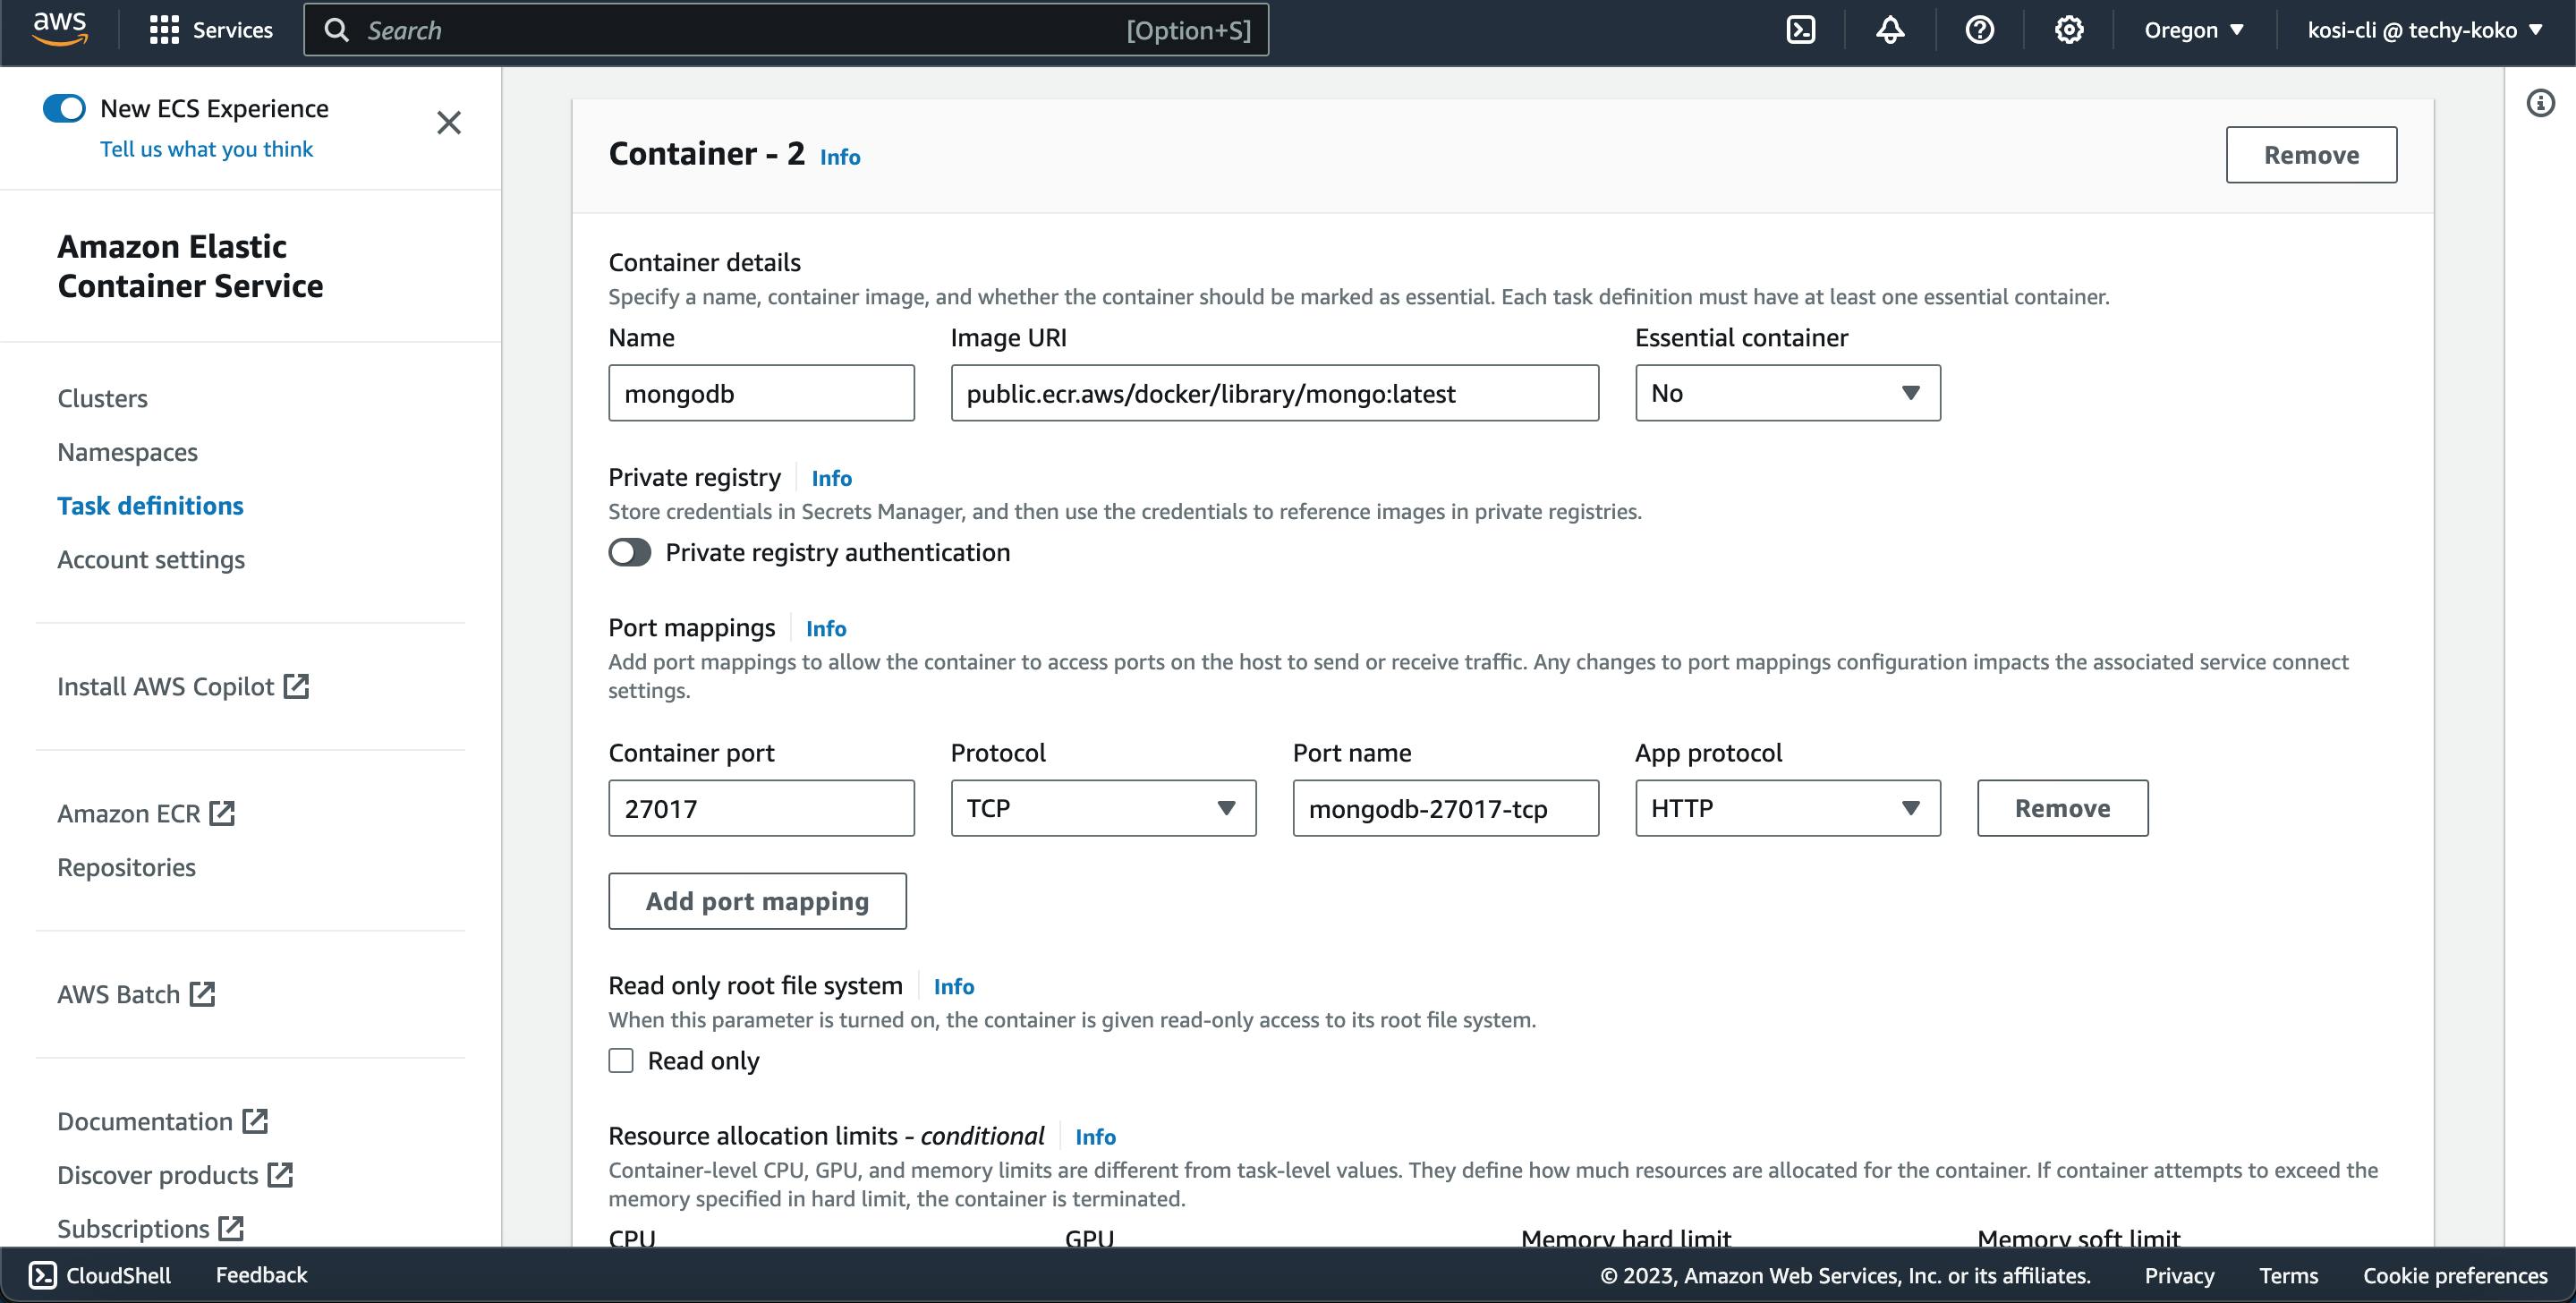
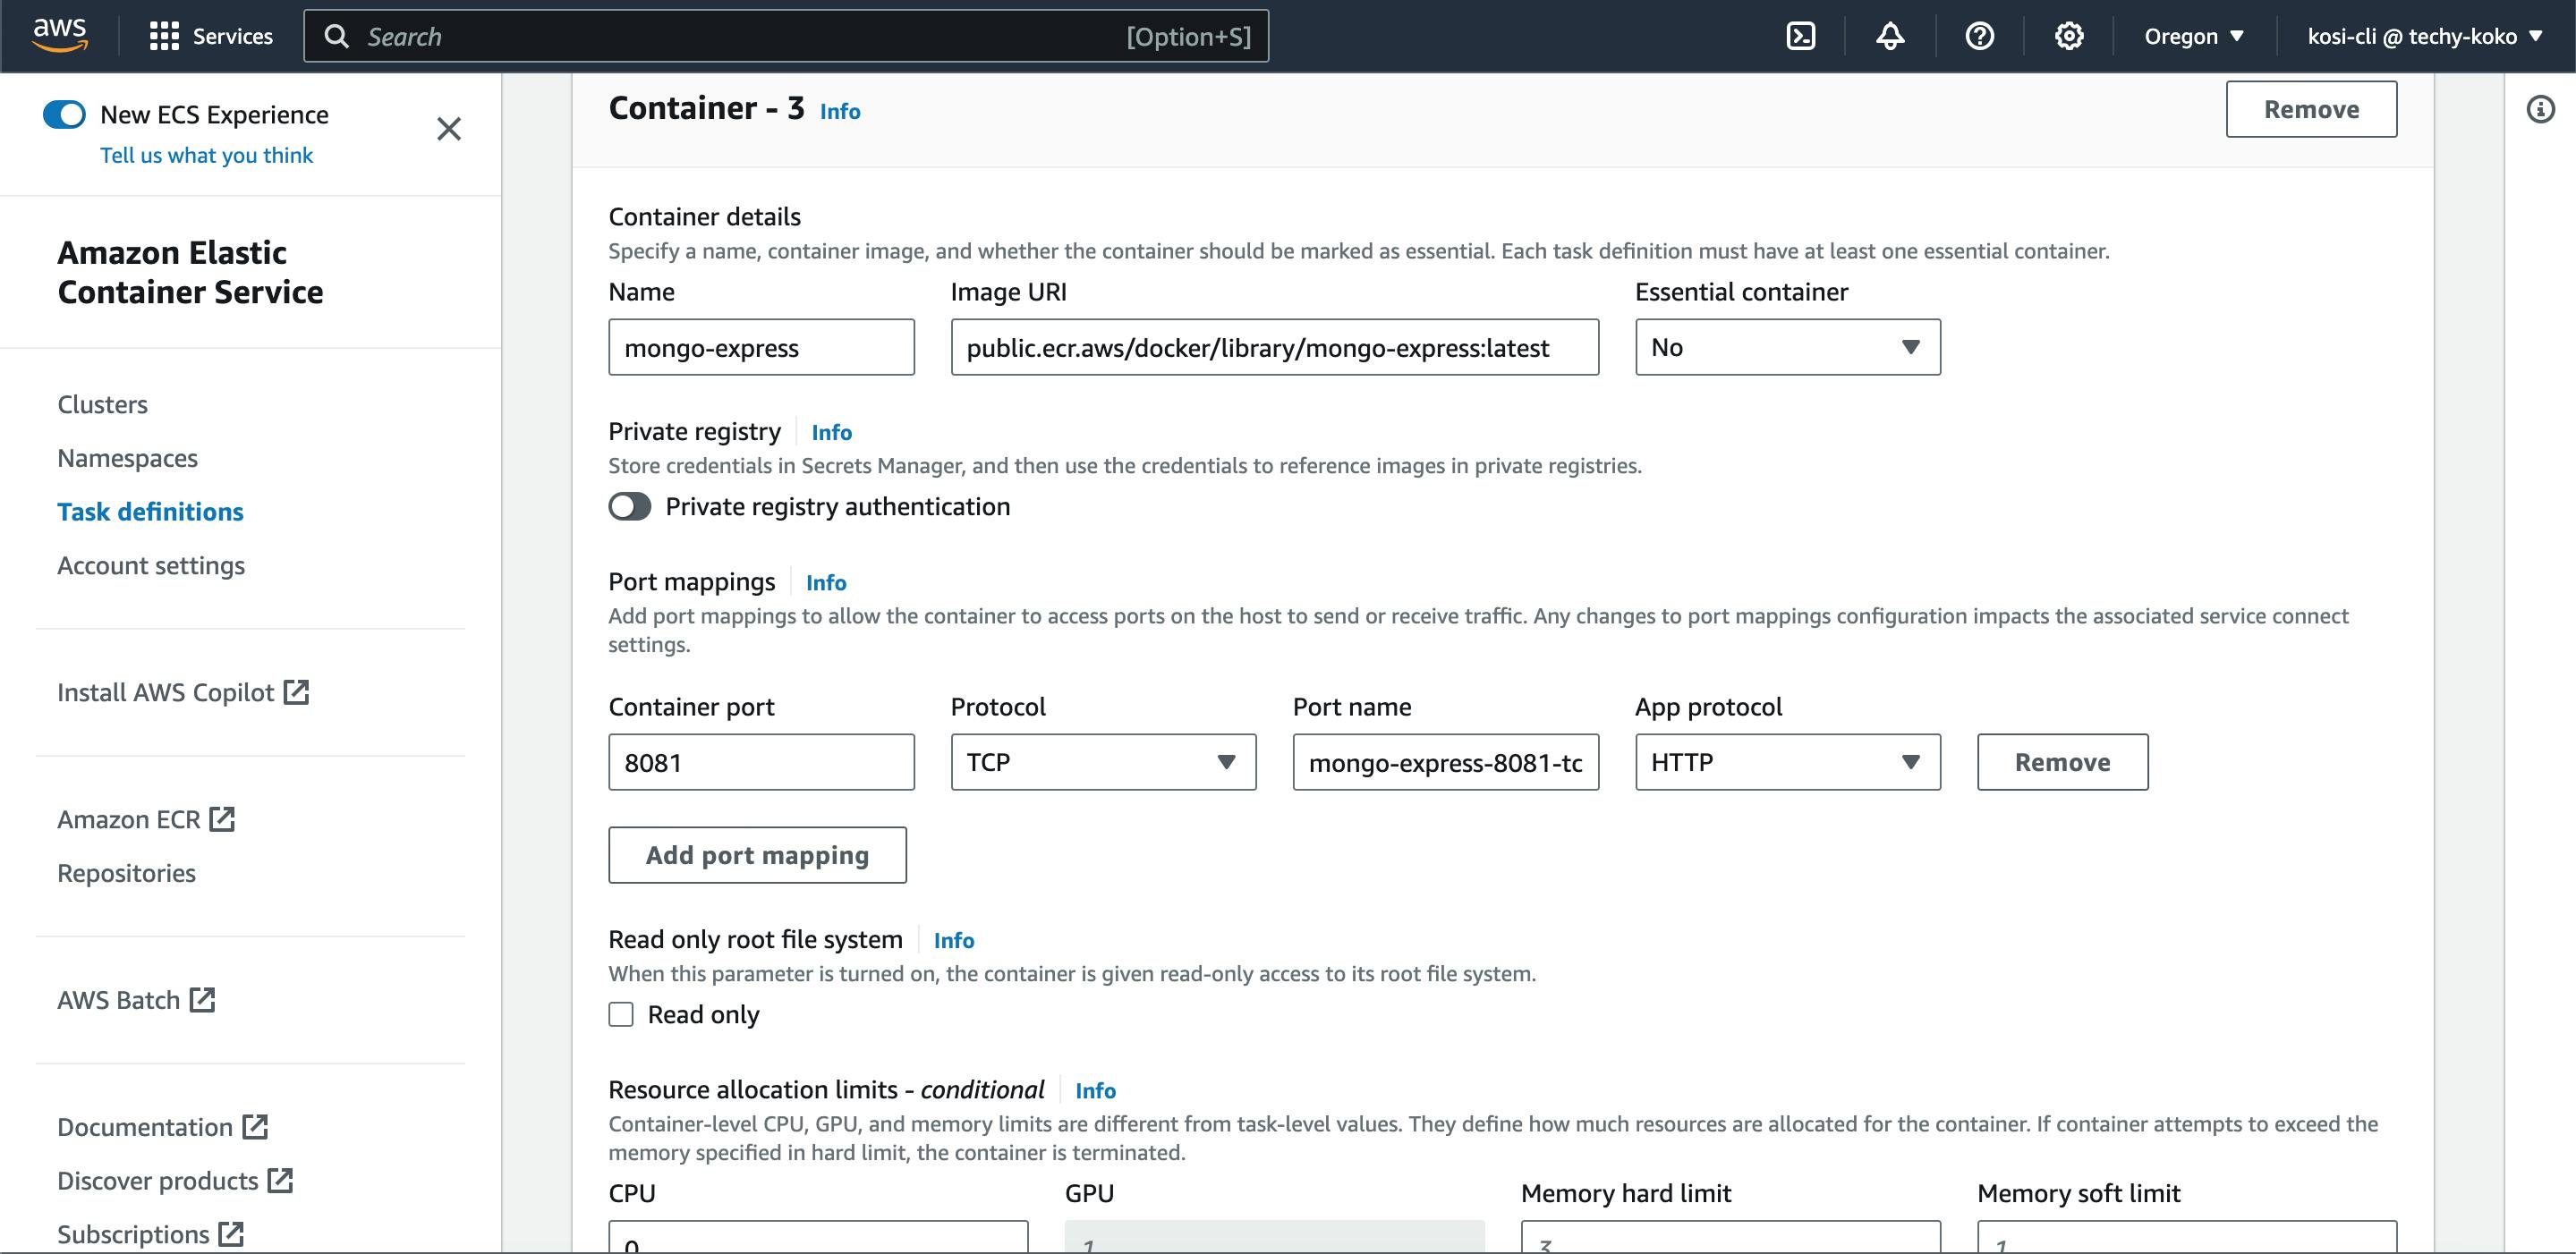
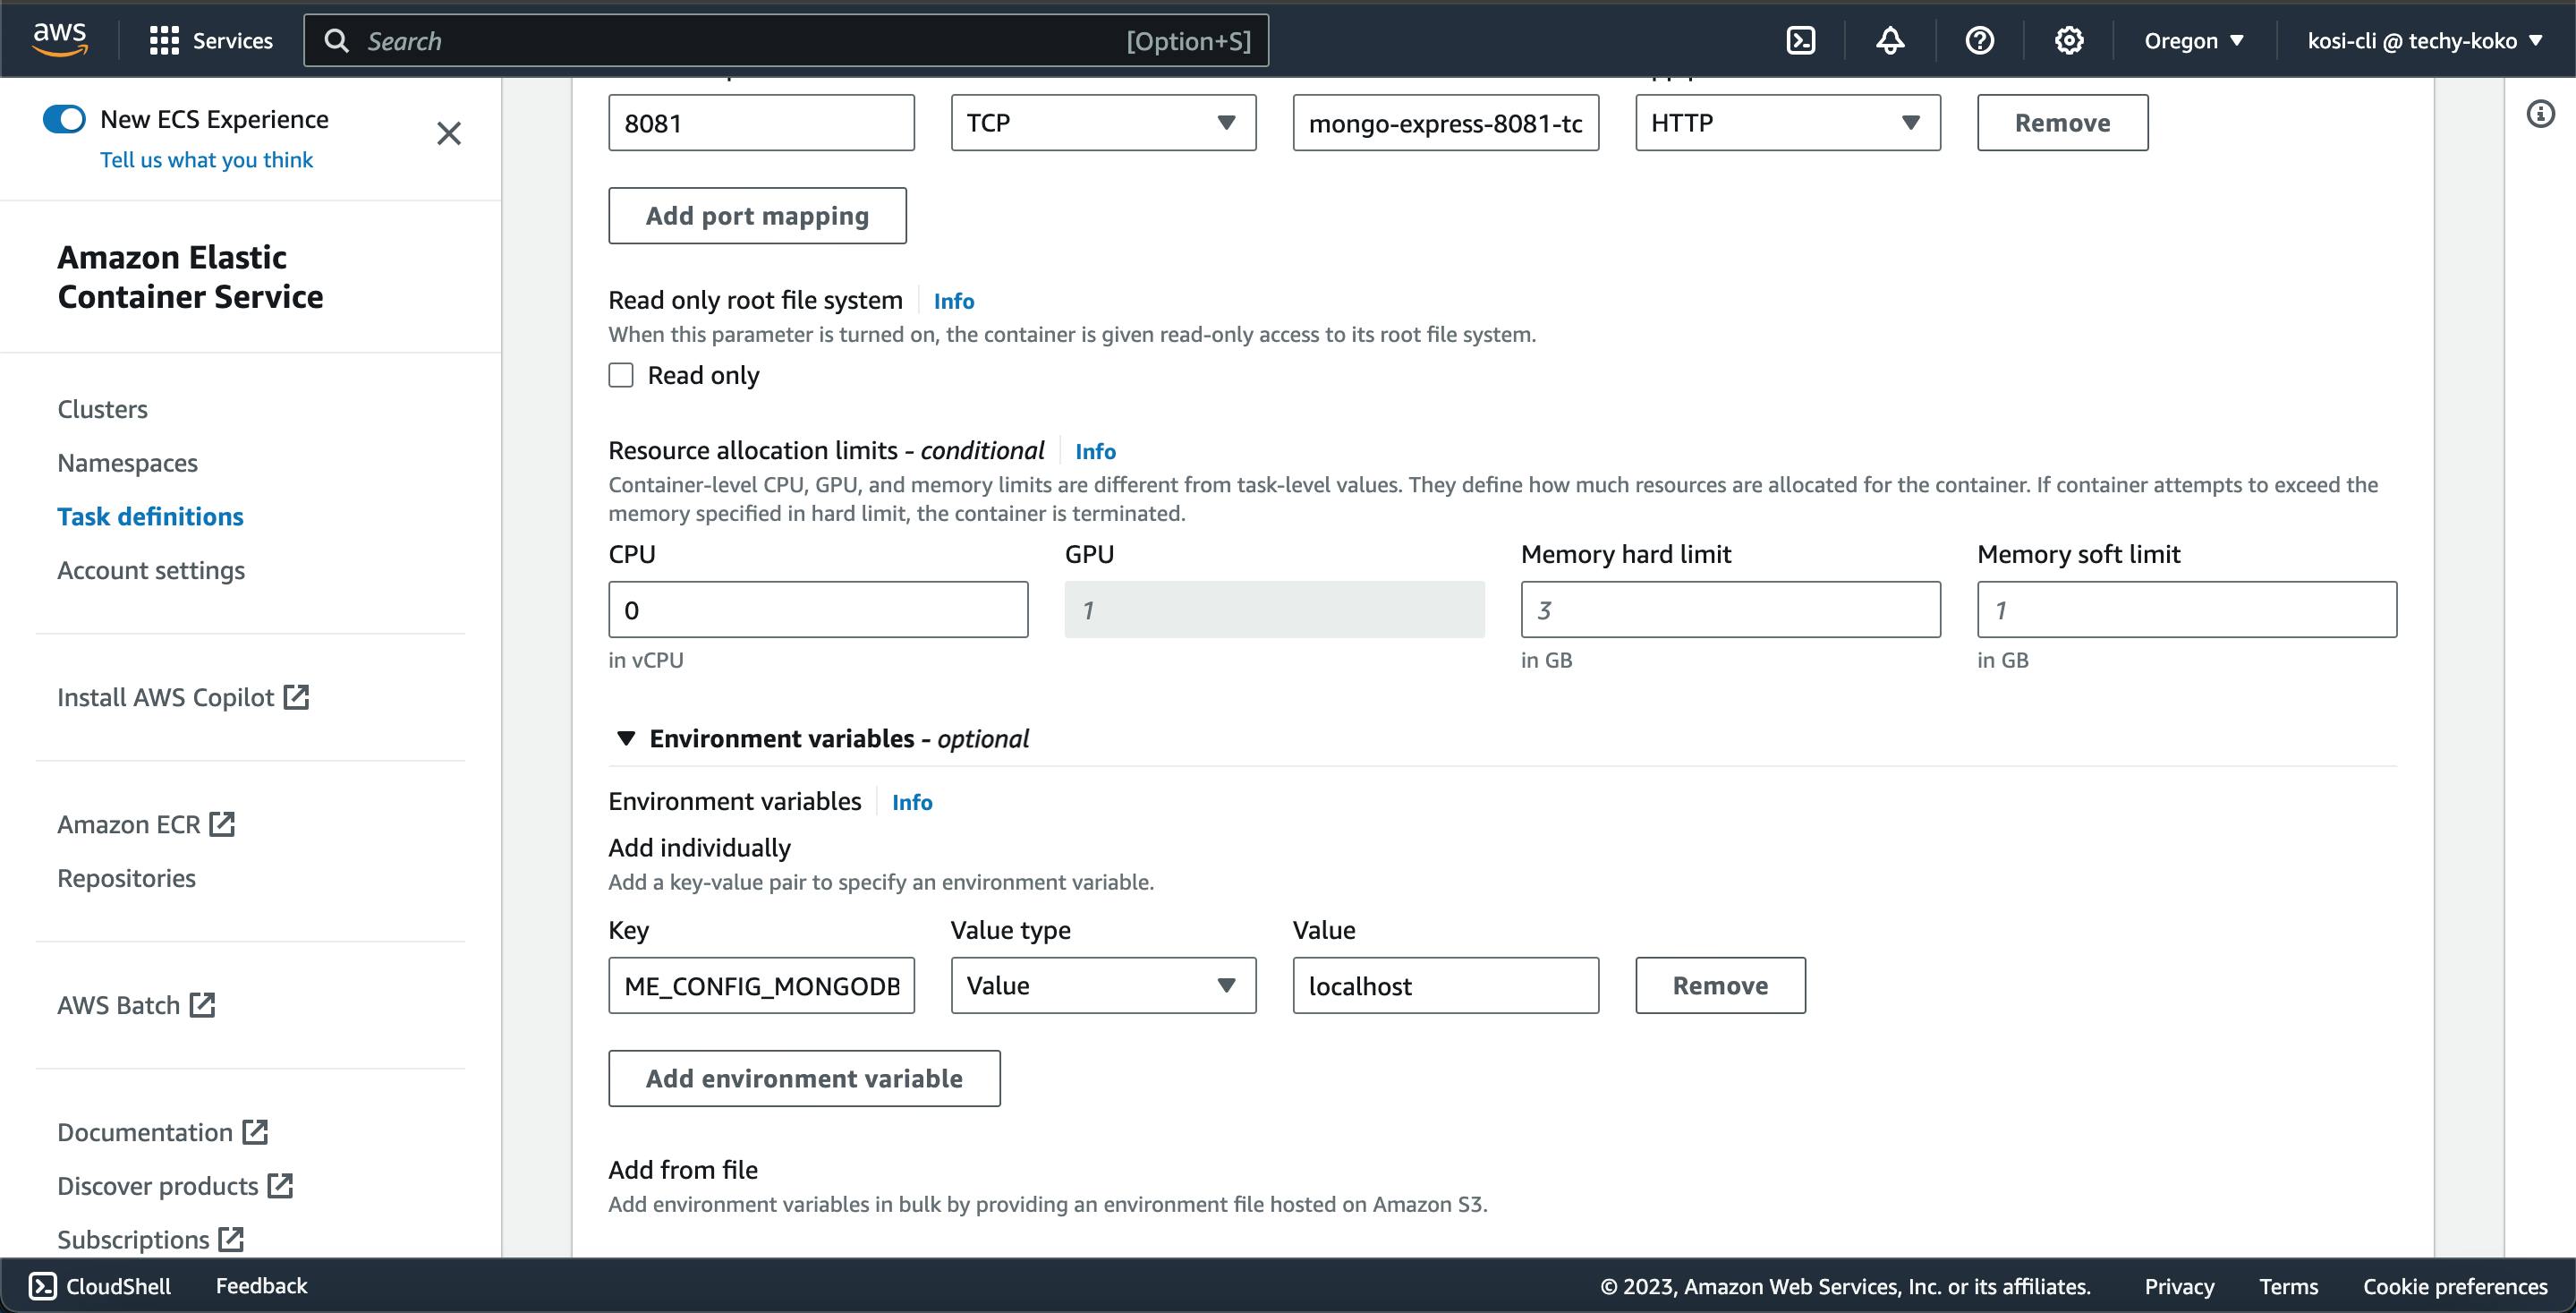
My created task definitions will be for my backend, MongoDB, and Mongo-express container(MongoDB and Mongo-express were pulled from Amazon ECR Public Gallery). also enable log collection for each of the containers for debugging purposes.
Notice that the backend is using an environment variable which is for the MongoDB, to allow the flow of communication between the backend and the database. and the Mongo-express uses an environment variable that references the MongoDB configuration.
** Add the environment variable MONGODB_ADMINUSERNAME, MONGODB_ADMINPASSWORD, MONGODB_URL

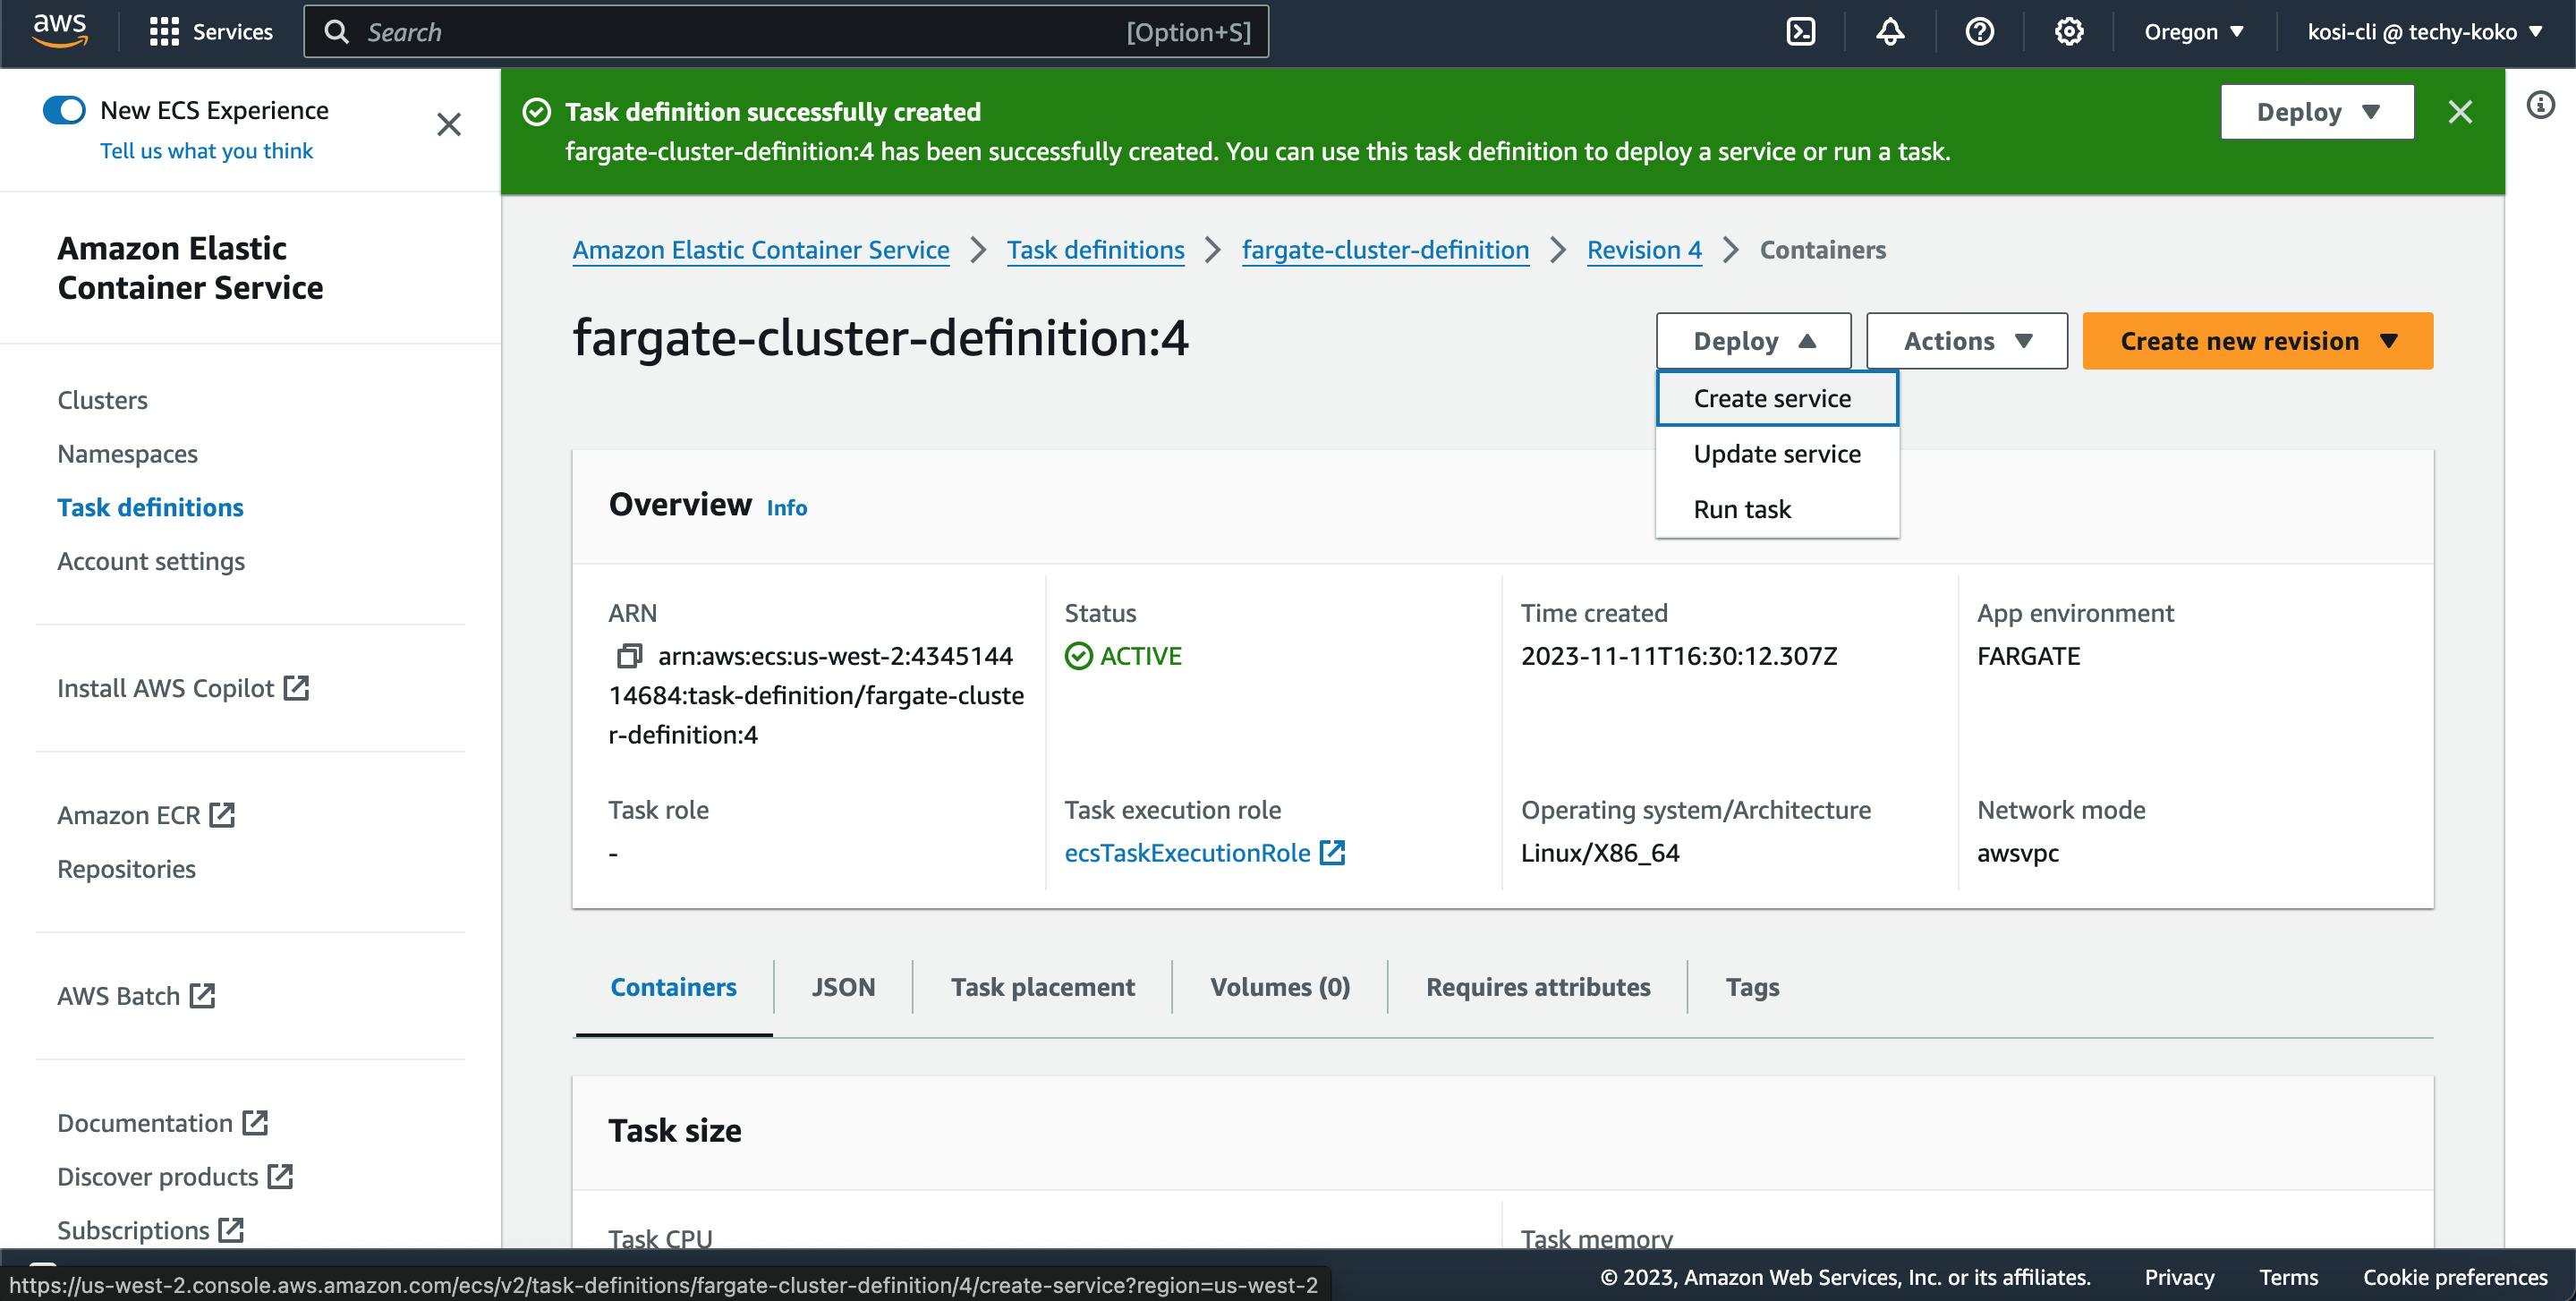
** Deploy the created Task definition and click on Create service. An Amazon ECS service runs and maintains your desired number of tasks simultaneously in an Amazon ECS cluster.
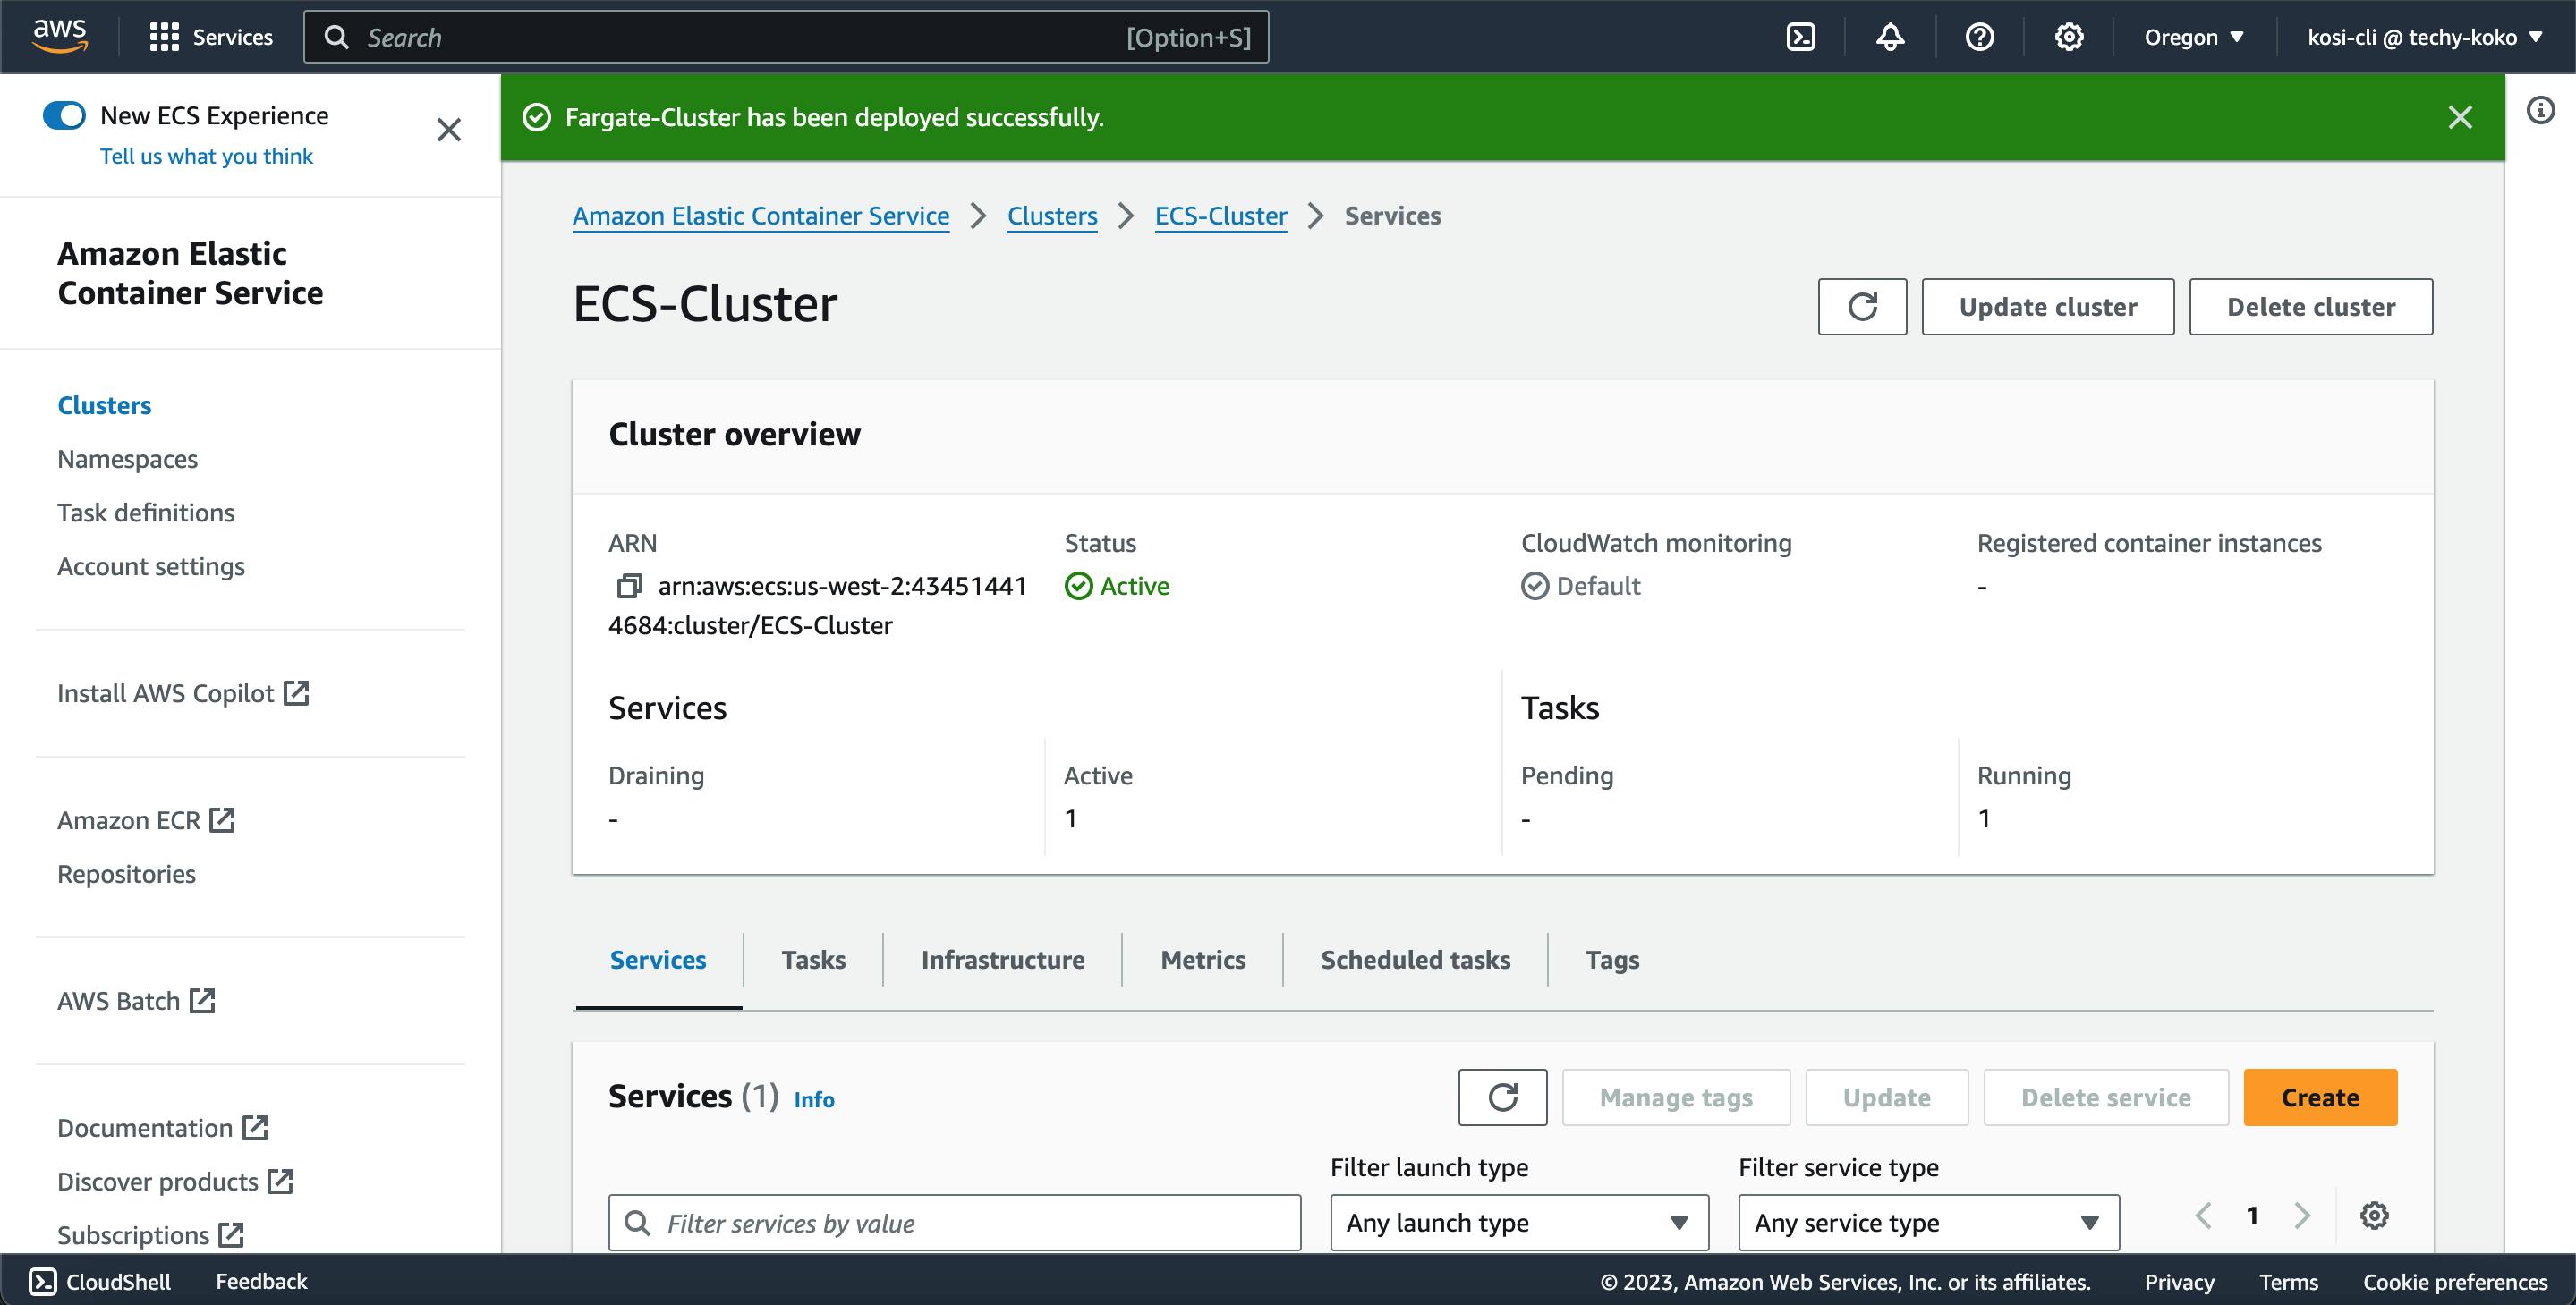
** Now the service has been successfully created and added to your cluster.

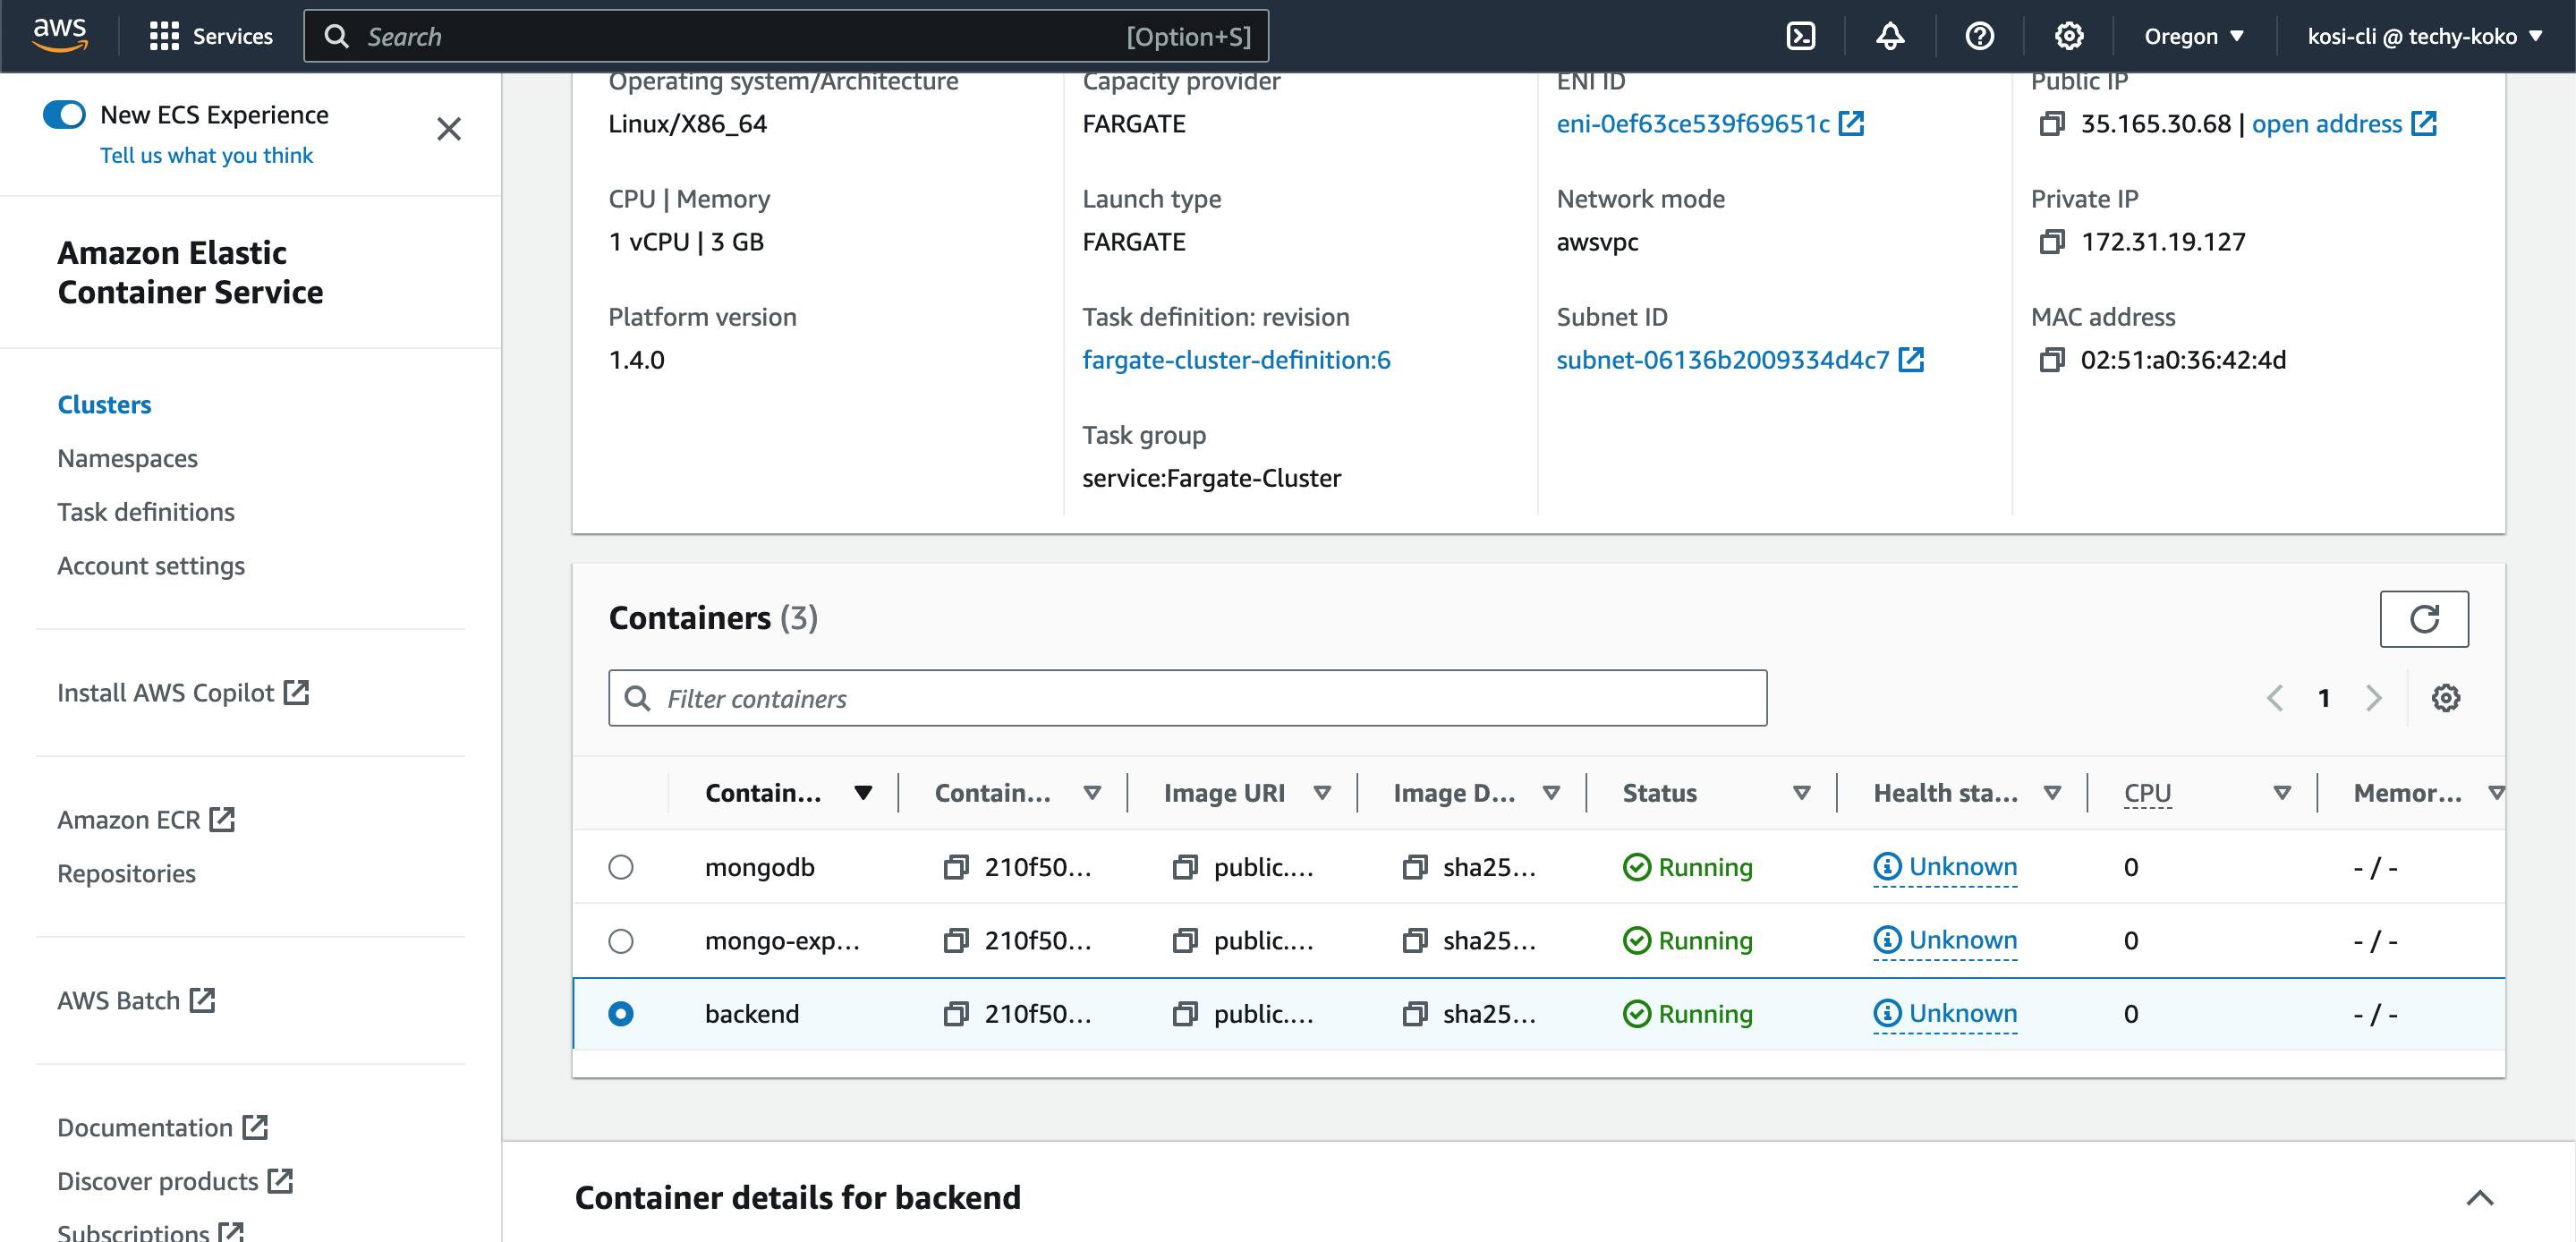
** Click on the Tasks tab menu and then you can view your running containers, also you can view your application using the public address provided.
Congratulations on getting this far....🥰 we containerized our backend code, pushed to Amazon Container registry and deployed on ECS.
Now we will dive into the client side of our application. The client and server side of our application can communicate with each other using the public address provided by ECS.
Deploy the Frontend Code on Amazon Simple Storage Service (S3)
Amazon S3 allows the storing and retrieval of any amount of data at any time, from anywhere. it is also used to deploy and host static files.
We will be creating an S3 bucket and then deploying our static files on S3 using the AWS Command Line Interface(CLI). For this, you need to have the AWS CLI installed in your terminal.
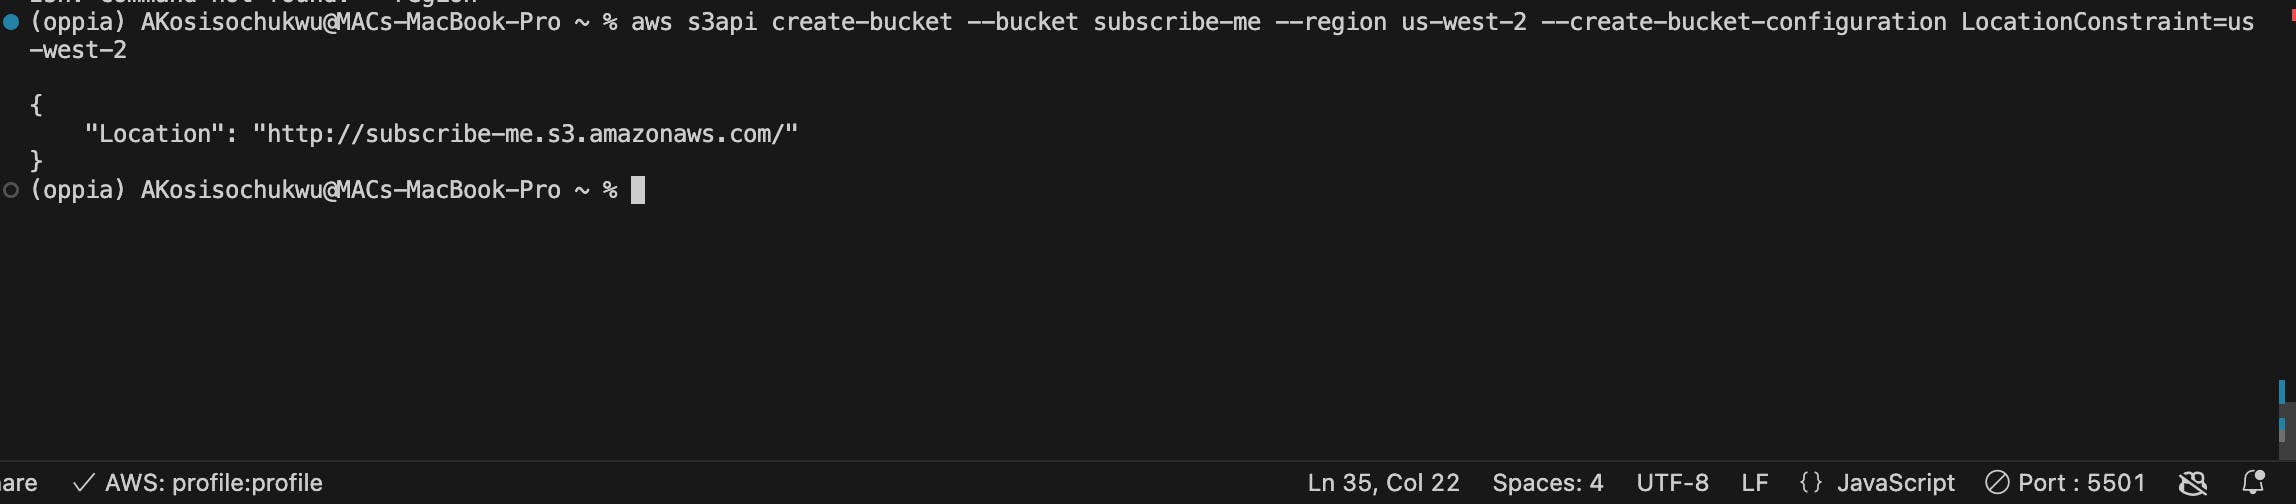
** Create an S3 Bucket
Replace YOUR_UNIQUE_BUCKET_NAME with a globally unique name for your bucket and YOUR_REGION with your preferred region
aws s3api create-bucket --bucket YOUR_UNIQUE_BUCKET_NAME --region YOUR_REGION --create-bucket-configuration LocationConstraint=YOUR_REGION
** Configure the S3 Bucket for Website Hosting
aws s3 website s3://YOUR_UNIQUE_BUCKET_NAME/ --index-document index.html --error-document error.html
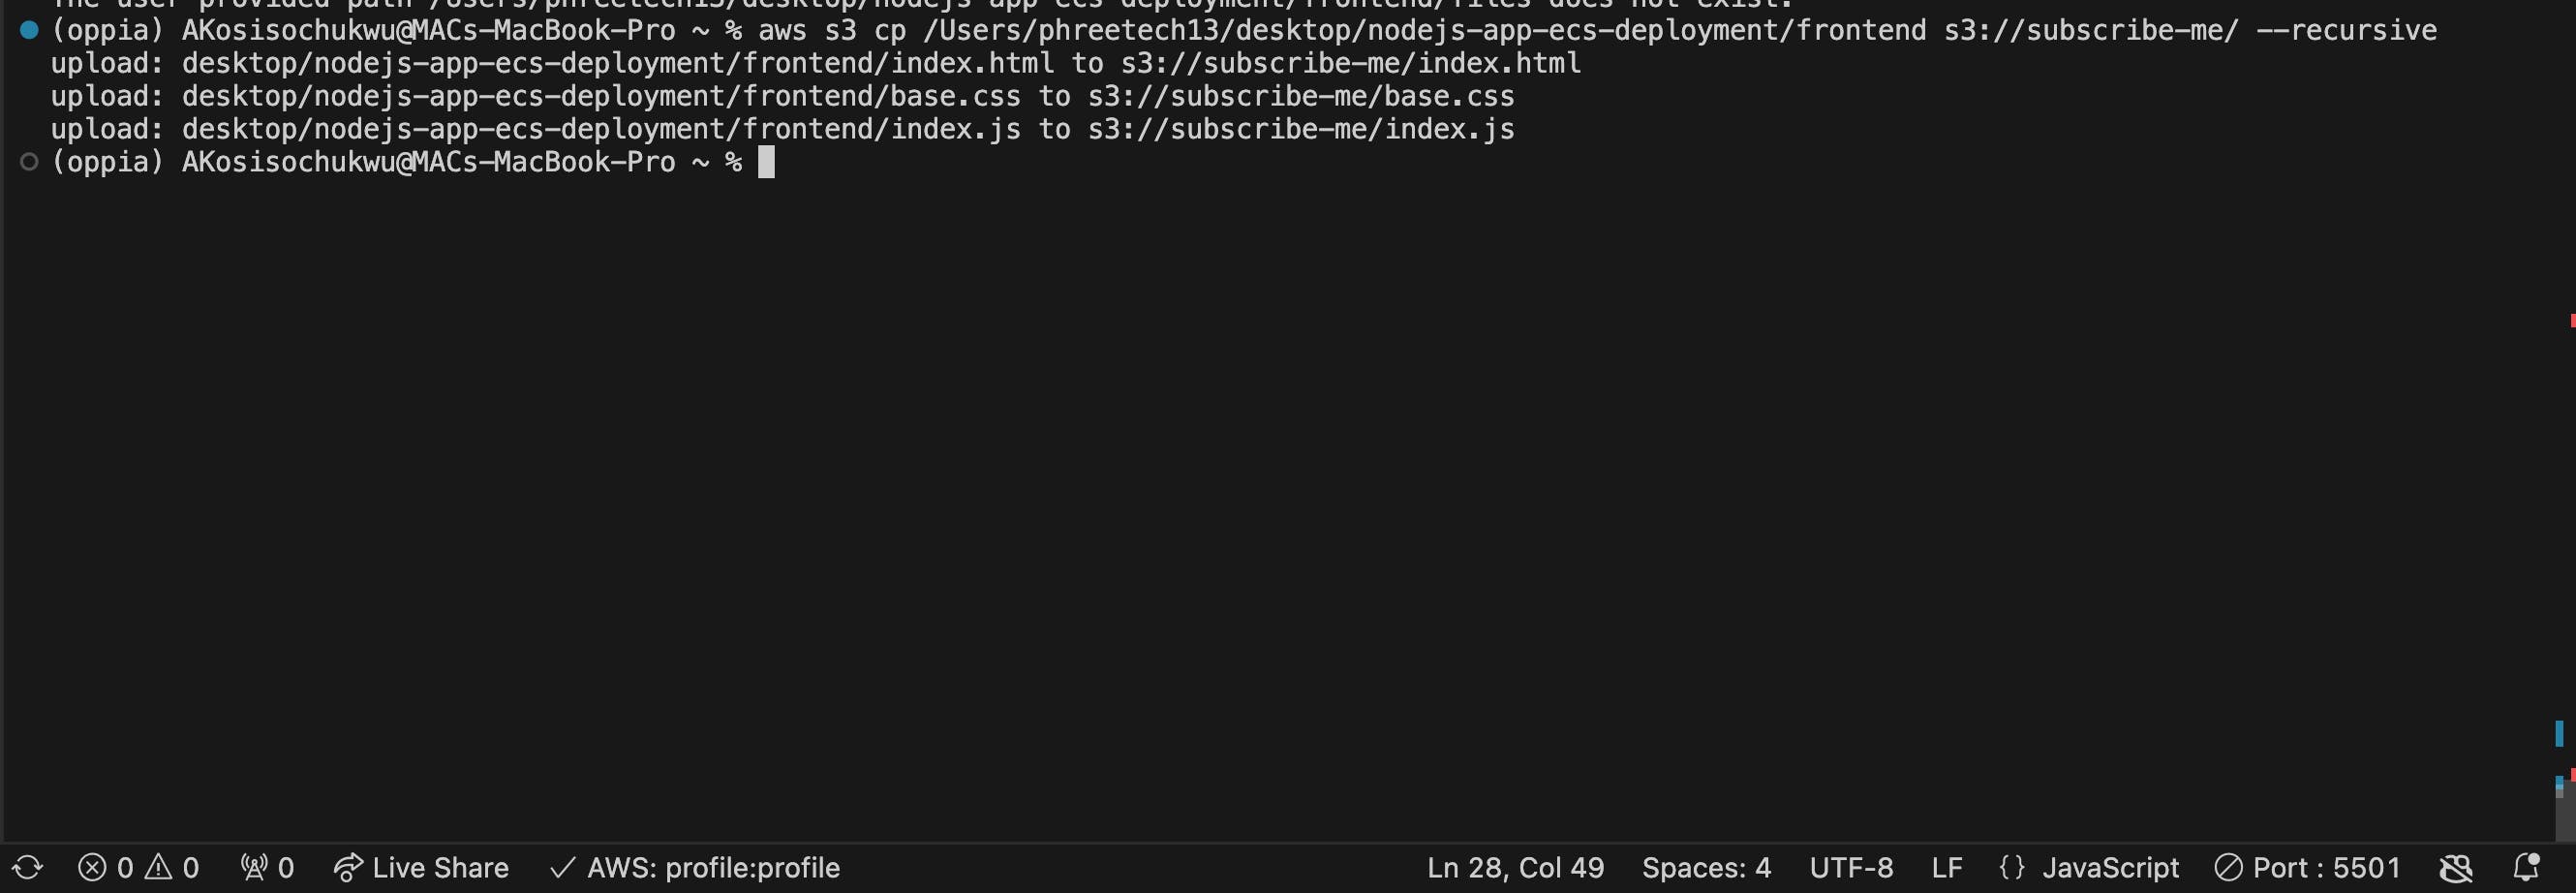
** Upload Your Frontend Files
Replace /path/to/your/frontend/files with the actual path to your frontend files and YOUR_UNIQUE_BUCKET_NAME with your bucket name.
You can run pwd command on your terminal to get the path to your specified folder
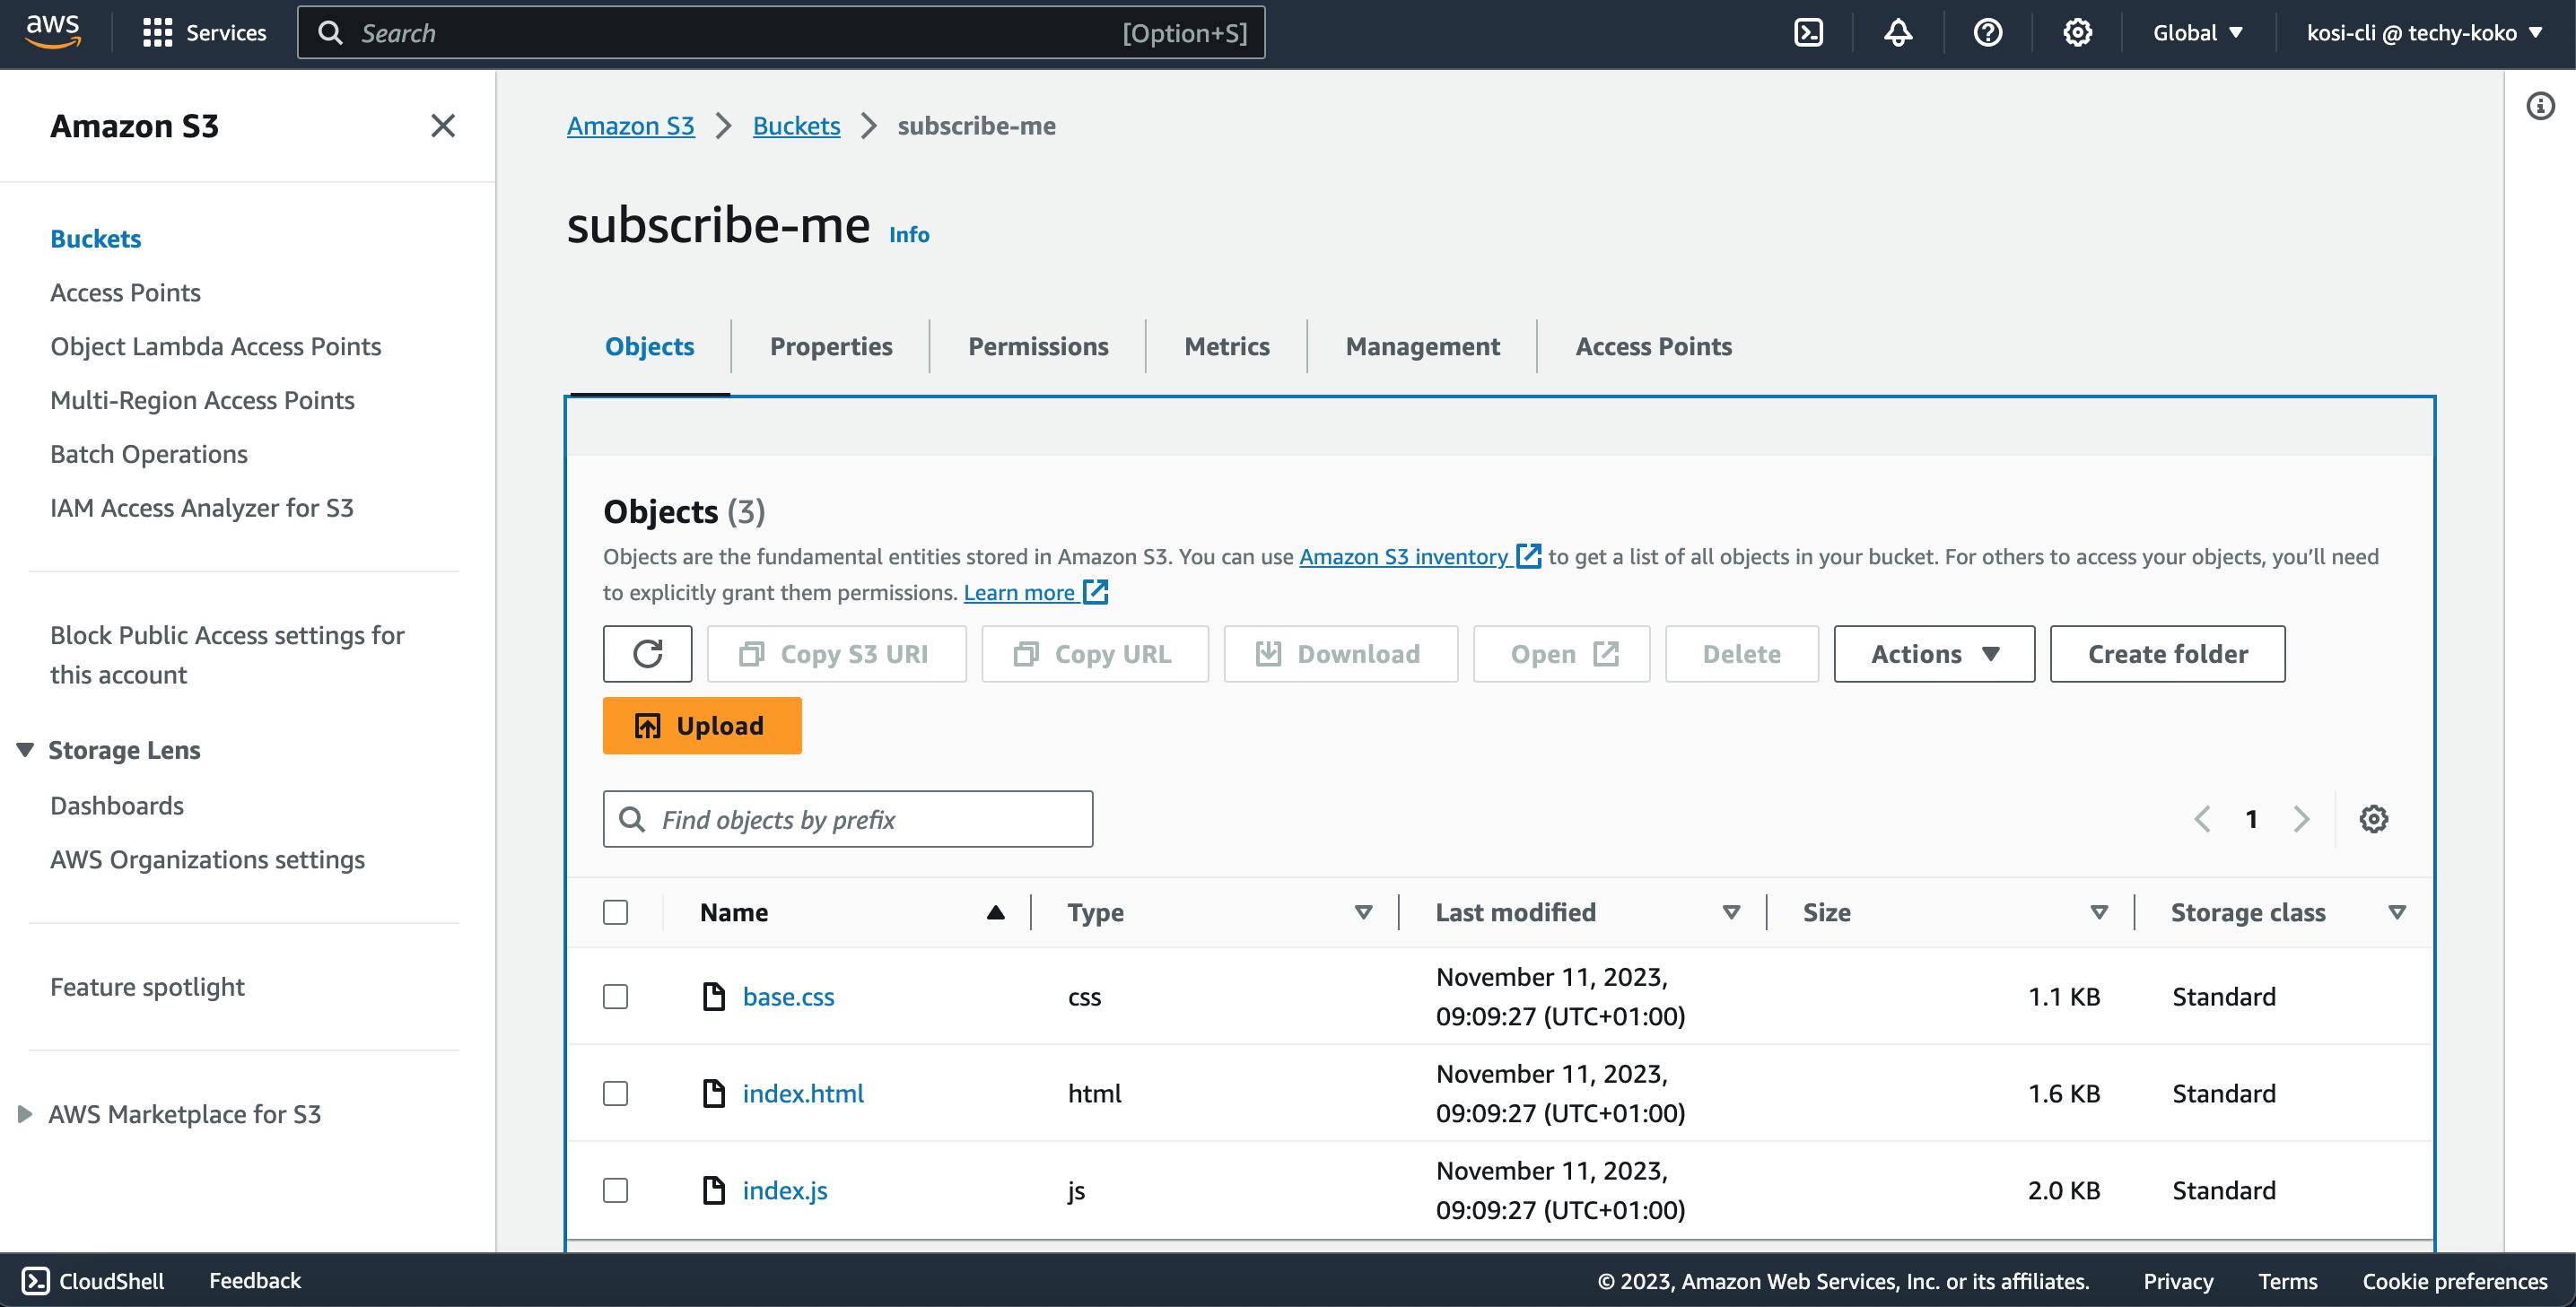
On successful completion, you should see those files uploaded to your S3 bucket.
aws s3 cp /path/to/your/frontend/files s3://YOUR_UNIQUE_BUCKET_NAME/ --recursive
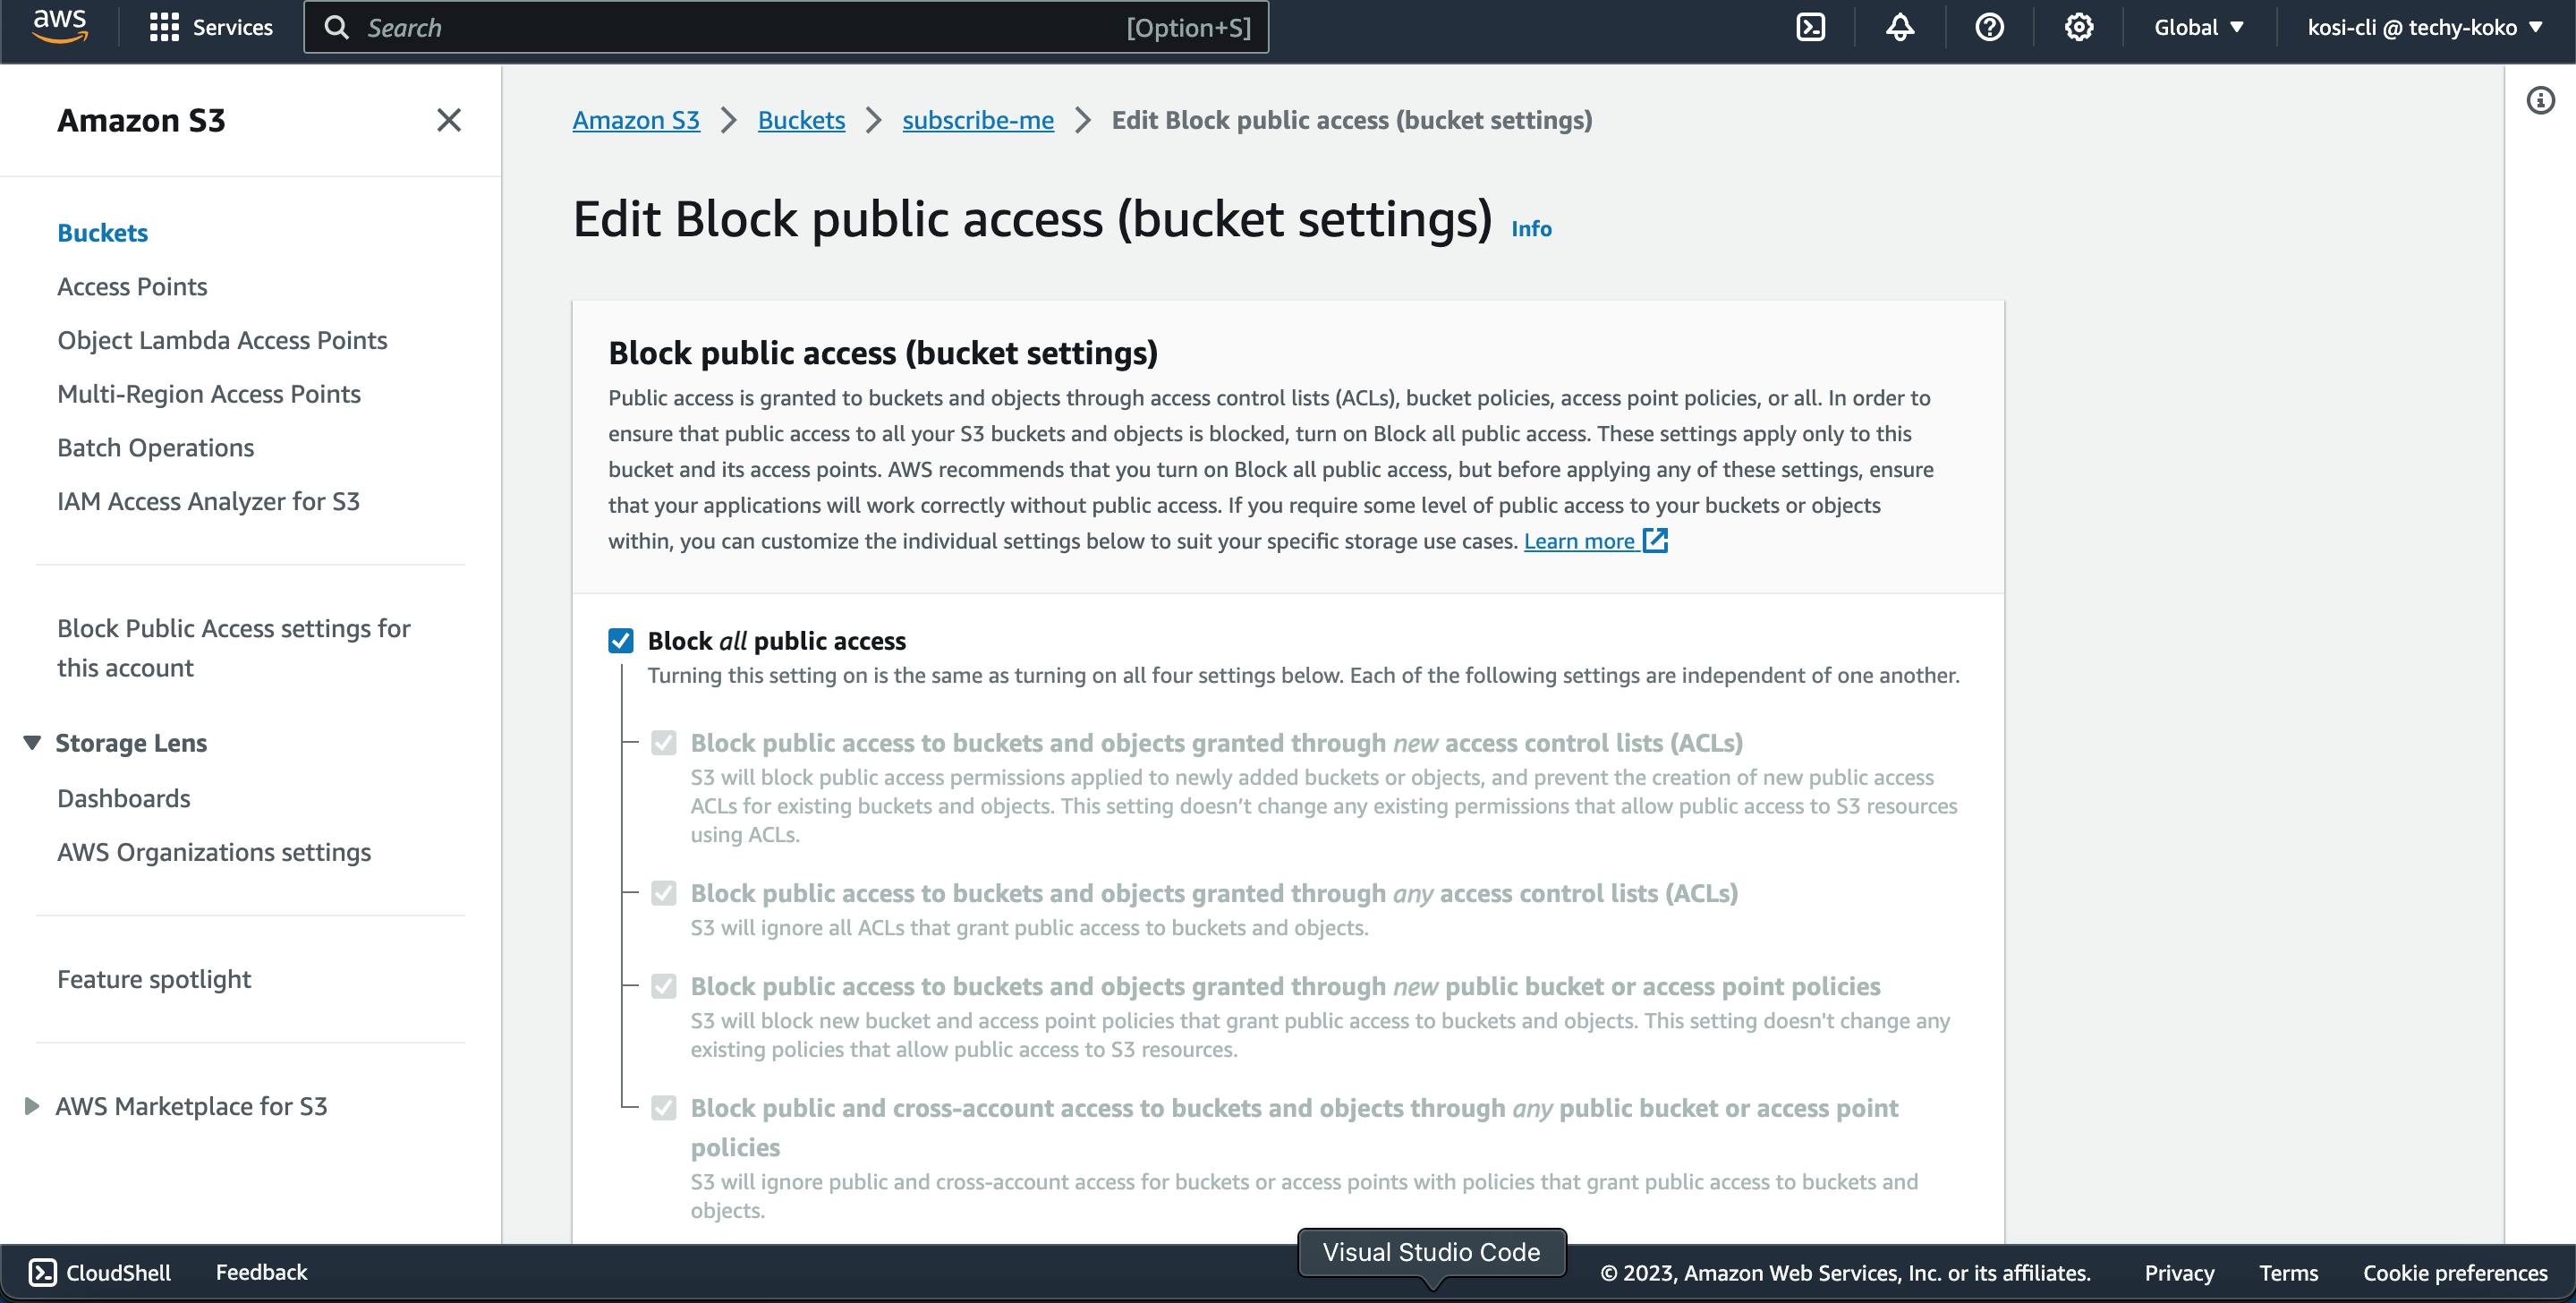
** Set Permissions for website access
By default your S3 bucket is blocked from being publicly accessed but since we want our users to view the application over the Internet, we will have to edit the permissions.
Uncheck the Block all public access box and save changes.
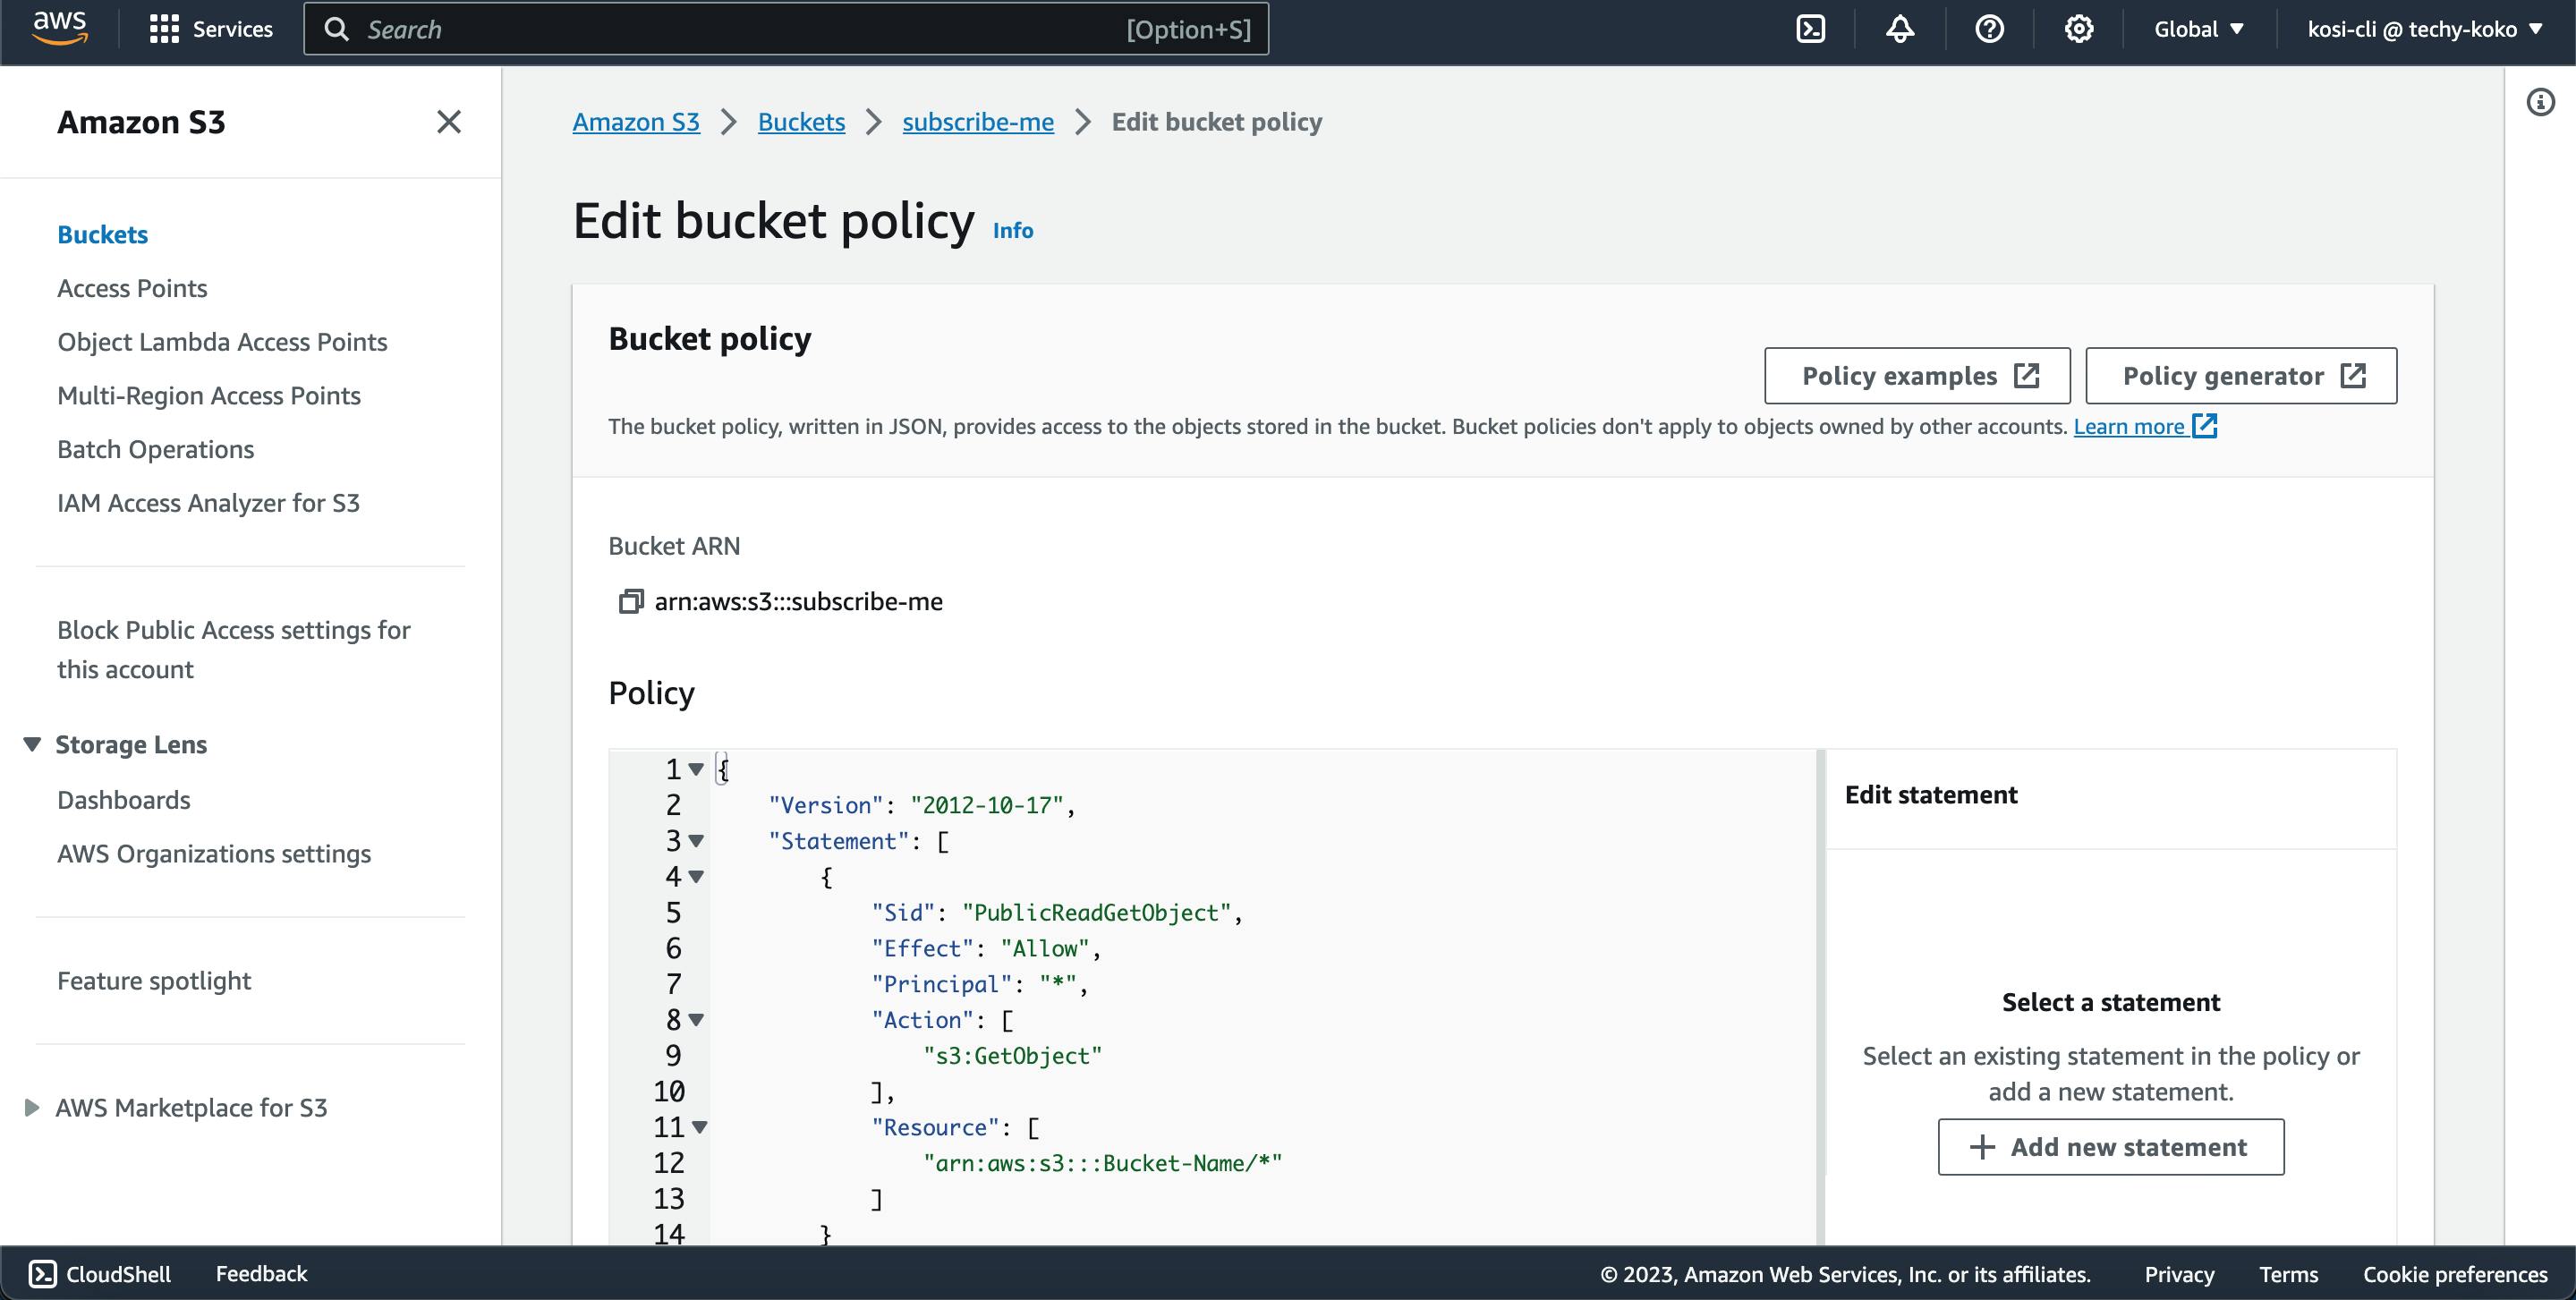
** Also edit Bucket policy to allow your static website publicly accessible with this JSON code.
{
    "Version": "2012-10-17",
    "Statement": [
        {
            "Sid": "PublicReadGetObject",
            "Effect": "Allow",
            "Principal": "*",
            "Action": [
                "s3:GetObject"
            ],
            "Resource": [
                "arn:aws:s3:::subscribe-me/*"
            ]
        }
    ]
}
If you don't want to disable block public access settings for your bucket but you still want your website to be public, you can create a Amazon CloudFront distribution to serve your static website.
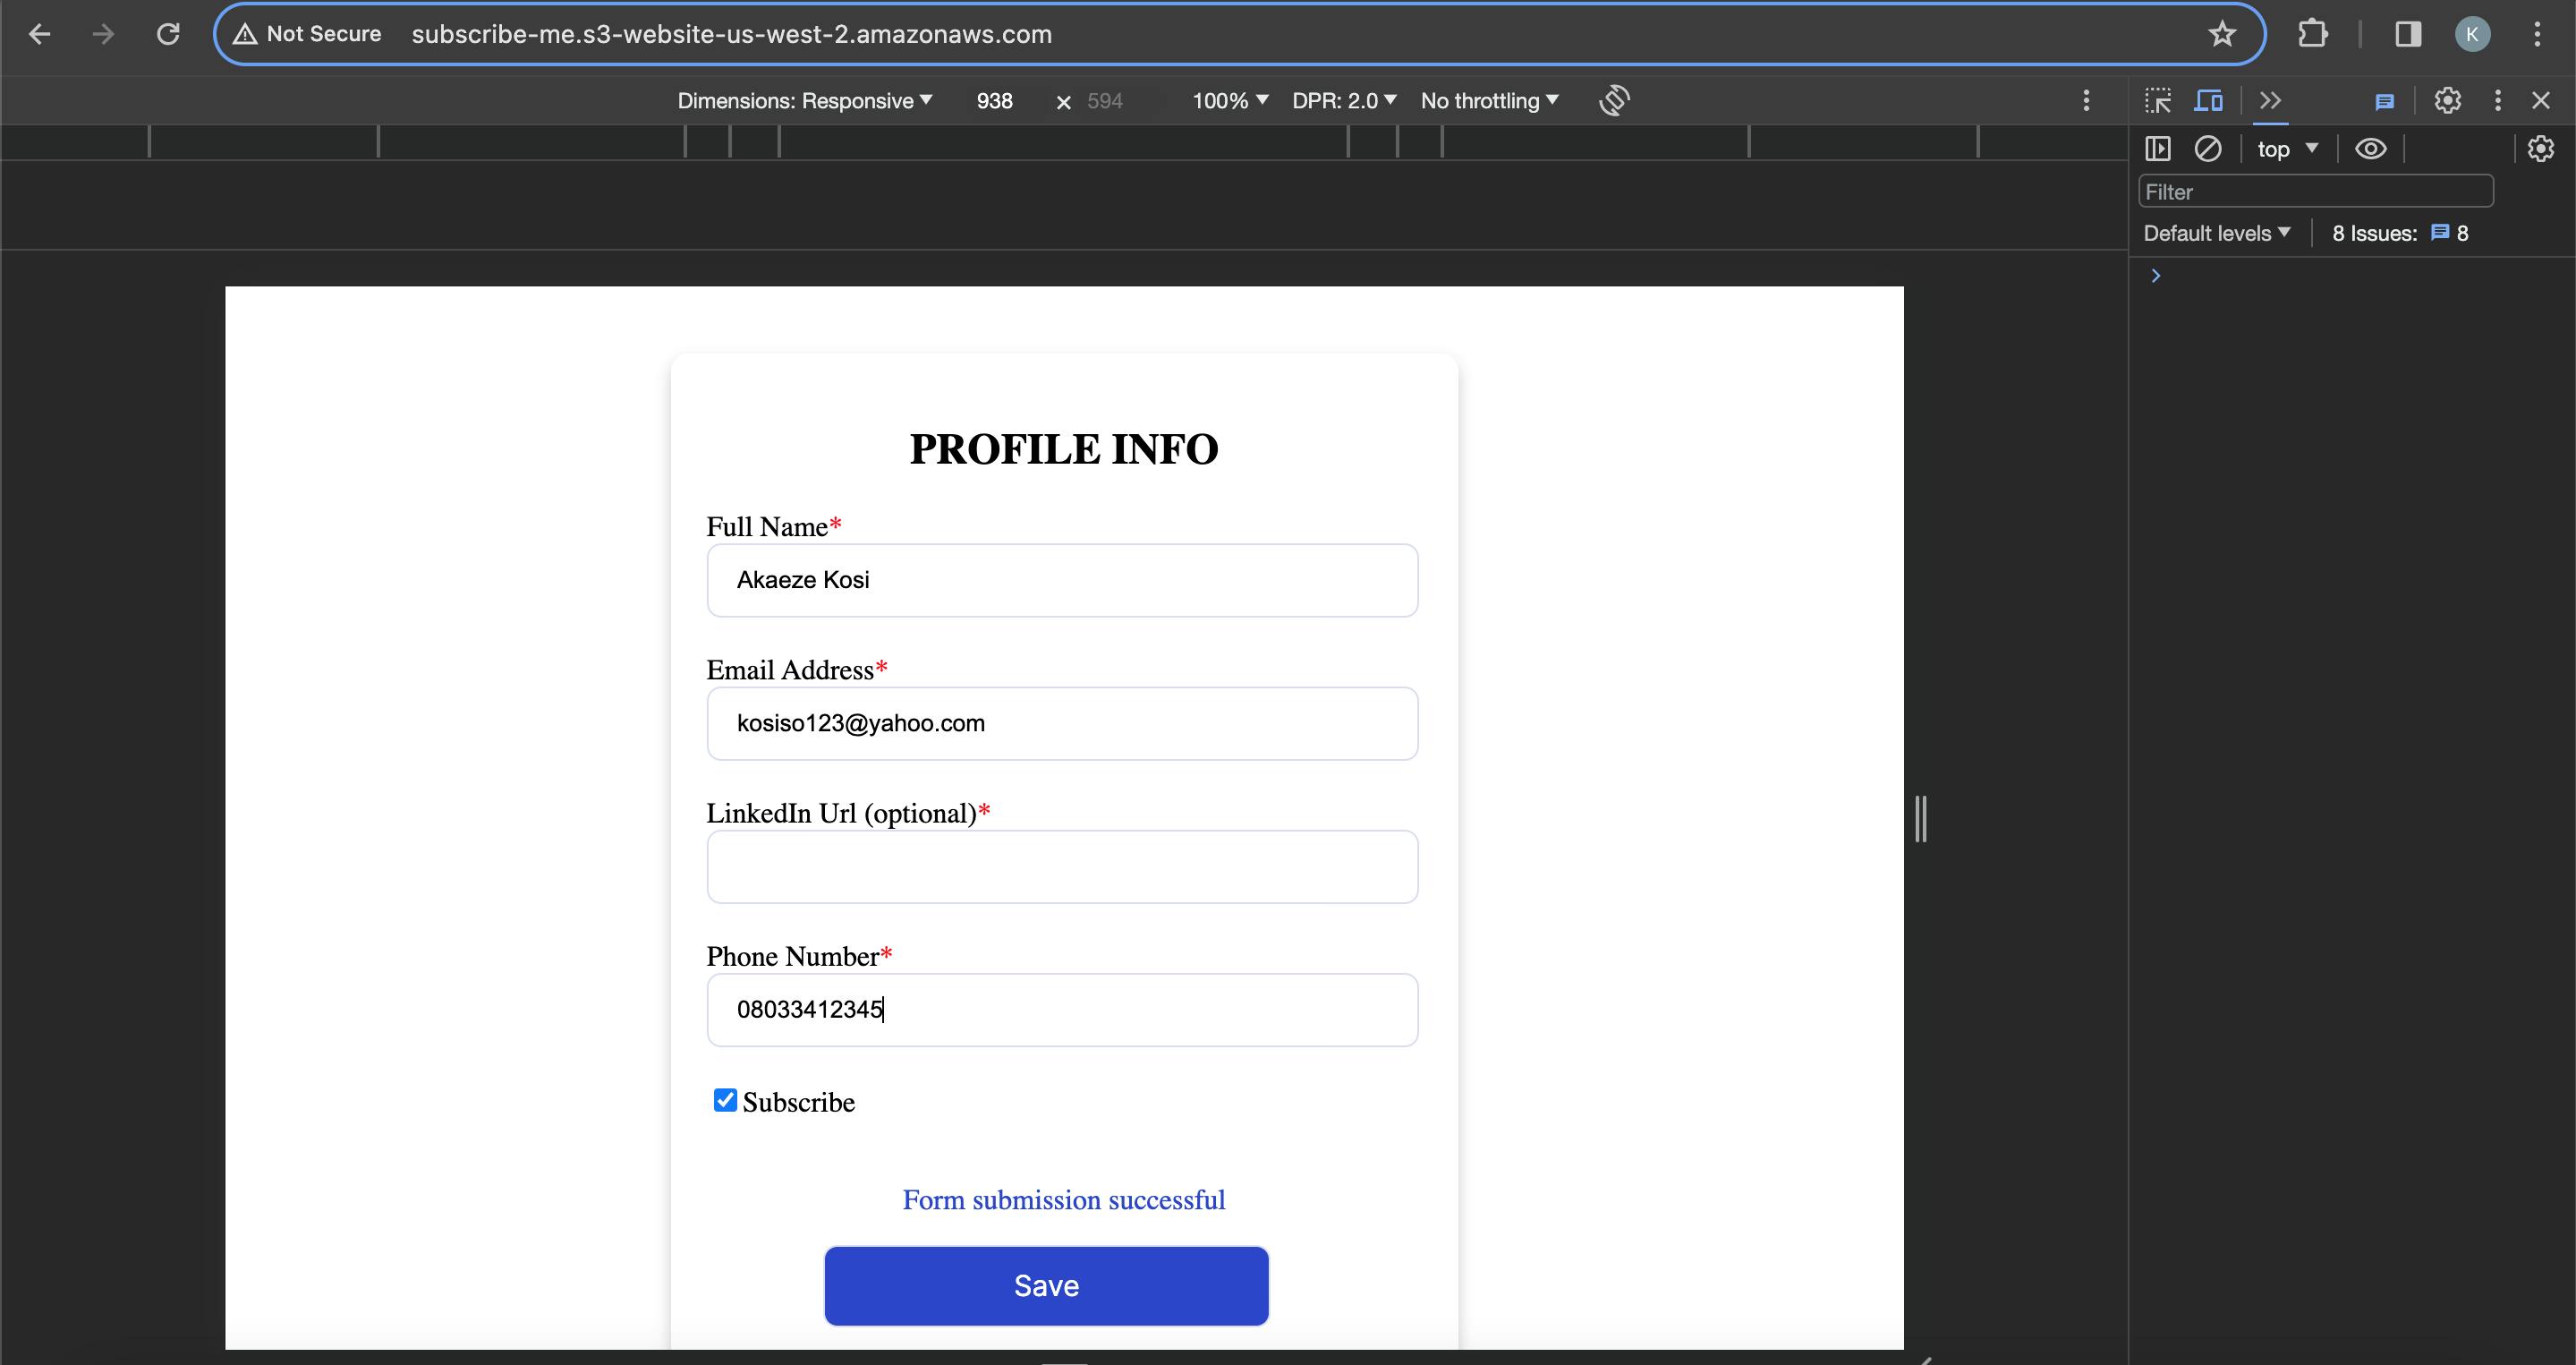
** And now we can view the static website using the URL provided and fill in our details.
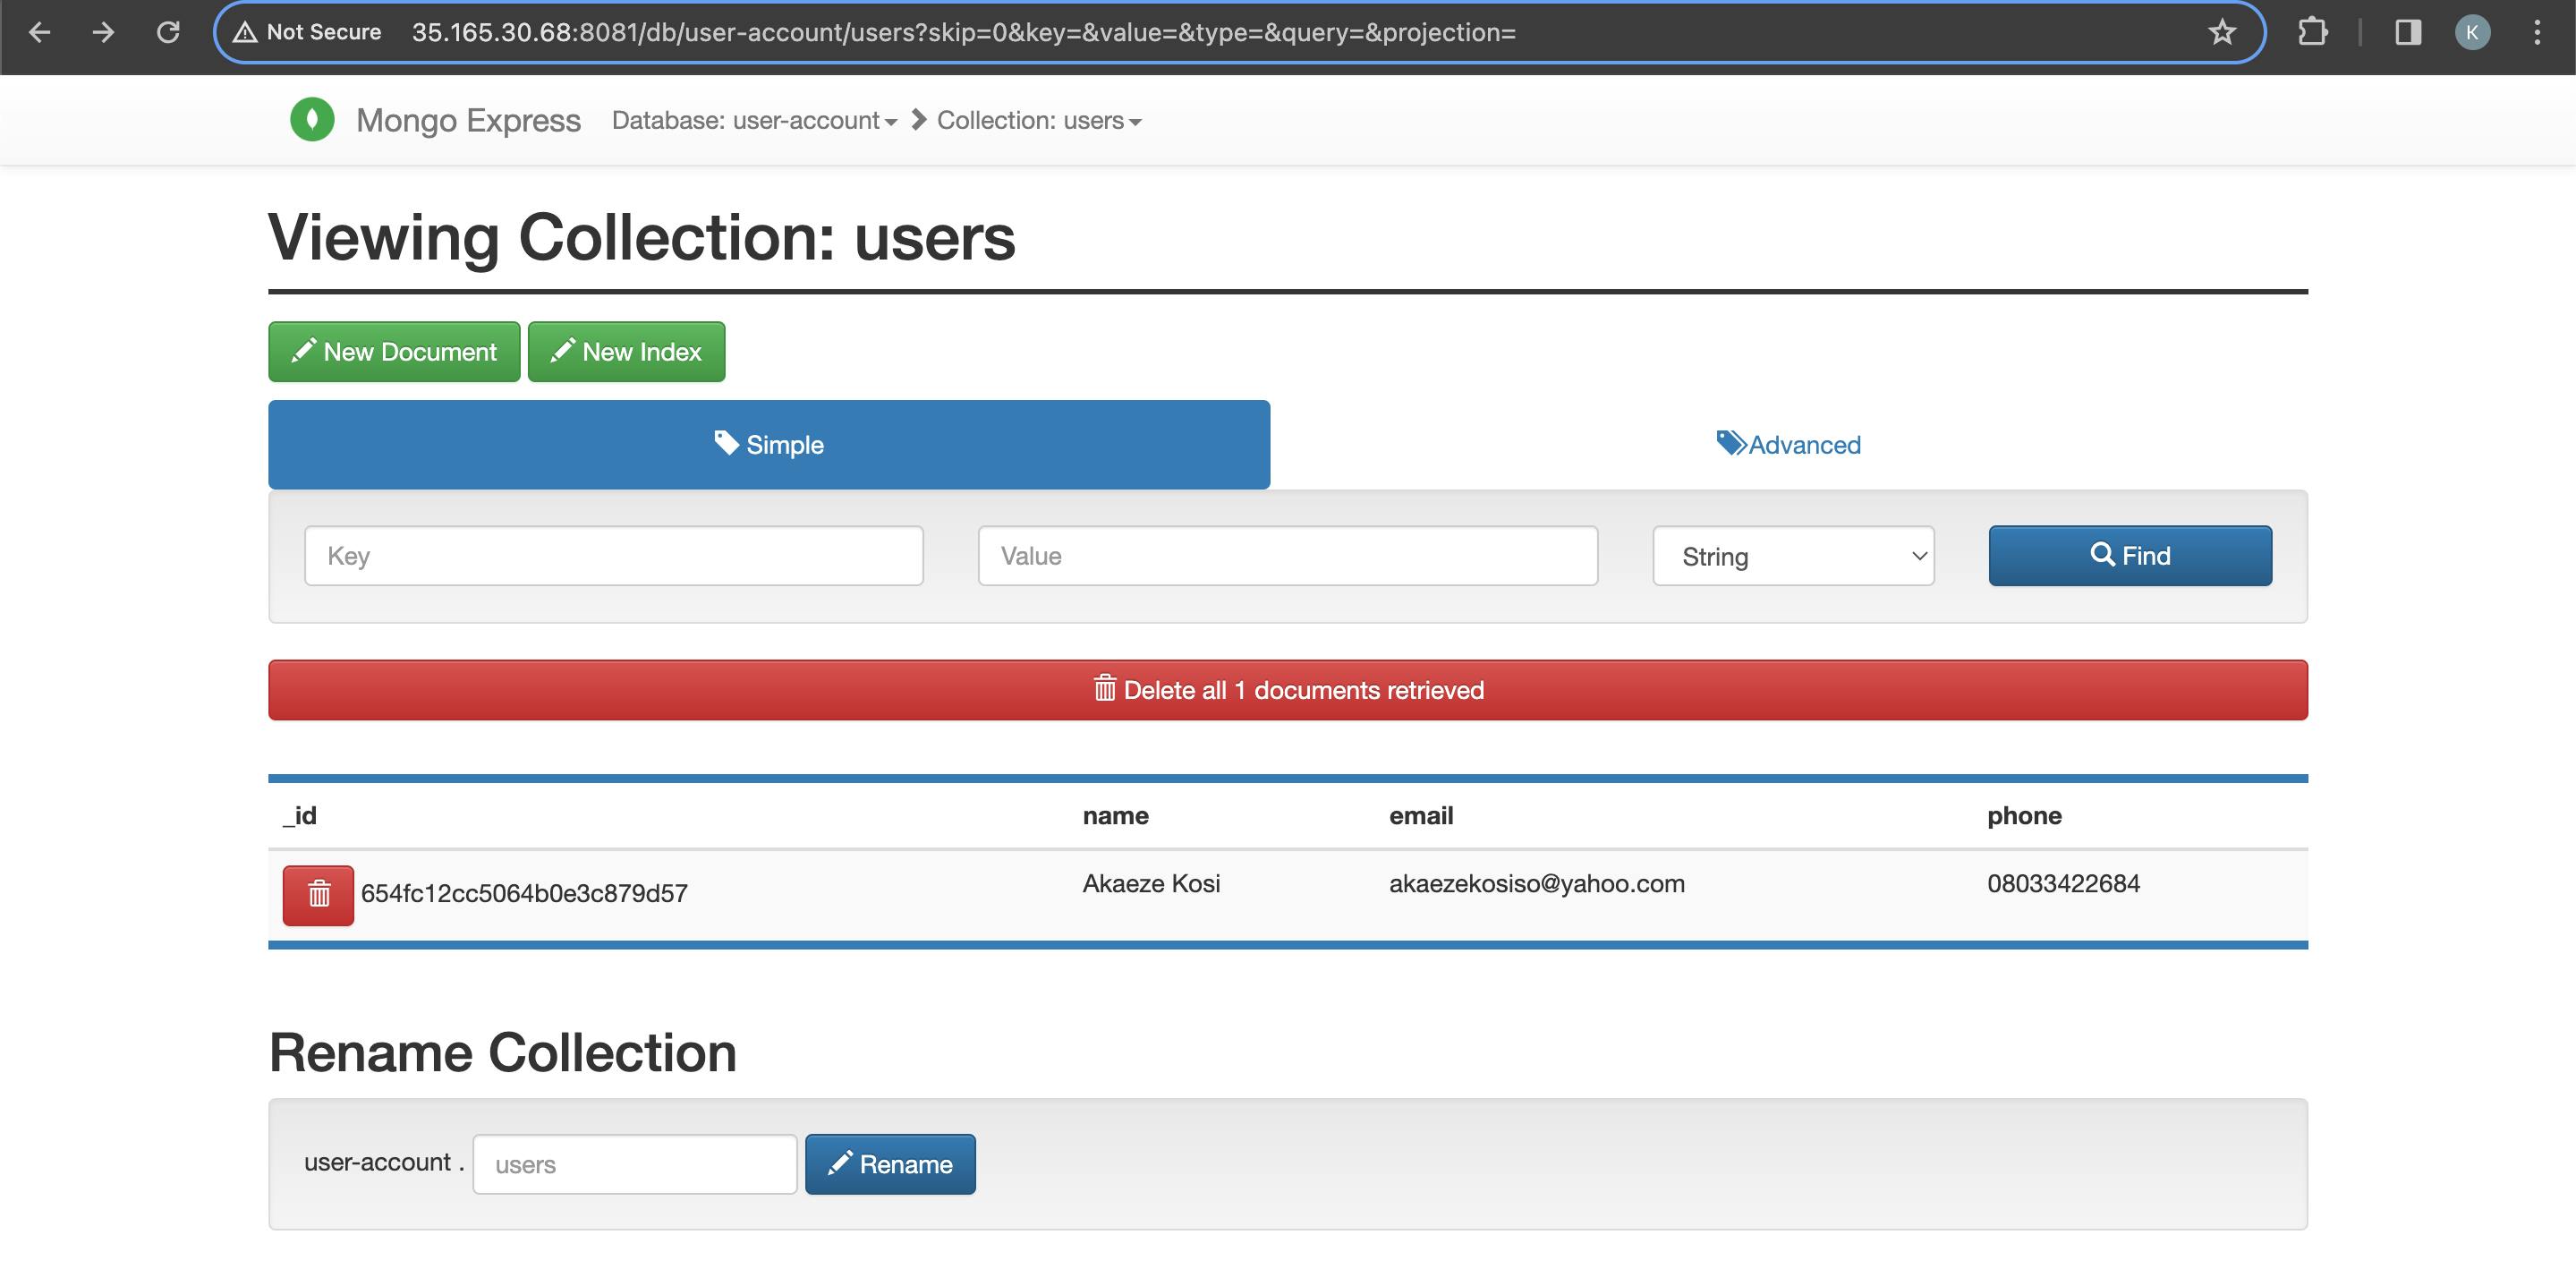
** We can also view our database using the IP address provided by ECS and the port number we assigned to our mongo-express. (eg http://35.165.30.68:8081/)
From here we can see that the user input has been successfully added to the database.
It's time for practice💃💃..... I will advise you to go through this tutorial practically to fully understand all the steps explained and if you don't understand some of the steps, feel free to ask your questions in the comment section.